

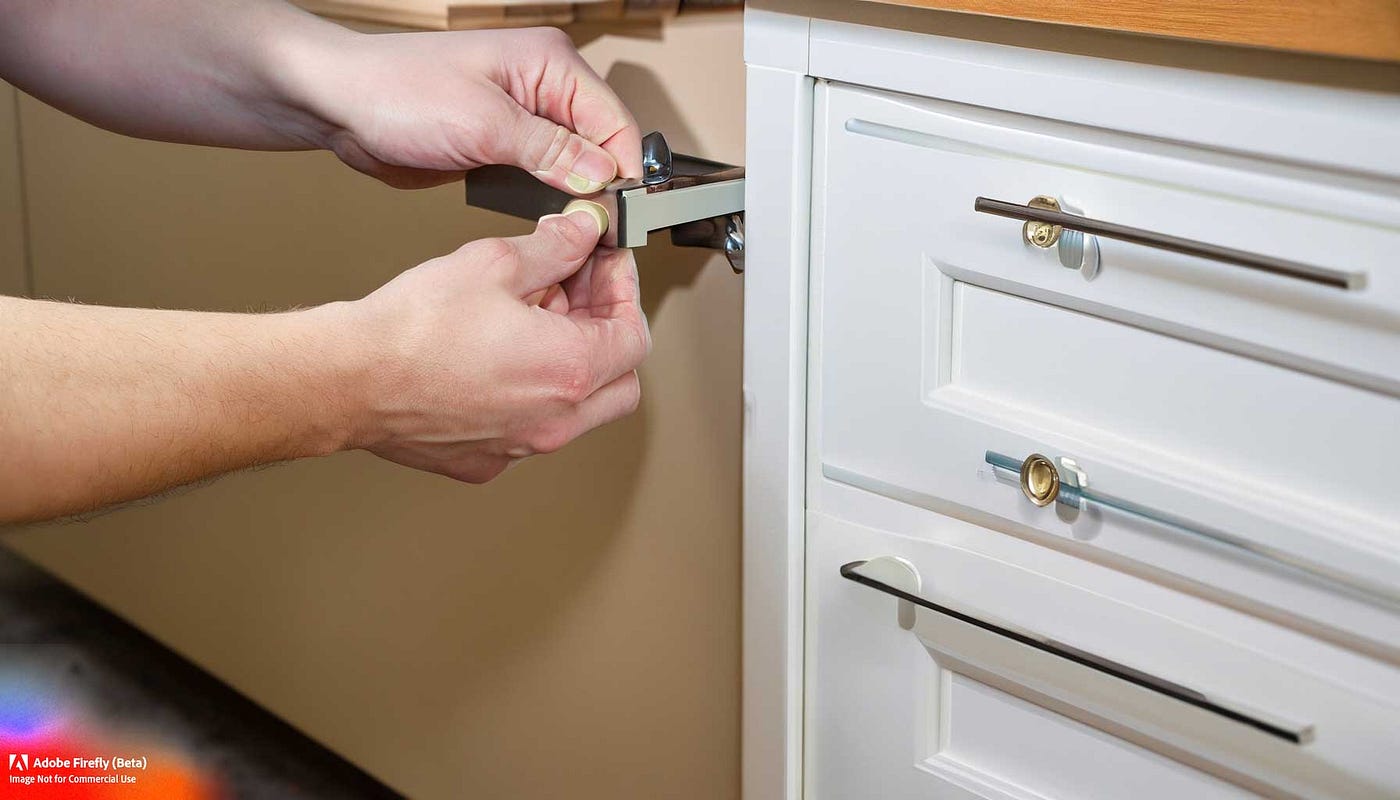
Are your kitchen cabinets missing that perfect finishing touch? Learning how to install kitchen cabinet hardware can instantly transform your kitchen, making it feel fresh and stylish without a full remodel.
If you’ve never done it before, the idea of drilling holes and aligning handles might seem tricky. Don’t worry—you’re about to learn a simple, step-by-step method that anyone can follow. By the end of this guide, you’ll have the confidence to install kitchen cabinet hardware like a pro, saving money and adding value to your home.
Ready to get started? Let’s dive in!

Credit: atelierdeluxe.online
Choosing The Right Hardware
Kitchen cabinet hardware changes the look and feel of your kitchen. Picking the right hardware makes your cabinets easy to use.
Think about style, size, and finish before buying hardware. This helps you find the best match for your kitchen.
Types Of Cabinet Hardware
There are many types of cabinet hardware. Each type has a different look and function.
- Knobs: Small and round, easy to grip
- Pulls: Long bars or handles for pulling
- Handles: Shaped for comfort and style
- Edge pulls: Small and hidden on cabinet edges
Choose hardware that fits your cabinet style and how you use your kitchen.
Selecting Styles And Finishes
Styles and finishes affect your kitchen's look. Pick styles that match your cabinets and decor.
- Modern: Clean lines and simple shapes
- Traditional: Detailed and classic designs
- Rustic: Rough and natural finishes
- Transitional: Mix of modern and traditional
Finishes like brushed nickel, oil-rubbed bronze, or chrome add color and texture. Match finishes with your kitchen appliances.
Measuring For Fit
Measure your cabinets before buying hardware. This helps avoid wrong sizes and holes.
Measure the distance between screw holes if replacing hardware. Check the size of knobs and pulls for comfort.
- Use a tape measure for accuracy
- Note hole spacing in inches or millimeters
- Measure cabinet door thickness
- Consider how hardware fits your hand
Gathering Tools And Materials
Installing kitchen cabinet hardware needs the right tools and parts. Preparing these items first makes the job easier and faster.
Below are the tools and hardware you will need to complete the installation correctly.
Essential Tools
Having the right tools helps you install cabinet hardware safely and neatly. Use tools that fit well and work properly.
- Drill with drill bits
- Screwdriver (Phillips and flathead)
- Measuring tape
- Level
- Pencil
- Masking tape
- Center punch or awl
- Safety glasses
Hardware And Accessories Needed
Choosing the correct hardware and accessories is important. This ensures the handles and knobs fit and function well.
| Hardware Type | Purpose | Notes |
|---|---|---|
| Cabinet knobs | Easy grip for opening doors | Choose style to match decor |
| Cabinet pulls | Better leverage for larger doors | Available in many shapes and sizes |
| Screws | Secure hardware to cabinets | Use correct length for thickness |
| Mounting templates | Mark exact drill spots | Helps keep hardware aligned |
Preparing Cabinets For Installation
Preparing your kitchen cabinets is important before adding new hardware. It helps the hardware fit well and last longer.
This guide covers how to clean and clear surfaces and remove old hardware safely.
Cleaning And Clearing Surfaces
Start by cleaning the cabinet surfaces where you will install the hardware. Dirt and grease can stop screws from holding tightly.
Use a mild cleaner and a soft cloth to wipe down the area. Make sure the surface is dry before you begin installation.
- Remove dust and crumbs with a dry cloth
- Use warm water with mild soap for sticky spots
- Dry the surface completely with a towel
- Check for any damage or rough spots
Removing Old Hardware
Take off old handles, knobs, or pulls carefully. Removing them cleanly prevents damage to the cabinet surface.
Use a screwdriver to unscrew the old hardware. Keep screws and parts if you plan to reuse or recycle them.
- Open cabinet doors to access screws
- Use the right screwdriver size for each screw
- Turn screws counterclockwise to remove
- Gently pull off hardware after unscrewing
- Fill holes if needed before installing new hardware

Credit: www.fynesdesigns.com
Marking Placement
Marking placement is important when installing kitchen cabinet hardware. It ensures that handles and knobs are straight and evenly spaced.
Proper marking helps avoid mistakes and keeps your kitchen looking neat. Here’s how you can do it effectively.
Finding The Perfect Spot
Finding the right spot for your cabinet hardware is key. Start by deciding where each knob or handle should go.
Consider the cabinet's design and your personal preference. Make sure it is easy to reach and use.
- Measure the distance from the edges
- Check alignment with other cabinets
- Consider user height for ease of use
Using Templates And Measuring Tools
Templates and measuring tools can help you mark placement accurately. Use these tools to ensure even spacing and alignment.
Templates can be bought or made at home. They make the process faster and more accurate.
- Use a ruler or tape measure for precision
- Mark spots with a pencil before drilling
- Double-check measurements to prevent mistakes
Drilling And Attaching Hardware
Installing kitchen cabinet hardware makes your kitchen look fresh. It also improves the function of cabinets.
Drilling and attaching hardware needs care. You must measure and drill carefully for the best fit.
Drilling Pilot Holes
Pilot holes guide screws and prevent wood from splitting. Mark the spot before drilling.
Use a drill bit smaller than the screw size. Drill straight and do not press too hard.
- Measure and mark the hole location
- Select a drill bit smaller than the screw
- Hold the drill steady and drill straight down
- Drill only as deep as the screw length
Securing Handles And Knobs
Place the handle or knob over the pilot holes. Insert screws from inside the cabinet.
Tighten screws with a screwdriver. Do not overtighten to avoid damage.
- Align hardware holes with pilot holes
- Insert screws through the cabinet door
- Hold hardware firmly in place
- Tighten screws until secure but not too tight
Finishing Touches
Installing kitchen cabinet hardware is not complete without proper finishing touches. These final steps ensure your hardware looks great and works well.
Focus on checking alignment and tightness first. Then, clean and polish the hardware for a fresh look.
Checking Alignment And Tightness
After attaching the hardware, check if everything lines up correctly. Misaligned knobs or pulls can affect cabinet use and look.
- Look closely at each handle or knob to see if it sits straight.
- Use a level tool for long pulls or bars.
- Tighten screws gently but firmly to avoid damage.
- Test the hardware by opening and closing cabinet doors.
- Make small adjustments if something feels loose or off-center.
Cleaning Up And Polishing
Cleaning your new hardware helps remove fingerprints, dust, and any debris from installation. Polishing adds shine and protects the finish.
| Cleaning Step | Tools Needed | Tips |
|---|---|---|
| Remove dust | Soft cloth or microfiber towel | Wipe gently to avoid scratching |
| Clean grease or stains | Mild soap and water, soft sponge | Use a damp cloth, then dry thoroughly |
| Polish hardware | Metal polish or furniture wax | Apply with soft cloth, buff to shine |
Tips For A Professional Look
Installing kitchen cabinet hardware can enhance the look of your kitchen. Here are some tips to achieve a professional appearance.
Attention to detail in hardware placement and design matching will make a big difference.
Consistent Hardware Placement
Consistency in hardware placement is key to a neat finish. Align handles and knobs for visual harmony.
- Measure the center of each cabinet door.
- Use a template for drilling holes.
- Double-check alignment before installation.
Matching Hardware To Cabinet Design
Choose hardware that complements your cabinet style. The right match enhances the overall kitchen design.
Consider the following design styles:
- Modern: Sleek, metallic finishes
- Traditional: Ornate, detailed designs
- Rustic: Warm, wooden textures
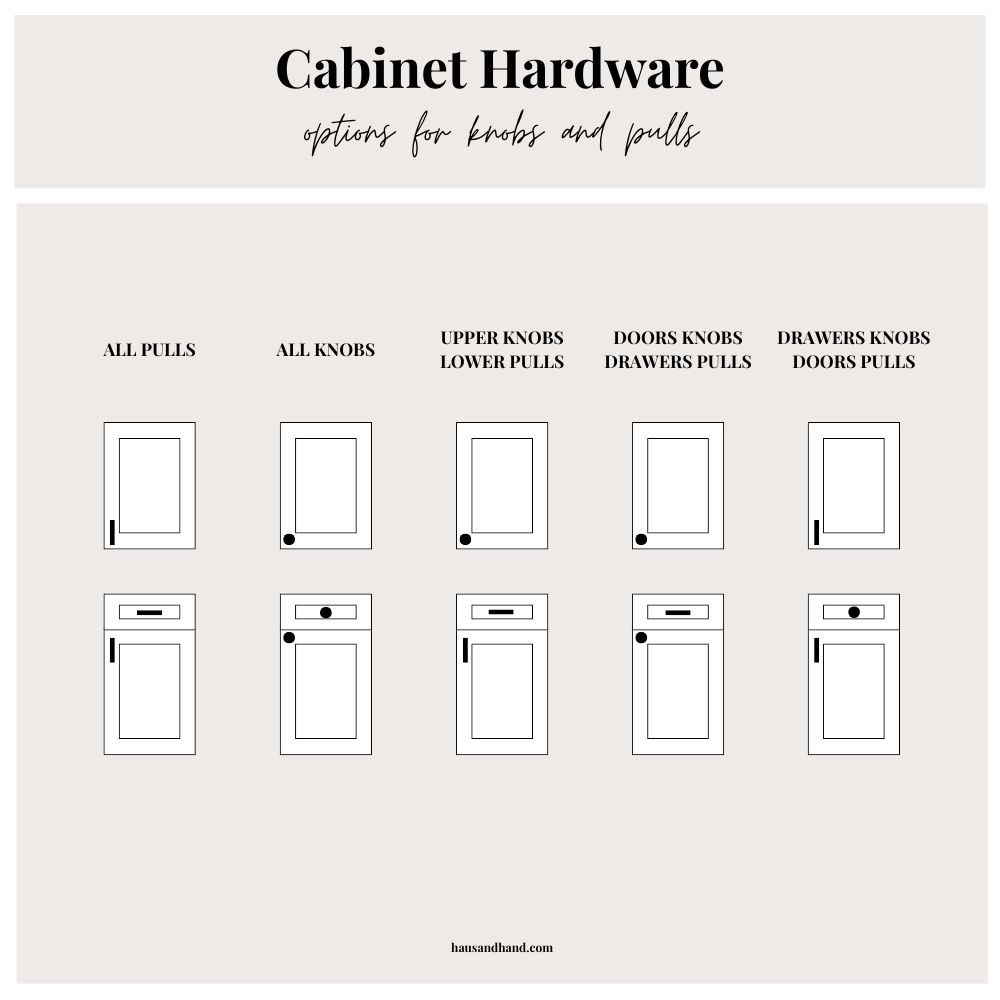
Credit: hausandhand.com
Frequently Asked Questions
What Tools Are Needed To Install Kitchen Cabinet Hardware?
You will need a drill, screwdriver, measuring tape, pencil, level, and screws. These tools ensure precise and secure hardware installation.
How Do I Measure For Cabinet Hardware Placement?
Measure the cabinet’s width and height. Mark the center or desired position for handles or knobs to ensure even placement.
Can I Install Cabinet Hardware Without Drilling?
Yes, adhesive-backed hardware options exist, but drilling provides a stronger and more durable hold for regular use.
How Do I Choose The Right Cabinet Hardware Size?
Select hardware proportional to cabinet size. Larger cabinets suit bigger handles; smaller cabinets look best with compact knobs.
Conclusion
Installing kitchen cabinet hardware can be simple and quick. Take your time to measure and mark carefully. Use the right tools to avoid mistakes and damage. Each step builds a better look and feel for your kitchen. Enjoy the new style and improved function of your cabinets.
Small changes make a big difference in your space. Now, you can update your kitchen with confidence and ease.

