Are your wooden furniture pieces looking dull or scratched? You don’t need expensive products to bring back their shine.
With a simple DIY furniture polish, you can restore the beauty of your favorite items using ingredients you probably already have at home. Imagine saving money, avoiding harsh chemicals, and giving your furniture a fresh, natural glow—all with one easy recipe.
Keep reading, and you’ll discover how to make your own polish that works wonders, protecting your furniture while making it look brand new. Your home deserves that extra touch, and you’re just a few steps away from achieving it.
Benefits Of Diy Furniture Polish
Making your own furniture polish might sound like extra work, but it brings real benefits that store-bought products often can't match. When you create your own polish, you gain control over the ingredients, the cost, and even how it fits your specific furniture needs. Let's look at why DIY furniture polish can be a smart choice for your home care routine.
Cost-effectiveness
Buying commercial furniture polish regularly can add up quickly. DIY polish uses simple ingredients like olive oil, vinegar, or lemon juice, which you probably already have at home. This makes it a budget-friendly option that stretches your dollar further without sacrificing quality.
Also, a little homemade polish goes a long way, so you avoid frequent repurchases. Have you ever checked the price per use on store polishes? Making your own can drastically reduce that cost.
Natural Ingredients
Many store-bought polishes contain chemicals and synthetic fragrances that can irritate your skin or cause allergies. DIY furniture polish is made from natural ingredients, which are gentler and safer for you and your family.
For example, using coconut oil not only nourishes the wood but also adds a subtle, pleasant scent without artificial additives. Wouldn’t you prefer a polish that’s kind to your health and your furniture?
Customization Options
With DIY polish, you can tailor the recipe to match your furniture type and personal preferences. Want a polish that adds extra shine? You can add beeswax. Need something that also cleans? Add a bit of mild soap or lemon juice.
This flexibility means you’re not stuck with one-size-fits-all products. How often do you wish a product was just right for your unique furniture needs?
Eco-friendly Choices
Creating your own furniture polish reduces plastic waste from commercial packaging. Plus, natural ingredients break down more easily in the environment compared to synthetic chemicals. This small change supports a healthier planet without much effort from you.
Choosing DIY polish is a way to reduce your environmental footprint while caring for your home. How much impact could you make by switching to eco-friendly cleaning habits?

Credit: www.hometalk.com
Key Ingredients For Diy Polish
Creating your own furniture polish requires choosing the right ingredients. These ingredients help clean, protect, and enhance the wood’s natural beauty. Each component plays a unique role in the polish’s effectiveness and finish. Understanding these key ingredients helps you make a polish that suits your furniture’s needs perfectly.
Oils For Shine And Protection
Oils give wood a natural shine and guard it from drying out. Common oils include:
- Olive oil – adds a soft glow and moisture
- Mineral oil – safe and odorless, great for all woods
- Linseed oil – penetrates deeply for long-lasting protection
These oils soak into the wood, enhancing grain and providing a smooth finish.
Waxes For Durability
Waxes create a protective barrier on the wood surface. They help resist scratches and water damage. Types of wax often used are:
- Beeswax – natural and easy to apply
- Carnauba wax – hard and glossy for extra durability
Waxes lock in oils and make the polish last longer.
Essential Oils For Fragrance
Essential oils add a pleasant scent to your furniture polish. They also have mild antibacterial properties. Popular choices include:
- Lemon oil – fresh and clean scent
- Lavender oil – calming and soothing aroma
- Tea tree oil – natural disinfectant
These oils make your polish smell nice without overpowering.
Common Household Additives
Other simple ingredients improve polish texture and cleaning power. These include:
- White vinegar – removes grime and brightens wood
- Rubbing alcohol – helps polish dry faster
- Water – thins polish for easier application
These additives help create a balanced, easy-to-use polish.
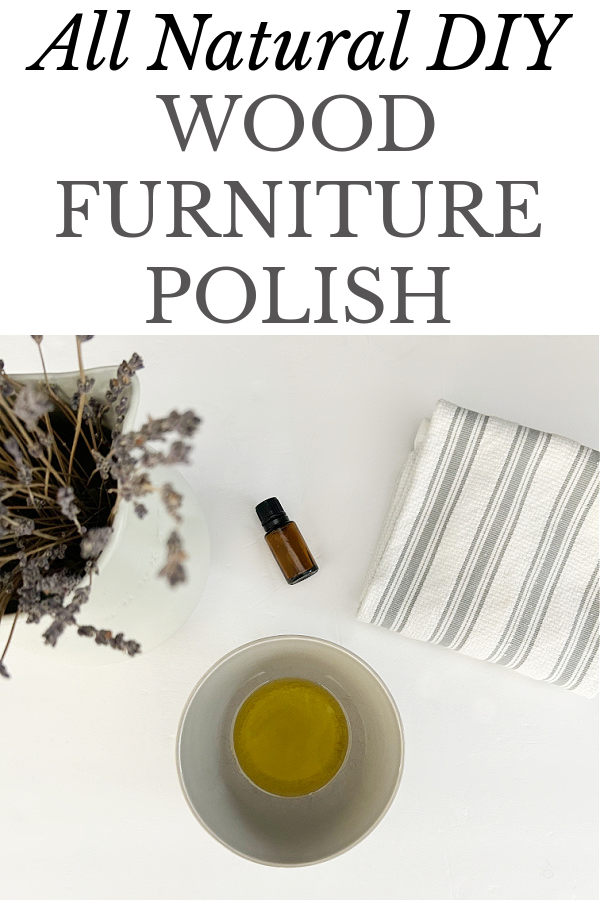
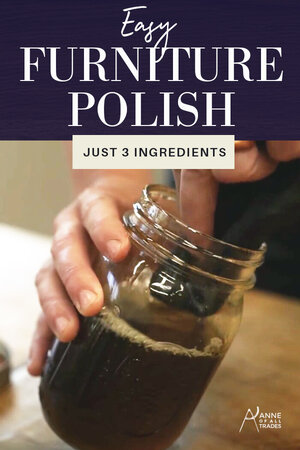
Simple Recipes For Furniture Polish
Create your own furniture polish using simple ingredients found at home. These easy recipes clean and shine wood naturally without harsh chemicals. Save money and keep furniture looking fresh with DIY polish.
Simple Recipes for Furniture Polish Maintaining the gleam of your furniture doesn't have to rely on commercial polishes filled with chemicals. Instead, try creating your own DIY furniture polish using simple ingredients you likely have at home. These recipes not only shine your furniture but also provide a safer, eco-friendly alternative.
Oil And Vinegar Blend
A classic recipe that combines the cleaning power of vinegar with the nourishing properties of oil. Mix equal parts of white vinegar and olive oil. Use a soft cloth to apply it to the furniture, wiping with the grain for the best results. This blend not only cleans but also adds a protective layer to your wooden surfaces. Plus, it’s a great way to recycle that nearly-empty bottle of olive oil.
Beeswax And Olive Oil Polish
Beeswax offers a wonderful way to enhance the luster of your furniture. Melt 2 tablespoons of beeswax in a double boiler and add 4 tablespoons of olive oil. Once cooled, apply a small amount to your furniture using a clean, soft cloth. This polish is perfect for those who prefer a more substantial finish. It’s ideal for older furniture that needs an extra bit of care.
Lemon And Olive Oil Mixture
Bring a refreshing scent to your home with a lemon and olive oil polish. Mix 1 cup of olive oil with 1/4 cup of lemon juice. Apply with a cloth and enjoy the fresh aroma while it conditions your wood. This mixture not only polishes but also helps to repel dust. Who knew keeping your furniture clean could smell so good?
Coconut Oil And Essential Oils
For a more fragrant polish, coconut oil paired with essential oils creates a delightful blend. Melt 1/4 cup of coconut oil and add a few drops of your favorite essential oil, such as lavender or eucalyptus. Use a microfiber cloth to polish the furniture, leaving a lovely scent in your home. This recipe is perfect for those who love experimenting with scents. It’s like giving your furniture a spa day! Which recipe will you try first? Let the natural ingredients breathe new life into your furniture while keeping your home chemical-free.

Credit: www.anneofalltrades.com
Step-by-step Application Process
Applying DIY furniture polish correctly brings out the wood’s natural beauty. Follow these simple steps to get a smooth, lasting finish. The process is easy and requires only a few tools. Proper care during each step ensures the best results.
Preparing The Furniture Surface
Start by cleaning the furniture well. Use a soft cloth to remove dust and dirt. For sticky spots, use a mild soap solution. Let the surface dry completely before polishing. Avoid rough sanding; a light wipe is enough. This helps the polish stick better to the wood.
Applying The Polish Evenly
Use a clean, soft cloth or a foam applicator. Pour a small amount of polish onto the cloth. Spread the polish in thin, even layers. Follow the direction of the wood grain for a natural look. Avoid over-applying polish to prevent sticky buildup.
Buffing Techniques For Best Shine
Wait a few minutes after applying the polish. Use a dry, soft cloth to buff the surface gently. Use circular or back-and-forth motions to bring out the shine. Apply light pressure to avoid scratching the wood. Buff until the surface looks smooth and glossy.
Drying And Curing Time
Let the polish dry fully before using the furniture. This usually takes about 1 to 2 hours. Avoid placing items on the surface during this time. For the best cure, keep the furniture in a dry area. Full curing may take up to 24 hours for a hard finish.
Tips To Maintain Furniture Shine
Keeping your furniture looking shiny and fresh doesn't have to be complicated. With simple habits and the right care, you can maintain that polished look for years. Let’s dive into practical tips that help your furniture stay vibrant and well-protected.
Regular Cleaning Practices
Dust your furniture often using a soft, dry cloth. This prevents dirt buildup, which dulls the shine over time. Avoid using rough materials that can scratch the surface.
Try wiping with a slightly damp cloth followed by a dry one to remove stubborn spots. Be gentle and take your time to protect the finish. Have you noticed how quick dusting can instantly brighten a room?
Avoiding Harmful Chemicals
Many store-bought cleaners contain harsh chemicals that strip away polish and damage wood. Instead, opt for natural products like diluted vinegar or mild soap solutions. These keep your furniture safe and shiny.
Test any cleaner on a hidden spot first to make sure it doesn’t cause discoloration. Your furniture deserves products that nourish rather than harm. Are you unknowingly using cleaners that harm your prized pieces?
Proper Storage Conditions
Furniture shine fades faster when exposed to extreme temperatures or direct sunlight. Keep pieces away from heaters, air conditioners, and windows that let in harsh rays. This simple step preserves the finish and prevents cracking.
Maintain moderate humidity to avoid wood swelling or shrinking. Using a humidifier or dehumidifier can make a big difference, especially in seasonal changes. Have you checked your room’s climate control lately?
Reapplying Polish Schedule
Reapplying polish regularly keeps the surface protected and glossy. Depending on usage, aim to polish every 3 to 6 months. Over-polishing can create buildup, so follow the recommended schedule.
Use a high-quality furniture polish and apply it with a soft cloth in circular motions. This small routine can revive dull spots and extend your furniture’s life. When did you last give your furniture that refreshing touch?
Troubleshooting Common Issues
DIY furniture polish can work wonders on your wooden pieces, but sometimes things don’t go as planned. You might notice sticky residue, a dull finish, streaks, or even scratches after polishing. These issues can be frustrating, but with the right approach, you can fix them quickly and keep your furniture looking great.
Sticky Residue Removal
If your furniture feels sticky after polishing, it usually means too much polish was applied or the polish formula was too thick. To fix this, gently wipe the surface with a soft cloth dampened with a little warm water and mild soap.
After cleaning, dry the area thoroughly to avoid water damage. You can also use a cloth with a small amount of mineral spirits to break down stubborn residue, but test it on a hidden spot first to prevent discoloration.
Handling Dull Finish
A dull finish often happens when polish builds up or the wood isn’t properly cleaned before application. Try buffing the surface with a dry, soft cloth to bring back some shine.
If that doesn’t work, lightly rub the surface with a mixture of equal parts olive oil and vinegar. This natural blend restores luster without harsh chemicals. Have you noticed how simple ingredients can outperform expensive products?
Preventing Streaks And Smudges
Streaks appear when polish isn’t evenly spread or when too much is used. Always apply polish in thin, even layers using a soft, lint-free cloth.
Wipe in the direction of the wood grain for a smooth finish. If streaks remain, buff the surface gently to even out the shine. Remember, less is often more with polish—are you using just the right amount?
Dealing With Scratches
Small scratches can be disguised using a homemade polish with equal parts olive oil and lemon juice. Apply it with a soft cloth and rub gently into the scratch.
For deeper scratches, consider using a wood filler or touch-up marker that matches your furniture’s color. Always test products on a hidden area first to avoid unwanted results. Have you tried this simple trick to make scratches nearly disappear?
Safety And Storage Guidelines
Handling DIY furniture polish requires care to keep you safe and maintain the polish quality. Understanding safety and storage guidelines helps prevent accidents and extends the polish's usability. Follow simple rules to handle ingredients correctly and store your polish properly.
Safe Handling Of Ingredients
Wear gloves to protect your skin from irritants. Work in a well-ventilated area to avoid inhaling fumes. Keep ingredients away from children and pets. Avoid mixing unknown substances that may cause reactions. Use clean tools to prevent contamination.
Proper Storage Containers
Choose airtight containers made from glass or sturdy plastic. Avoid metal containers that can react with ingredients. Label containers clearly with the polish name and date. Store containers in a cool, dry place away from sunlight. Keep containers tightly closed to prevent spills and evaporation.
Shelf Life Of Homemade Polish
| Ingredient | Typical Shelf Life |
|---|---|
| Olive Oil | 6 months |
| Lemon Juice | 1 week |
| Beeswax | 1 year |
| Homemade Polish Mix | 2-3 months |
Regularly check your polish for changes in smell or texture. Dispose of polish if it looks or smells off.
Disposal Tips
- Do not pour polish down the drain or toilet.
- Dispose of small amounts with household trash.
- Check local guidelines for disposing chemicals safely.
- Use up leftover polish on furniture or wood scraps.
Credit: www.anneofalltrades.com
Frequently Asked Questions
What Ingredients Are Best For Diy Furniture Polish?
Natural oils like olive, lemon, and coconut work best. They nourish wood, add shine, and are safe to use. Avoid harsh chemicals to protect your furniture’s finish and longevity.
How Do I Apply Homemade Furniture Polish Safely?
Use a soft cloth to apply polish in small amounts. Rub gently in the wood grain direction. Test on a hidden spot first to prevent damage or discoloration.
Can Diy Furniture Polish Remove Scratches?
Homemade polish can minimize light scratches by moisturizing wood and filling minor imperfections. Deep scratches may require professional repair or specialized products for best results.
How Often Should I Polish Wooden Furniture?
Polish wooden furniture every 2-3 months to maintain shine and protection. Over-polishing can cause buildup and dullness. Regular dusting helps extend polish effects.
Conclusion
DIY furniture polish is easy to make with common household items. It helps keep your wood looking clean and shiny. You save money and avoid harsh chemicals found in store products. Try different recipes to find what works best for your furniture.
Regular polishing protects wood and makes it last longer. Keep your home fresh and inviting with simple DIY polish. Start today and enjoy beautiful, well-cared-for furniture every day. Simple steps, great results. Why not give it a try?