

Are you tired of dealing with a tripped circuit breaker? Does the thought of calling an electrician every time it happens make you cringe?
You're not alone. Many people face the same inconvenience. But what if you could handle it yourself with confidence and ease? Changing a circuit breaker might sound daunting, but it's simpler than you think. Imagine the satisfaction of fixing it yourself, saving time and money.
In this guide, we'll walk you through the process step-by-step, using straightforward language and clear instructions. By the end, you'll have the knowledge and confidence to tackle this task on your own. Let's get started and take control of your electrical issues once and for all!
Safety First
Safety is the top priority when changing a circuit breaker. Electricity can cause serious injury or worse. Taking the right precautions protects you and your home. Follow these simple steps to stay safe during the process.
Turn Off Main Power
Always switch off the main power before working on a circuit breaker. This stops electricity flow to the breaker panel. Locate the main breaker and flip it to the off position. Never skip this step. It prevents shocks and accidents.
Use Proper Safety Gear
Wear insulated gloves to protect your hands. Use safety glasses to shield your eyes. Avoid loose clothing or jewelry that can catch on wires. Non-slip shoes help you stand steady. Safety gear reduces risk during electrical work.
Test For Live Wires
Use a voltage tester to check if wires are live. Touch the tester to the wires you will work on. If it shows power, do not proceed. Confirm the main power is truly off before touching anything. Testing ensures no hidden electricity is present.
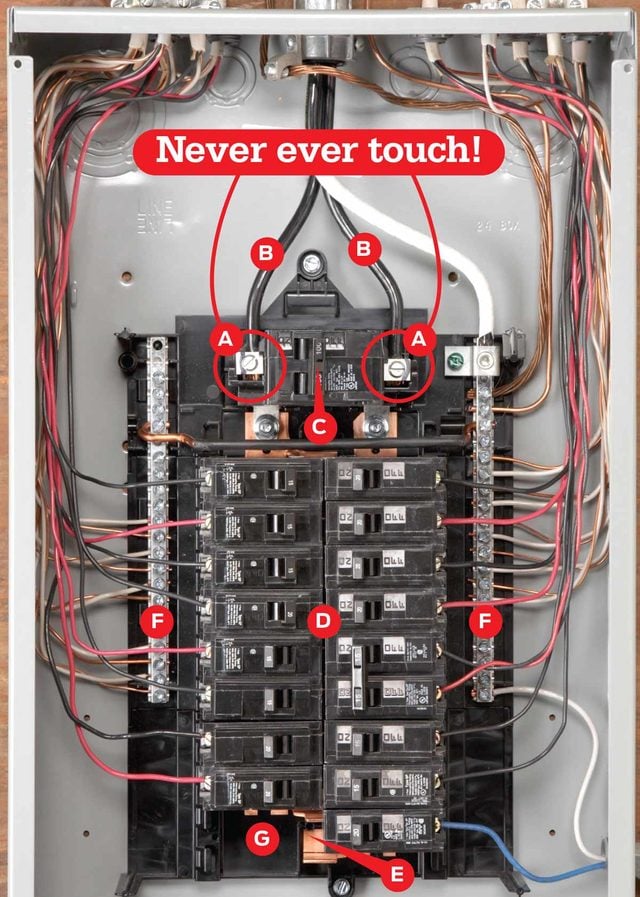
Credit: www.familyhandyman.com
Gathering Tools And Materials
Before you start changing a circuit breaker, gathering the right tools and materials is crucial. Having everything ready saves time and keeps you safe during the process. Missing a key tool can turn a straightforward task into a frustrating one.
Essential Tools Checklist
Make sure you have these tools on hand before you begin:
- Voltage tester– to confirm power is off.
- Flathead and Phillips screwdrivers– for panel screws and breaker terminals.
- Needle-nose pliers– to handle wires in tight spaces.
- Wire stripper– in case you need to strip insulation from wires.
- Flashlight or headlamp– for clear visibility inside the breaker panel.
- Insulated gloves– for extra protection.
Have you ever started a project only to realize you’re missing a simple screwdriver? Being prepared prevents that frustration.
Choosing The Right Breaker
Selecting the correct replacement breaker is more than just matching the old one. Check the breaker’s amperage rating—using one with too high or too low a rating can cause electrical hazards.
Look at the brand and model of your electrical panel. Some panels require breakers from specific manufacturers for proper fit and safety.
Don’t overlook the type of breaker—single-pole, double-pole, GFCI, or AFCI—since each serves different functions. What could go wrong if you pick the wrong type? The risks range from nuisance trips to serious safety issues.
Preparing The Work Area
Preparing your work area before changing a circuit breaker is crucial for safety and efficiency. A well-organized space helps you focus on the task without distractions or hazards. It also speeds up the process and reduces the chances of mistakes.
Clear The Panel Space
Start by removing any objects around the electrical panel. This includes tools, papers, or personal items that could get in your way. A clutter-free area lets you move freely and access the panel easily.
Also, clean dust or debris near the panel opening. Dust can interfere with electrical components or cause slipping hazards. Use a dry cloth or a small brush for this task.
Ensure Good Lighting
Good lighting is essential to see small parts and wiring clearly. If your workspace is dark, bring in a portable work light or a strong flashlight. Avoid relying solely on overhead lights that can cast shadows on the panel.
Have you ever struggled to read tiny labels or wiring colors in poor light? Proper illumination prevents errors and helps you work faster. Position the light so it shines directly into the panel without glare in your eyes.

Credit: www.angi.com
Removing The Old Breaker
Removing the old breaker is a crucial part of changing a circuit breaker safely. It requires careful steps to avoid any electrical hazards. Always turn off the main power before starting any work on the electrical panel. Use insulated tools and wear protective gear to stay safe throughout the process.
Identify The Breaker To Replace
Locate the circuit breaker that needs replacement inside the panel. Check the label or use a tester to confirm the correct breaker. Make sure to note its position and rating for proper replacement.
Disconnect The Wires
Loosen the screws holding the wires connected to the breaker. Gently pull the wires away from the breaker terminals. Keep the wires separated to avoid accidental contact during removal.
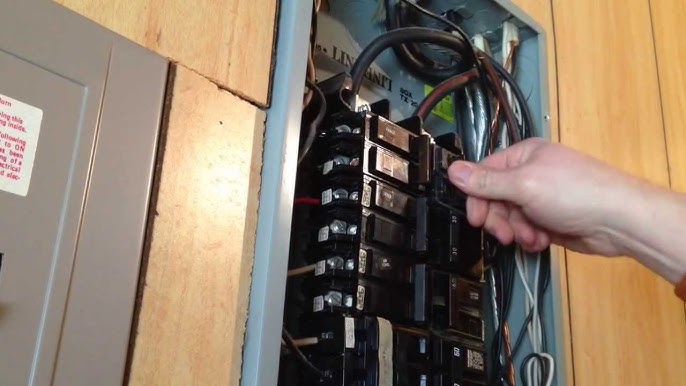
Remove The Breaker From The Panel
Grip the breaker firmly and pull it away from the panel’s bus bar. Some breakers may need a slight rocking motion to release. Set the old breaker aside safely for proper disposal.
Installing The New Breaker
Installing the new breaker is a crucial part of changing a circuit breaker. It requires careful attention to ensure everything fits correctly and functions safely. Handling the wires and securing the breaker properly are key steps to get your electrical panel back in working order.
Attach Wires To New Breaker
Start by identifying the wires you need to connect to the new breaker. Usually, there will be a hot wire and sometimes a neutral or ground wire, depending on the breaker type.
Loosen the terminal screws on the breaker just enough to slide the wires in. Make sure to strip the wire ends properly if needed, exposing about half an inch of copper for a solid connection.
Push the wires firmly under the terminal screws and tighten them securely. A loose connection can cause overheating or failure, so double-check the tightness before moving on.
Snap The Breaker Into Place
Once the wires are attached, position the breaker next to the bus bar in the panel. Align the breaker’s clips with the mounting rail and the connection points on the bus bar.
Press the breaker firmly until you hear or feel it snap into place. It should sit securely without any wiggle, ensuring a stable electrical connection.
If it doesn’t snap in easily, don’t force it. Recheck alignment and wire placement. Forcing the breaker can damage the panel or breaker itself, creating safety hazards.
Testing The New Breaker
Testing the new circuit breaker is a key step after installation. It confirms the breaker works correctly and keeps your home safe. This process involves restoring power, checking the breaker's function, and handling any issues that arise.
Restore Power Safely
Turn the main power switch back on carefully. Stand clear of the panel to avoid electric shock. Use insulated gloves if available. Switch on the new breaker slowly. Watch for sparks or unusual sounds. If anything looks wrong, turn off power immediately.
Check For Proper Function
Test the new breaker by turning it on and off several times. Confirm the connected devices receive power. Use a voltage tester for accurate results. The breaker should stay on without tripping under normal load. If it trips quickly, it may be faulty or overloaded.
Troubleshooting Common Issues
Breaker trips right away? Check for short circuits or overloaded circuits. Ensure wires are tight and correctly connected. Listen for buzzing sounds, which indicate loose parts. Replace the breaker if problems persist. Consult a professional electrician if unsure.
Maintenance Tips
Proper maintenance is key to keeping your circuit breakers working safely and efficiently. Paying attention to small signs of wear or damage can prevent costly repairs and dangerous electrical hazards. Let’s look at practical tips you can apply to extend the life of your circuit breakers and keep your home protected.
Regular Panel Inspections
Make it a habit to check your electrical panel every few months. Look for any signs of rust, corrosion, or discoloration around the breakers. These can indicate moisture issues or overheating, which need immediate attention.
Listen for unusual sounds like buzzing or crackling when the panel is in use. These noises often point to loose connections or overloaded circuits. If you spot any breakers that feel hot to the touch, that’s another red flag.
Keep the panel door clear of dust and debris, and ensure the breakers are tightly snapped into place. A clean, well-secured panel improves performance and safety. Have you noticed any flickering lights or frequent trips lately? These clues often hint at panel issues needing a closer look.
When To Call a Professional
Handling circuit breakers involves risk, especially if you’re unsure about the wiring or load capacity. If you encounter any signs of burning smells, visible sparks, or persistent breaker trips, it’s time to call an electrician. These issues can point to serious electrical faults.
Electrical codes and standards are complex, and a licensed professional knows how to diagnose hidden problems safely. Don’t wait for a small issue to turn into an emergency—professional help ensures the job is done correctly and keeps your home safe.
If you’re unsure about how to test or replace a breaker, or if your panel is outdated, seek expert advice. Would you rather risk a short circuit or get peace of mind from an expert’s inspection? Often, investing in professional maintenance saves you from bigger headaches down the line.

Credit: www.youtube.com
Frequently Asked Questions
How Do I Safely Turn Off Power Before Changing A Breaker?
Always switch off the main breaker first to cut power. Use a voltage tester to confirm no electricity flows. This prevents shock and ensures your safety during breaker replacement.
What Tools Are Needed To Change A Circuit Breaker?
You typically need a screwdriver, voltage tester, and replacement breaker. These tools help remove the old breaker and install the new one safely and accurately.
How Can I Identify The Correct Breaker To Replace?
Check the breaker label for amperage and circuit details. Match these with your replacement breaker to ensure compatibility and proper function.
How Do I Know If A Circuit Breaker Needs Replacing?
Frequent trips, visible damage, or a burning smell indicate replacement. These signs show the breaker no longer protects your electrical system.
Conclusion
Changing a circuit breaker can keep your home safe and running well. Always turn off power before starting the work. Use the right tools and follow steps carefully. If unsure, ask a professional to help. Regular checks help spot problems early.
Taking time to do it right saves trouble later. Stay safe and keep your electrical system working smoothly.

