Are you looking to add a touch of elegance and functionality to your living space? Mounting floating shelves might be the perfect solution for you.
Imagine effortlessly displaying your favorite books, plants, and decor, all while freeing up floor space. Floating shelves not only enhance the aesthetic appeal of your home but also offer practical storage options. You might think it's a daunting task, but with the right guidance, you can easily transform your walls into a stylish focal point.
In this guide, we'll walk you through each step, ensuring you feel confident and ready to tackle this project. Get ready to discover how simple it can be to mount floating shelves and elevate your home’s design.

Credit: www.create-enjoy.com
Choosing The Right Shelves
Choosing the right floating shelves is crucial for both the look and function of your space. The shelves you pick need to hold what you want without sagging or falling. Also, they should match your room’s style and your personal taste.
Material Options
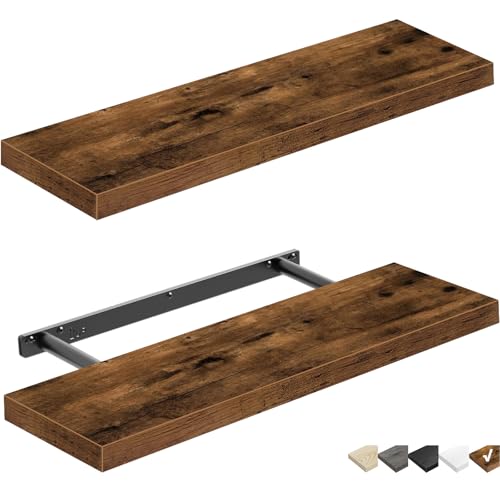
Floating shelves come in various materials, each with its strengths. Wood is a classic choice, offering warmth and durability. If you want a modern feel, metal shelves provide a sleek, industrial look and can hold heavier items.
Glass shelves add elegance but are best for lighter decor. MDF or engineered wood shelves are budget-friendly but may not last as long under heavy weight. Think about what you plan to place on the shelves and the room’s style before choosing the material.
Size And Weight Capacity
Size matters when mounting floating shelves. Too small, and they won’t fit your items; too large, and they may overwhelm your space or require stronger wall support. Measure the wall area and consider what you want to display.
Weight capacity is just as important. Some shelves look sturdy but can only hold light objects. Check the manufacturer’s weight limit and match it to your needs—whether it’s books, plants, or decorative pieces.
Style And Design
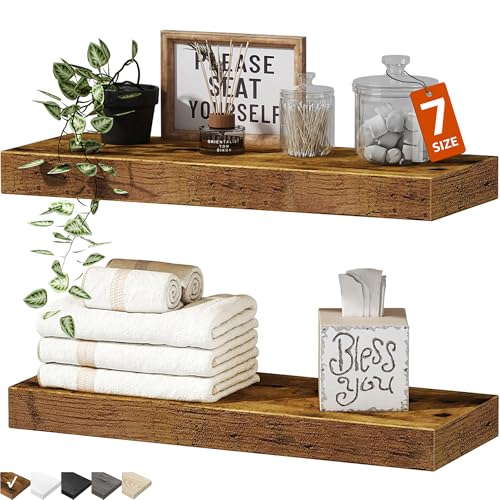
Your shelves should complement your room’s design, not clash with it. Floating shelves come in different shapes and finishes, from rustic reclaimed wood to smooth lacquered surfaces. Choose a style that fits your personality and the room’s theme.
Think about the edge profile too—rounded edges create a softer look, while sharp edges feel contemporary. Have you noticed how the right shelf design can make your display items pop? That’s the kind of effect you want to aim for.
Credit: crystelmontenegrohome.com
Gathering Tools And Materials
Gathering the right tools and materials is essential for mounting floating shelves properly. Having everything ready saves time and avoids interruptions. It also helps ensure the shelves are safe and secure. Below is a clear list of what you need to prepare before starting the project.
Required Tools
- Drill with various drill bits
- Stud finder
- Level
- Measuring tape
- Pencil for marking
- Screwdriver (manual or electric)
- Hammer
Hardware And Anchors
- Wall anchors suitable for your wall type (drywall, plaster, or masonry)
- Mounting brackets or floating shelf supports
- Appropriate screws for anchors and shelves
Safety Equipment
- Safety goggles to protect your eyes
- Work gloves to protect your hands
- Dust mask if drilling into dusty surfaces
Preparing The Wall
Preparing the wall is a crucial step before mounting floating shelves. A well-prepared surface ensures the shelves stay secure and look great. It involves finding the right support, marking the shelf position, and making the wall ready for installation.
Locating Studs
Studs provide the strongest support for floating shelves. Use a stud finder to locate them behind the wall surface. Move the finder slowly to find edges and center of each stud. Mark the stud locations clearly with a pencil. Avoid placing shelves only on drywall for better stability.
Marking Shelf Placement
Decide the height and spacing of your shelves. Use a level to keep marks straight and even. Mark the wall where the brackets or mounting hardware will go. Double-check measurements to ensure proper alignment. Clear and accurate marks help avoid errors during installation.
Wall Surface Preparation
Clean the wall area to remove dust and dirt. Smooth any rough spots or holes with sandpaper or filler. Let filler dry completely before mounting shelves. A clean, smooth surface improves shelf adhesion and prevents damage. Make sure the wall is dry and firm to hold screws securely.
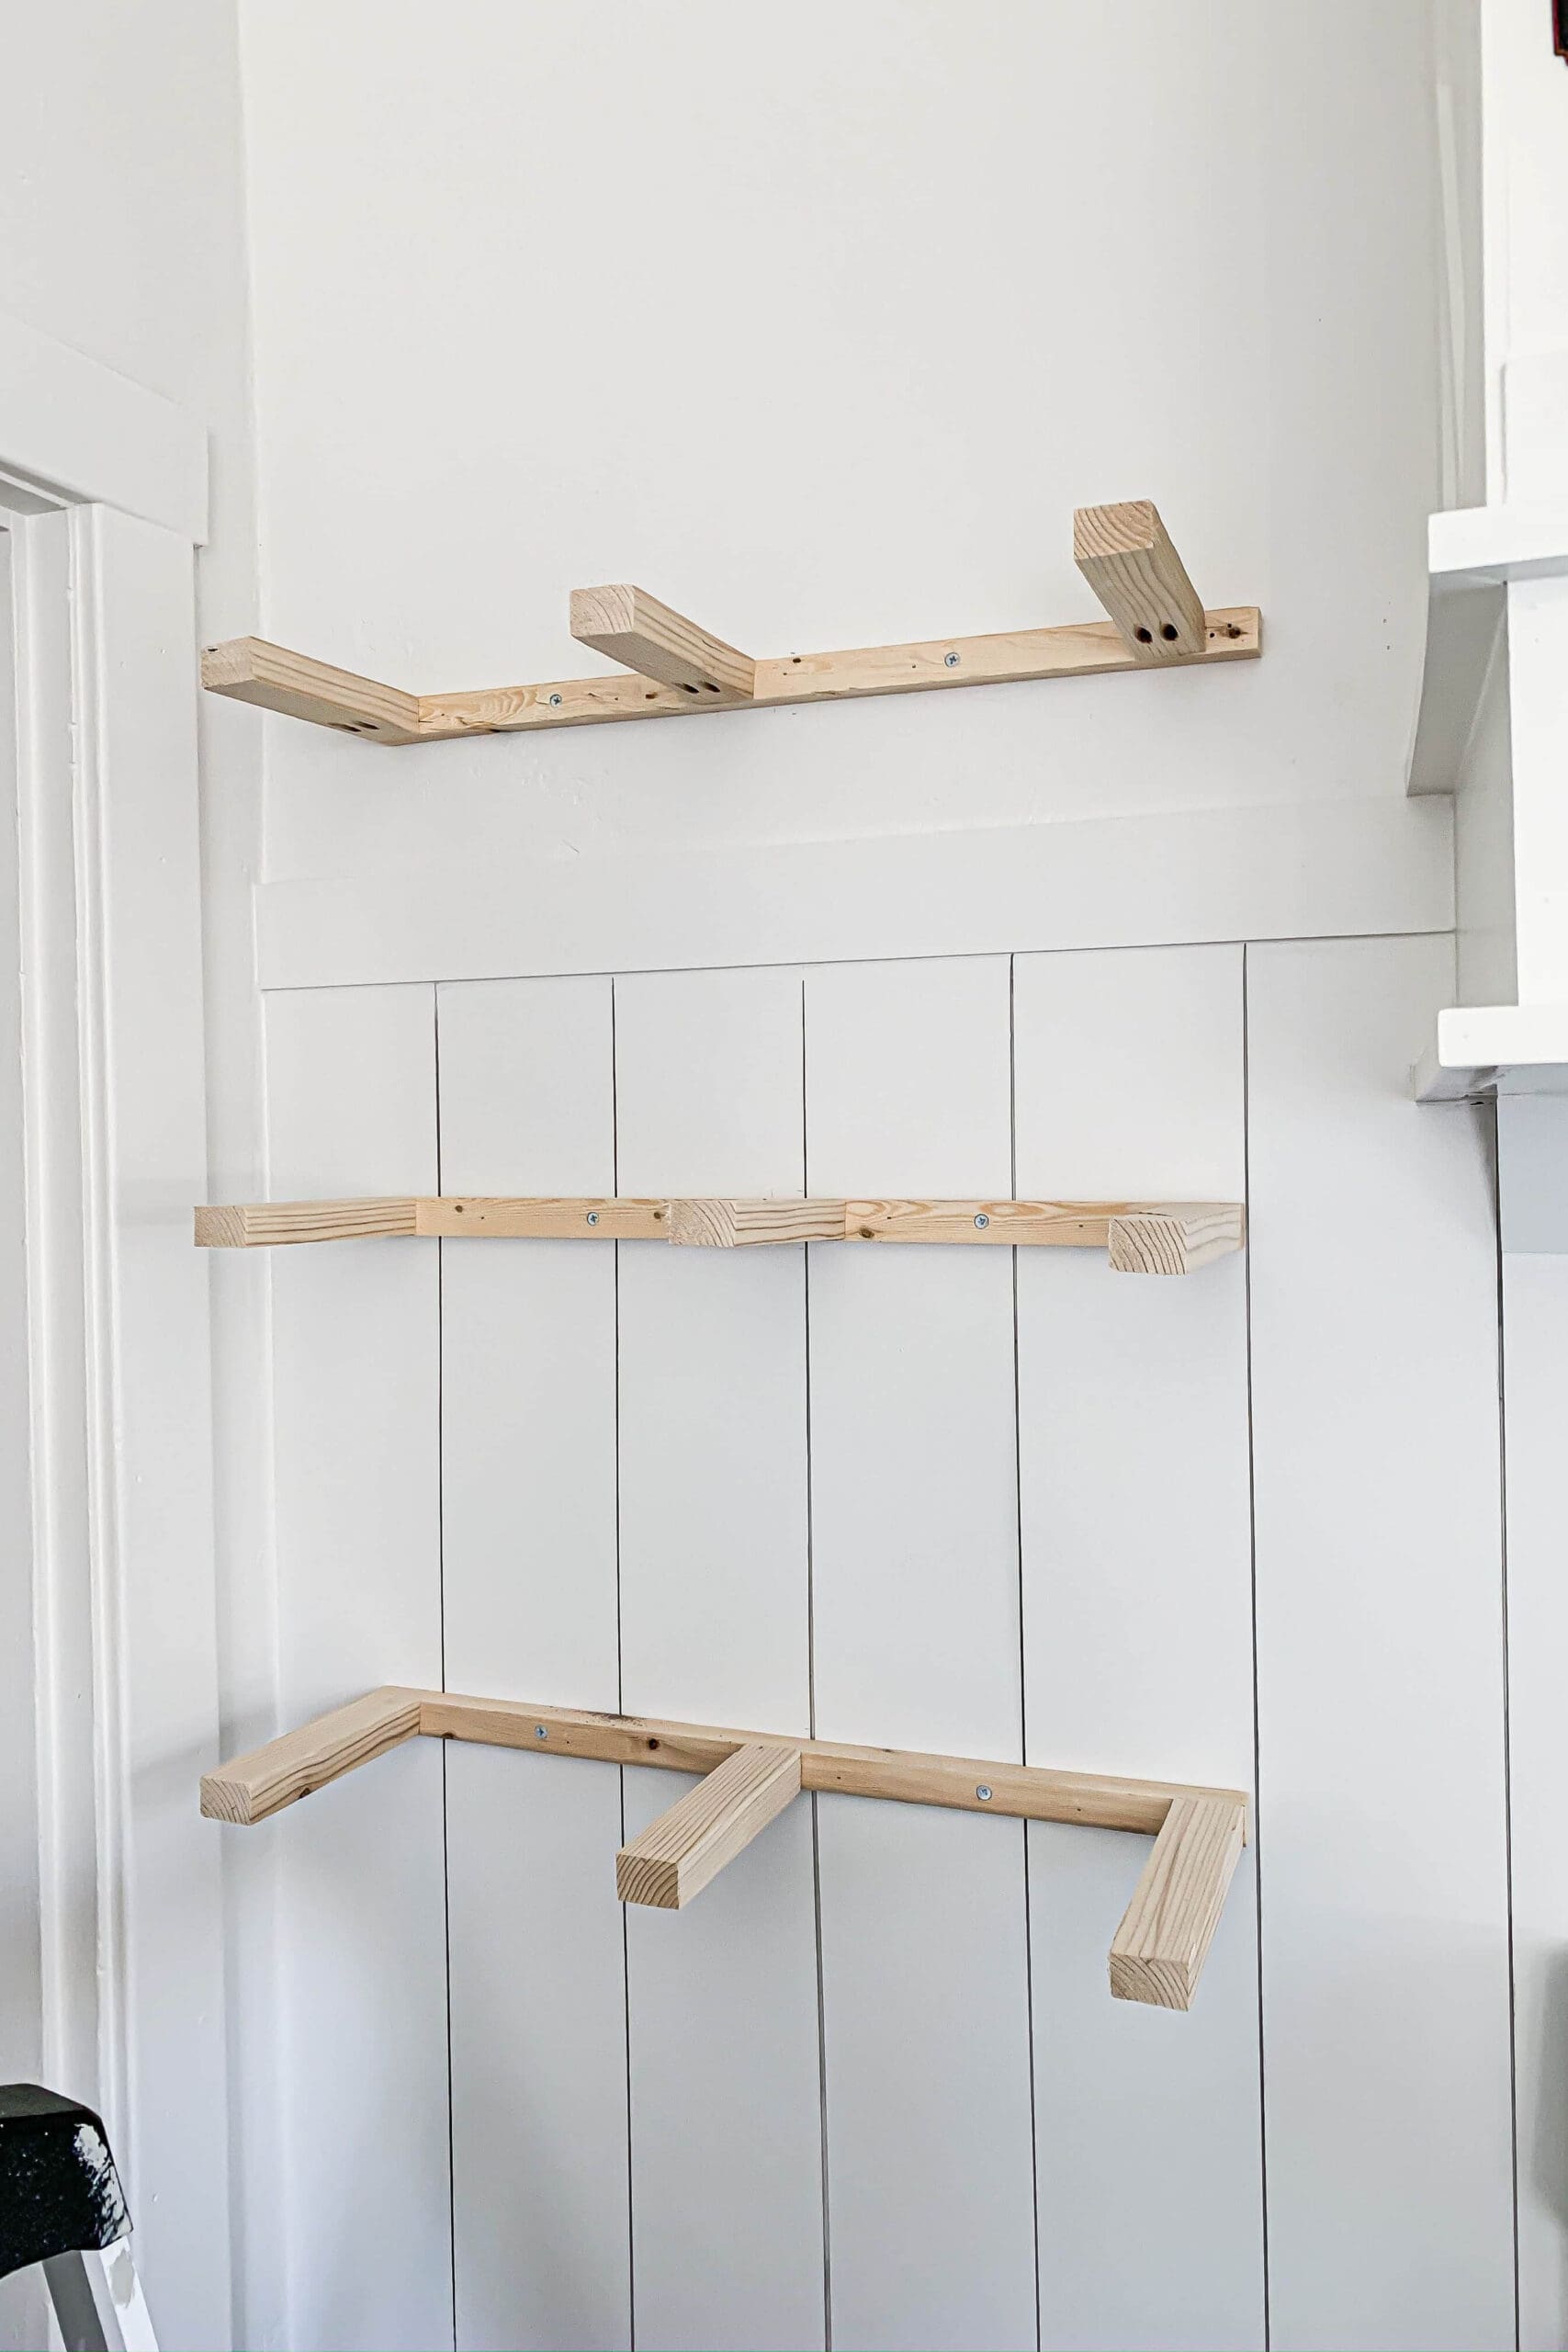
Installing The Brackets
Installing the brackets is a key part of mounting floating shelves. This process ensures your shelves stay stable and secure. Proper bracket installation helps support the weight of items placed on the shelves. Follow each step carefully for the best results.
Aligning Brackets
Start by holding the brackets against the wall. Use a level to keep them straight. Mark the spots where screws will go. Make sure the brackets line up with wall studs for strong support. Double-check the measurements before drilling.
Drilling Pilot Holes
Drill small pilot holes at the marked spots. Pilot holes make it easier to insert screws. They also prevent the wall from cracking. Use a drill bit slightly smaller than the screws. Keep the drill steady and drill straight into the wall.
Securing Brackets
Place the brackets back on the wall. Insert screws into the pilot holes. Tighten the screws with a screwdriver or drill. Ensure the brackets do not move or wiggle. Check the level one last time to confirm alignment.
Mounting The Shelves
Mounting the shelves is the key step in installing floating shelves. This process ensures the shelves are stable and look clean. Careful fitting and adjustments make the shelves safe and neat.
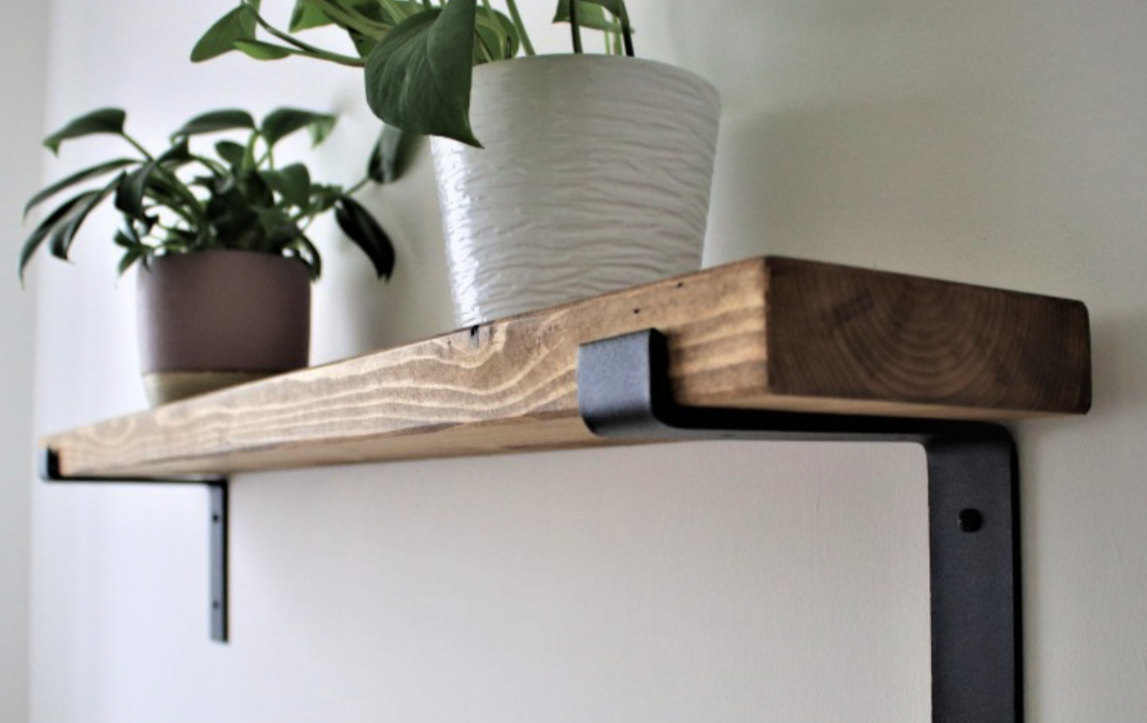
Fitting Shelves Onto Brackets
Slide the floating shelf carefully onto the metal brackets fixed on the wall. Align the holes on the shelf with the bracket ends. Ensure the shelf fits snugly without gaps. Avoid forcing the shelf to prevent damage.
Checking Level And Adjustments
Use a spirit level to check if the shelf is straight. Place the level on top of the shelf surface. Adjust the shelf by gently moving it until the bubble is centered. A level shelf looks professional and prevents items from sliding off.
Securing Shelves In Place
Secure the shelf using screws or set screws through the bracket holes. Tighten screws evenly to keep the shelf steady. Double-check the shelf for any wobbling. Properly secured shelves hold weight safely and last longer.
Finishing Touches
Finishing touches complete the look of your floating shelves. They make your installation neat and stylish. Small details create a big impact on the overall appearance. Focus on hiding hardware, choosing the right color, and styling your shelves.
Hiding Screws And Hardware
Cover screws with wood filler or putty that matches the shelf color. Sand the area smooth after it dries. Use screw caps or decorative covers for a cleaner look. Conceal brackets behind the shelf for true floating effect. These steps create a seamless and polished finish.
Painting Or Staining
Choose paint or stain that fits your room’s style. Apply thin, even coats for smooth coverage. Let each coat dry fully before adding another. Use primer before painting for better adhesion. Stain enhances natural wood grain and adds warmth. This step protects shelves and improves appearance.
Styling Your Shelves
Arrange items thoughtfully for balance and visual interest. Mix books, plants, and decorative objects. Use varying heights and textures for depth. Avoid overcrowding to keep shelves neat and functional. Change items seasonally for fresh looks. Well-styled shelves enhance your room’s character and charm.
Common Mistakes To Avoid
Mounting floating shelves looks simple but has common pitfalls. Avoiding these mistakes ensures strong, safe shelves. Keep your shelves steady and secure by following key tips. This helps prevent damage to walls and items placed on shelves.
Ignoring Weight Limits
Every floating shelf has a weight limit. Exceeding this limit can cause shelves to fall. Check the shelf’s packaging or instructions for weight capacity. Consider what you plan to place on the shelf. Heavy items like books or plants need stronger support.
Improper Stud Location
Studs provide the best support for floating shelves. Mounting shelves only on drywall weakens the hold. Use a stud finder to locate studs inside walls. Mark stud positions clearly before drilling. Align shelf brackets with studs to secure shelves firmly.
Skipping Level Checks
Level shelves look neat and prevent items from sliding off. Use a spirit level during installation to check the shelf’s angle. Adjust brackets if the shelf tilts. Double-check the level after tightening screws. Small mistakes here can cause big problems later.

Credit: www.youtube.com
Frequently Asked Questions
How Do You Securely Mount Floating Shelves?
To securely mount floating shelves, locate wall studs using a stud finder. Use appropriate anchors or screws for drywall. Level the bracket before fixing. Properly tightening screws ensures stability and prevents sagging or falling, making your shelves safe and durable.
What Tools Are Needed To Mount Floating Shelves?
You need a stud finder, drill, level, screwdriver, measuring tape, pencil, and anchors or screws. These tools help locate studs, mark placement, and securely attach shelves. Using the right tools ensures a precise, stable installation for your floating shelves.
Can Floating Shelves Hold Heavy Items Safely?
Floating shelves can hold heavy items if mounted correctly into studs. Use strong brackets and screws designed for weight support. Avoid overloading shelves beyond their weight capacity to prevent damage or accidents. Proper installation is key for safety and durability.
How High Should Floating Shelves Be Mounted?
Floating shelves are typically mounted 48 to 60 inches from the floor. This height suits most users for easy reach and display. Adjust height based on room layout and shelf purpose, ensuring both functionality and aesthetic appeal.
Conclusion
Mounting floating shelves adds style and function to any room. Follow steps carefully for strong, safe shelves. Use the right tools and anchors for your wall type. Take your time to measure and level properly. With patience, you can create neat, sturdy shelves.
Enjoy displaying books, plants, or decor on your new shelves. Small efforts bring big changes to your space. Try it yourself and see the difference.