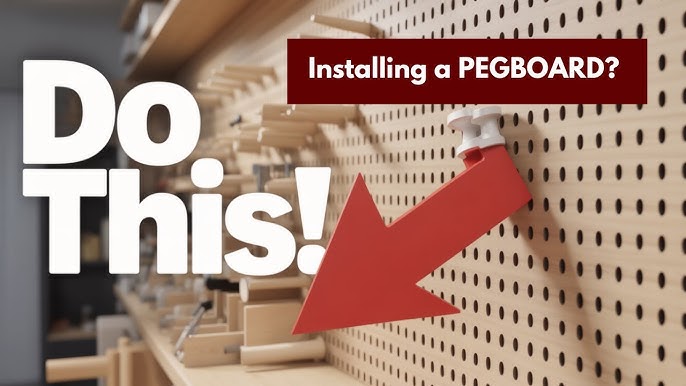
Are you tired of cluttered walls and searching for a simple way to organize your tools or craft supplies? Mounting a pegboard on drywall is an easy and effective solution that can transform your space instantly.
But if you’re worried about making mistakes or damaging your walls, you’re not alone. This guide will walk you through every step, giving you the confidence to hang your pegboard securely and neatly. Keep reading to discover the tips and tricks that will make your project smooth and stress-free.
Your perfect organized wall is just a few steps away!

Credit: www.justhangingpegboards.com
Choosing The Right Pegboard
Mounting a pegboard on drywall needs careful choice of the pegboard type. The right pegboard holds tools safely and fits your wall space well.
This guide helps you pick the best materials, sizes, and accessories for your pegboard.
Materials And Sizes
Pegboards come in various materials like wood, metal, and hardboard. Each type has benefits and fits different needs.
| Material | Strength | Best Use |
| Wood | Strong | Heavy tools, decorative look |
| Metal | Very strong | Industrial use, heavy items |
| Hardboard | Moderate | Light tools, crafts |
Pegboards come in sizes like 2x4 feet or 4x8 feet. Choose a size that fits your wall space and tool collection.
Selecting Pegboard Accessories
Accessories help organize your tools on the pegboard. Pick those that fit your needs and pegboard type.
- Hooks: for hanging tools like hammers and wrenches
- Bins: to hold small parts like screws and nails
- Shelves: for heavier items or boxes
- Tool holders: custom shapes for specific tools
Gathering Tools And Supplies
Mounting a pegboard on drywall needs the right tools and safety gear. Getting everything ready helps your work go smoothly.
This guide lists what you need before starting the project. Check your supplies carefully to avoid delays.
Essential Tools
You need specific tools to mount a pegboard well. These tools help you measure, drill, and fix the board securely.
- Measuring tape to get exact sizes
- Level to keep the pegboard straight
- Drill with screwdriver bits
- Stud finder to locate wall studs
- Hammer for nails or anchors
- Wall anchors for extra support
- Pencil for marking spots
Safety Gear
Safety gear protects you from accidents and injuries while working. Always wear the right equipment.
| Safety Item | Purpose |
| Safety goggles | Protect eyes from dust and debris |
| Work gloves | Keep hands safe from splinters and cuts |
| Dust mask | Prevent inhaling dust particles |
| Ear protection | Reduce noise from drilling |
Preparing The Wall
Mounting a pegboard on drywall needs careful preparation. This helps the pegboard stay strong and safe.
Start by getting the wall ready. This means finding the right spots to put screws and marks.
Locating Studs
Studs are wooden beams behind drywall. They hold weight better than drywall alone.
Use a stud finder tool to find these beams. Move it slowly along the wall until it beeps.
- Turn on the stud finder and calibrate it.
- Move it horizontally on the wall.
- Mark where the tool signals a stud.
- Check for studs about 16 inches apart.
Marking Drill Points
Mark the exact points on the wall where you will drill holes. These points go into the studs.
Use a pencil to make small marks. Make sure the marks line up with the pegboard holes.
- Hold the pegboard against the wall.
- Check the height and position.
- Mark the pegboard holes on the wall.
- Double-check the marks before drilling.

Credit: www.scrapbook.com
Installing Support Structures
Mounting a pegboard on drywall needs strong support. Drywall alone cannot hold heavy items.
Support structures help spread weight and keep the pegboard stable on the wall.
Using Furring Strips
Furring strips are thin wooden strips that create space between the drywall and pegboard. They provide a solid base for mounting.
Attach furring strips vertically to the wall studs before fixing the pegboard. This adds strength and prevents damage.
- Choose 1x2 or 1x3 wood strips
- Locate wall studs with a stud finder
- Use screws to fix strips into studs
- Space strips evenly to support the pegboard fully
Securing Supports To Drywall
Fasten support structures firmly to drywall using appropriate anchors. Drywall alone can crumble under weight.
Use drywall anchors or toggle bolts if you cannot hit a stud. These anchors hold screws securely in drywall.
- Mark spots for screws on drywall
- Drill pilot holes for anchors
- Insert drywall anchors or toggle bolts
- Screw furring strips or supports into anchors
- Check that supports are tight and stable
Mounting The Pegboard
Mounting a pegboard on drywall is a practical way to organize tools. It helps keep your workspace neat and accessible.
With a few steps, you can securely attach the pegboard to the wall. This guide will help you through the process.
Aligning The Pegboard
Proper alignment is crucial for a secure pegboard installation. Make sure it is level and properly positioned.
- Use a level to ensure the pegboard is straight.
- Mark the wall where the screws will go.
- Ensure the marks align with the pegboard holes.
Attaching With Screws
Once aligned, the next step is to attach the pegboard securely. Using screws will hold it in place.
Consider using drywall anchors for added support:
- Choose anchors that match your screw size.
- Drill pilot holes at the marked points.
- Insert the drywall anchors into the holes.
Finally, use a screwdriver to fasten the screws through the pegboard and into the anchors. Ensure each screw is tight.
Finishing Touches
After mounting your pegboard on drywall, the final steps help keep your space tidy. These finishing touches make your pegboard functional and neat.
Focus on adding the right hooks and holders. Then organize your tools for easy access and a clean look.
Adding Hooks And Holders
Select hooks and holders that fit your tools well. This prevents tools from falling or getting damaged. Use heavy-duty hooks for heavier items like hammers.
- Use small hooks for screwdrivers and pliers
- Choose baskets for loose items like nails and screws
- Install shelves or trays for paint cans or glue
- Place tool holders for drills and wrenches
Organizing Tools
Arrange tools by type and frequency of use. Keep often-used tools at eye level and within reach. Group similar tools together for quick access.
| Tool Type | Suggested Location | Holder Type |
| Hand Tools | Middle rows | Hooks or magnetic strips |
| Power Tools | Lower rows | Custom holders or shelves |
| Small Items | Top corners | Baskets or bins |
| Measuring Tools | Eye level | Hooks or clips |
Tips For Maintenance
Keeping your pegboard in good shape helps it last longer. Regular care makes sure it stays useful and neat. Small fixes can prevent big problems later.
Check your pegboard often for any damage or changes. This helps keep your tools safe and easy to find.
Cleaning The Pegboard
Dust and dirt can build up on your pegboard. Clean it regularly to keep it looking good. Use a soft cloth or duster to remove dust.
For deeper cleaning, use a damp cloth with mild soap. Avoid soaking the pegboard to stop damage. Let it dry fully before hanging tools again.
Adjusting Layout Over Time
Your storage needs may change. Move hooks and shelves to fit new tools. This keeps your pegboard organized and practical.
Try different layouts to find what works best. Make sure heavy items are well supported. Regular changes keep your workspace efficient.
- Group similar tools together
- Place often-used items within easy reach
- Keep heavier tools near the bottom
- Use labels to identify tool spots

Credit: www.wallwerx.com
Frequently Asked Questions
How Do You Securely Mount A Pegboard On Drywall?
To securely mount a pegboard on drywall, locate wall studs first. Use screws and anchors for extra support. Attach the pegboard with spacers to allow hook insertion. This method ensures stability and prevents damage to the drywall.
What Tools Are Needed To Mount A Pegboard On Drywall?
You need a stud finder, drill, screws, wall anchors, spacers, a level, and a screwdriver. These tools help locate studs, secure the pegboard, and maintain proper alignment for an effective installation.
Can I Mount A Pegboard Without Studs On Drywall?
Yes, you can use heavy-duty wall anchors or toggle bolts if studs are unavailable. This provides strong support for the pegboard, ensuring it holds tools safely without damaging the drywall.
How Far Should A Pegboard Be From The Wall?
The pegboard should be mounted about ½ to ¾ inch away from the wall. This spacing allows peg hooks to fit behind the board and hold items securely.
Conclusion
Mounting a pegboard on drywall can organize your space well. Use the right tools and follow each step carefully. Secure the pegboard to studs for strong support. Measure twice to avoid mistakes and keep it level. Once mounted, add hooks and shelves for easy access.
A well-mounted pegboard saves time and reduces clutter. Enjoy a neat, functional wall that fits your needs. Keep your workspace tidy and tools within reach. Simple steps lead to great results every time.