

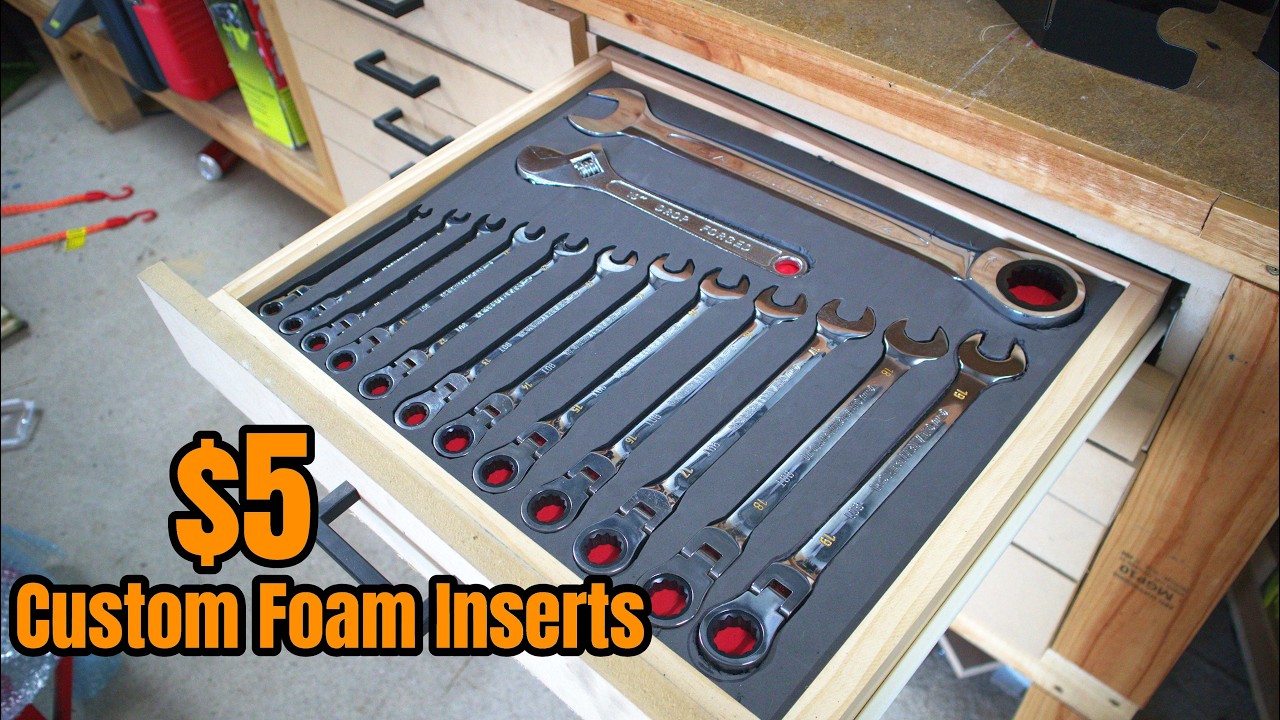
Are you tired of digging through messy toolboxes, wasting time searching for the right tool? Imagine having a perfectly organized tool storage where every item has its own snug spot, easy to find and ready to use.
Knowing how to cut foam for tool storage is the secret to creating that kind of order. It might sound tricky, but with the right tips, you can do it yourself quickly and neatly. Keep reading, and you’ll learn simple steps to transform your tool storage, protect your tools, and save time every time you work.
Choosing The Right Foam
Choosing the right foam is key for effective tool storage. The foam should not only protect your tools but also fit perfectly inside your storage box or drawer system.
The type of foam you need depends on the kind of tools you own and how you plan to store them. Heavy-duty tools require firmer, more durable foam, while delicate tools benefit from softer, more cushioned options.
Different foams offer varying levels of protection, durability, and ease of cutting. That’s why understanding foam density and thickness is essential when selecting the best option for your needs.
Higher-density foam provides better support and resists dents, making it ideal for heavy or sharp tools. Lower-density foam is softer, easier to cut, and suitable for lightweight items but may wear out faster over time.
Finally, knowing where to buy quality foam ensures that your storage solution remains reliable and long-lasting. Look for trusted retailers, read reviews, and consider whether you need custom-cut options or sheets you’ll cut yourself.
Types Of Foam for Tool Storage
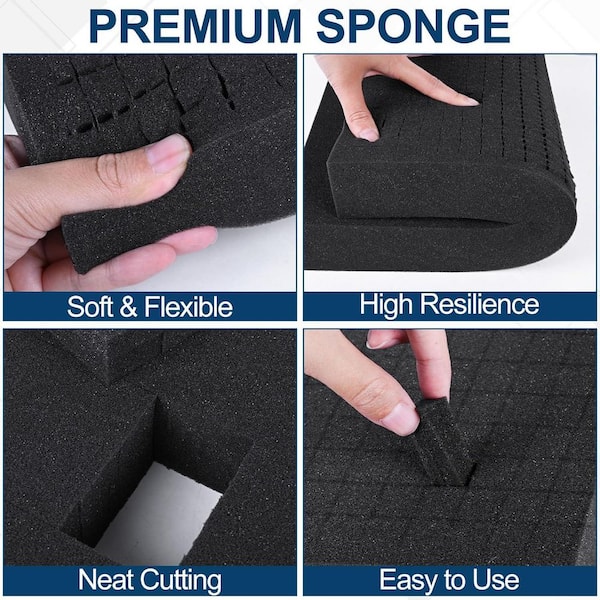
Several foam types of suit tool storage needs. Polyurethane foam is soft and easy to cut. It cushions delicate tools well but wears down faster.
Polyethylene foam is firmer and resists wear. It holds heavy tools securely and lasts longer. EVA foam is tough and shock-absorbent. It works well for sharp or heavy items.
- Polyurethane: soft, easy to shape, less durable
- Polyethylene: firm, durable, good for heavy tools
- EVA foam: shock-absorbent, tough, protects sharp tools
Foam Density And Thickness
Foam density affects tool protection and durability. Higher density foams offer better support and resist dents. Lower density foams are softer but wear out quickly.
Thickness depends on tool size and storage depth. Thin foam suits small hand tools. Thick foam suits large or heavy tools, giving more cushion.
| Density | Best For | Durability |
|---|---|---|
| Low | Light tools, delicate items | Lower |
| Medium | General tool storage | Medium |
| High | Heavy or sharp tools | High |
Where To Buy Quality Foam
Buy foam from craft stores, hardware shops, or online retailers. Check product details for foam type, density, and thickness.
Online stores often offer more choices and better prices. Read reviews to ensure good quality foam. Specialty foam suppliers provide custom cuts and higher-grade materials.

Credit: onreva.com
Tools Needed For Cutting
Cutting foam for tool storage requires a sharp utility knife, a straight edge, and a cutting mat. A hot wire cutter can also be useful for precise cuts. These tools ensure clean lines and an organized finish.
Cutting foam for tool storage is a rewarding project that can transform your workspace into a more organized and efficient area. To achieve those precise cuts and snug fits, you need the right set of tools. This guide will walk you through the essential cutting tools and safety gear required to make your foam cutting process smooth and safe.
Essential Cutting Tools
To start, a sharp utility knife is indispensable for cutting foam. Its precision and control make it ideal for creating clean lines. A hot wire cutter is another excellent option, especially for thicker foam, as it melts through the material with ease. A straight edge or ruler will help you maintain accuracy in your cuts, ensuring that each tool has a snug fit. Additionally, having a marking pen on hand allows you to outline the shapes of your tools before making any cuts. This step is crucial to avoid mistakes that could ruin your foam. Lastly, a cutting mat is beneficial to protect your work surface and ensure the foam doesn't slip while you're working.
Safety Gear To Use
While cutting foam, safety should always be a priority. Start with a pair of safety goggles to protect your eyes from any small particles or debris. Foam can be deceptive, as cutting through it can release fine particles that may irritate your eyes. Consider wearing a dust mask, especially if you're using a hot wire cutter. The fumes from melted foam can be unpleasant and potentially harmful over time. Gloves, though optional, can provide extra grip and protect your hands from accidental cuts. Are you prepared with the right tools and safety gear for your foam cutting project? Taking a few minutes to gather these essentials can make a big difference in your results and ensure your safety throughout the process.
Preparing The Foam
Preparing the foam is a crucial step to ensure your tool storage is both efficient and neat. Taking the time to get accurate measurements and clear markings will save you from frustration later.
This stage is all about setting a solid foundation for the entire project. When you measure carefully and mark precisely, your cuts will fit perfectly, making tool access easy and your storage durable.
Measuring Your Tools
Start by gathering all the tools you want to store in the foam. Lay them out on a flat surface and measure their length, width, and height carefully. Use a ruler or tape measure that you trust for precision.
Don’t just measure the tool itself—consider any attachments or handles that stick out. If you miss these details, your cutouts might be too tight, making it hard to remove the tools easily. Think about how much clearance you want around each tool for quick access.
Have you ever tried fitting a tool into a foam slot only to find it’s too snug? That’s what happens when clearance is overlooked. Adding at least a few millimeters around each measurement helps prevent that issue.
Marking Cut Lines
Once you have all the measurements, transfer them onto the foam with a pencil or fine marker. Use a ruler or straight edge to draw clean, straight cut lines. This will guide your cutting and keep the slots uniform.
It’s helpful to mark the outline of each tool’s shape, especially if they have irregular forms. This way, you won’t just cut rectangles but customized slots that fit perfectly. This personal touch makes your tool storage look professional and organized.
Try to keep your markings light at first. You can always darken the lines once you’re confident they’re accurate. This reduces the chance of mistakes and wasted foam.
Cutting Techniques
Cutting foam for tool storage requires precision and the right technique to ensure clean edges and a perfect fit. Different types of foam and the complexity of your tool shapes call for various cutting methods. Choosing the right technique will save you time and reduce frustration, making your tool storage both functional and neat.
Straight Cuts With A Utility Knife
A sharp utility knife is often the simplest and most effective tool for straight cuts. Use a metal ruler as a guide to keep your cut straight and clean. Press firmly and make several light passes instead of trying to cut through in one go; this prevents jagged edges and tearing.
Always keep your blade fresh—dull knives make rough cuts and increase the risk of injury. If you’re cutting thick foam, consider using a fresh blade halfway through to maintain precision. Have you noticed how a sharp blade changes your confidence and control?
Using Hot Wire Cutters
Hot wire cutters melt through foam, creating smooth edges with minimal effort.
This method works best on polystyrene and similar foam types.
They’re perfect for making intricate shapes or curves that a knife can’t easily handle.
The smooth cuts give your tool storage a clean, professional look.
Be cautious with the temperature settings. Too hot, and you might burn the foam. Too cool, and it won’t cut properly.
If you don’t own a hot wire cutter, many hobby shops offer rentals or demos.
This way, you can test if it suits your project needs.
Just imagine how much time you could save with a tool that glides through foam like butter!
Scoring And Breaking Foam
For very thick foam, scoring and then snapping it apart can be efficient. Use a utility knife to score a line where you want the foam to break. Apply even pressure along the score, then gently bend the foam until it separates cleanly.
This technique reduces the risk of uneven cuts and is quicker than slicing through dense foam. It’s perfect for creating basic shapes without intricate details. Have you tried snapping foam instead of cutting it? It might just become your new favorite shortcut.
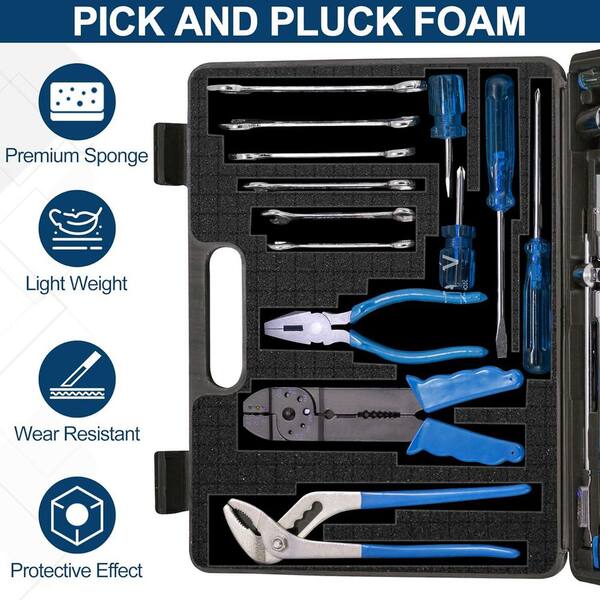
Shaping Foam For A Perfect Fit
Shaping foam to fit your tools perfectly is key to creating a tidy, efficient tool storage system. It’s not just about cutting foam; it’s about customizing each space to hold your tools snugly, protecting them from damage and making them easy to find. Thoughtful shaping turns a simple foam block into a smart organizer that suits your exact needs.
Cutting Tool Outlines
Start by tracing each tool’s outline directly onto the foam using a marker. Make sure your lines are clear but not too thick, so you maintain precision during cutting.
Use a sharp utility knife or an electric carving knife to carefully cut along the traced lines. Take your time—smooth, steady cuts prevent jagged edges and help your tools fit perfectly.
Have you noticed how a clean outline makes the difference between a tool that slips out and one that stays put? Precision here pays off in daily use.
Creating Recesses And Slots
Once the outlines are cut, it’s time to deepen the foam to create recesses that hold your tools securely. Use a combination of a utility knife and a foam cutter to remove foam within the traced areas.
Work in small layers to avoid cutting too deep too fast. This lets you adjust the depth precisely to match your tool’s thickness.
Consider adding slots or grooves for handles or smaller parts to rest in. These details keep tools from shifting when you move your storage system.
Credit: www.homedepot.com
Assembling And Securing Foam Inserts
Assembling and securing foam inserts is key to keeping your tools safe and organized. Proper assembly ensures each tool fits snugly. Securing the foam prevents shifting during transport or storage.
Take time to align layers and attach the foam firmly. This creates a durable insert that lasts. Well-prepared foam inserts make tool access quick and easy.
Layering Foam Inserts
Layering foam inserts allows customization for different tool sizes. Start with a base layer that fits your toolbox. Add layers on top to create depth.
Cut each layer to match tool shapes. Use thinner foam for small tools and thicker foam for heavy tools. Stack layers carefully to avoid gaps.
Glue or spray adhesive works well to hold layers together. Press layers firmly for a strong bond. Let glue dry fully before use.
Fixing Foam Into Toolboxes
Secure foam inserts to prevent movement inside the toolbox. Measure the toolbox interior to fit foam precisely. Cut edges cleanly for a tight fit.
Use double-sided tape or spray adhesive to fix foam inside. Press foam firmly against toolbox walls and base. Avoid loose edges that can catch or tear.
Check the foam fit after placing tools. Adjust if tools shift or foam moves. A stable insert keeps your tools protected and easy to find.
Maintaining Foam Tool Storage
Maintaining your foam tool storage is key to keeping your workspace organized and your tools protected. Over time, foam can collect dust, dirt, and even start to wear down in spots. Taking care of it ensures your tools stay secure and your storage looks professional.
Cleaning And Care Tips
Start by gently removing loose debris with a soft brush or compressed air. Avoid using harsh chemicals that can break down the foam material. Instead, use a mild soap solution and a damp cloth to spot clean stubborn stains.
Make sure the foam dries completely before placing tools back. Moisture can cause mold or mildew, which damages both foam and tools. Regular light cleaning keeps the foam fresh and extends its lifespan.
Replacing Worn Foam
Foam wears out faster in areas where tools are frequently removed and replaced. Notice any thinning, tearing, or loss of shape? That’s your cue to replace those sections.
You don’t need to replace the entire foam insert if only parts are damaged. Cut out the worn spots and fit in new foam pieces to maintain a snug fit. This saves money and keeps your storage customized.
Think about how often you use each tool and which foam areas get the most wear. Could you rearrange tools to spread out the wear more evenly? Small changes like this help your foam last longer and keep your tools safer.
Credit: www.homedepot.com
Frequently Asked Questions
What Tools Do I Need To Cut Foam For Tool Storage?
You need a sharp utility knife, a straightedge, and a cutting mat. A marker helps mark cutting lines. Optional tools include scissors or an electric foam cutter for precision.
How Do I Measure Foam For Custom Tool Storage?
Measure your tools’ dimensions accurately using a ruler or tape measure. Add extra space for easy removal. Transfer these measurements to the foam before cutting.
What Type Of Foam Is Best For Tool Storage?
Closed-cell polyethylene foam is ideal due to durability and resistance to moisture. It provides firm support and protects tools from damage and corrosion.
How Can I Make Precise Foam Cuts For Tool Storage?
Use a sharp blade and steady hand with a straightedge guide. Cut slowly and apply consistent pressure. Replace blades often to maintain clean edges.
Conclusion
Cutting foam for tool storage makes your workspace neat and safe. Use sharp tools and measure carefully for best results. Take your time to create perfect shapes that fit your tools. This simple step helps protect tools and saves space.
Well-cut foam keeps everything organized and easy to find. Try these tips to improve your tool storage today. Your tools will thank you!

