


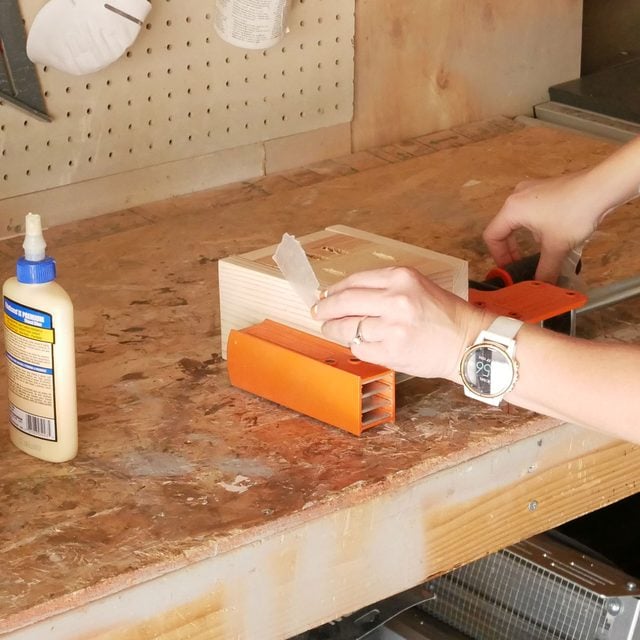
If you want your wood projects to hold strong and last long, mastering the right clamping techniques is key. You might have the best glue, but without proper clamping, your work can fall apart or look sloppy.
Imagine putting in hours of effort only to see your pieces come loose or misaligned. You’ll discover simple yet effective clamping methods that ensure your glued wood stays perfectly bonded every time. Keep reading, and you’ll learn how to save time, avoid frustration, and create flawless results that you’ll be proud of.
Types Of Clamps For Wood Glue
Clamps help hold wood pieces tightly while glue dries. This keeps joints strong and straight. Different clamps fit different projects and needs.
Choosing the right clamp can make your woodworking easier and better. Here are common types used for gluing wood.
Bar Clamps
Bar clamps have a long metal bar with adjustable arms. They hold wide or large pieces of wood firmly. You slide the arm to fit the wood size and tighten it.
These clamps provide strong pressure and are good for table tops or panels. They are easy to adjust and can hold heavy wood parts.
C-clamps
C-clamps look like the letter "C" and have a screw to tighten. They work well for small to medium wood pieces. They apply strong pressure in one spot.
Use C-clamps for detailed work or when you need a firm hold in a small area. They are simple and very durable.
Spring Clamps
Spring clamps are small and use a spring to hold wood pieces together. They are quick to use and good for light jobs. Their grip is less strong than other clamps.
Use spring clamps for temporary holds or to keep small parts in place while gluing. They work well on thin or delicate wood.
Pipe Clamps
Pipe clamps use a metal pipe with adjustable heads. You can change the pipe length to fit big wood pieces. They give very strong pressure over wide areas.
These clamps are good for large frames or wide panels. You can add longer pipes for bigger projects. They are strong but need more space to use.
Corner Clamps
Corner clamps hold two pieces of wood at a right angle. They keep corners square while glue dries. These clamps are useful for frames and boxes.
They make sure joints stay at 90 degrees. Corner clamps save time and make your work more precise.

Credit: www.familyhandyman.com
Choosing The Right Clamp
Clamps are vital tools for gluing wood. They hold pieces tightly together while the glue dries. Picking the right clamp makes your project easier and more successful.
Several factors influence the choice of a clamp, including size, material, and pressure control. Understanding these aspects helps in selecting the best clamp for your needs.
Clamp Size And Capacity
The size of a clamp determines its reach and the size of the wood it can hold. Choose a clamp that can cover the width of your wood pieces. Larger clamps are better for bigger projects.
- Small clamps for narrow wood pieces
- Medium clamps for average-sized projects
- Large clamps for wide boards or panels
Material And Durability
Clamps are made from different materials, like steel or aluminum. Steel clamps are strong and durable. Aluminum clamps are lighter and easier to handle.
- Steel clamps for heavy-duty tasks
- Aluminum clamps for lightweight projects
- Plastic clamps for temporary holds
Clamp Pressure Control
Pressure control is crucial for a secure hold. Too much pressure can damage the wood. Too little pressure may result in weak joints.
Adjustable clamps let you fine-tune the pressure. This ensures a firm grip without harming the wood surface.
| Pressure Level | Use |
| Low | Delicate materials |
| Medium | Standard projects |
| High | Thick boards |
Preparing Wood For Clamping
Proper preparation of wood before clamping ensures a strong glue bond. It helps avoid gaps and weak joints.
Follow these key steps to get your wood ready for clamping and gluing.
Surface Cleaning
Clean surfaces remove dust, dirt, and oils that stop glue from sticking well. Use a soft brush or cloth to wipe the wood.
- Remove sawdust with a brush or vacuum
- Wipe wood with a dry or slightly damp cloth
- Avoid oily or waxy residues
- If needed, lightly sand the surface to open the wood pores
Aligning Wood Pieces
Proper alignment of wood pieces avoids gaps and weak glue joints. Check edges and surfaces before clamping.
| Check Point | What to Do |
| Edges | Ensure they are straight and smooth |
| Surfaces | Match flat surfaces evenly |
| Fit | Test fit pieces without glue first |
| Clamp Placement | Plan clamp positions to keep alignment |
Applying Glue Properly
Apply glue evenly on both surfaces for a strong bond. Avoid using too much or too little glue.
- Use a brush or spreader to cover the surface
- Apply a thin, even layer
- Do not let glue dry before clamping
- Wipe off excess glue after clamping
Effective Clamping Techniques
Clamping wood properly is key to strong glue joints. It holds the pieces tightly while the glue dries.
Using the right clamping methods helps avoid weak spots and mess. Learn how to clamp wood well.
Even Pressure Distribution
Apply pressure evenly across the glued surfaces. This stops gaps and weak joints from forming.
Use multiple clamps spaced evenly to spread the force. Tighten clamps gradually and check pressure.
- Place clamps at equal distances
- Tighten clamps little by little
- Check the joint for even contact
Avoiding Glue Squeeze-out
Too much clamp pressure can push glue out of the joint. This leaves less glue inside to bond.
Use just enough pressure to hold the pieces firm. Wipe away extra glue before it dries.
- Do not overtighten clamps
- Remove excess glue quickly
- Use glue sparingly on the surfaces
Using Cauls For Protection
Cauls are boards placed between clamps and wood. They spread pressure and protect the wood surface.
Use soft cauls to avoid dents. Cauls also help keep the wood flat during clamping.
- Choose smooth, straight boards as cauls
- Wrap cauls with soft cloth if needed
- Place cauls under clamp pads for even pressure
Clamping Patterns For Different Joints
Clamping wood properly is key for strong glued joints. Different joints need different clamping patterns. This guide explains the best clamping methods for common wood joints.
Using the right clamp placement keeps the wood pieces aligned and tight during drying. It also prevents gaps and weak bonds. Let’s look at patterns for edge-to-edge, miter, and panel joints.
Edge-to-edge Joints
Edge-to-edge joints join boards side by side to make wider boards. Clamps must press the edges evenly to avoid gaps.
- Place bar clamps or pipe clamps across the width, spaced every 12 inches.
- Use cauls, which are straight boards, above and below the joint. Cauls spread the pressure evenly.
- Tighten clamps until the glue squeezes out slightly. Do not over-tighten.
Miter Joints
Miter joints join two boards at a 45-degree angle. Clamping must hold the angle tight and aligned.
Clamping tips for miter joints:
- Use a corner clamp or a band clamp to keep the angle steady.
- If no special clamps are available, use two bar clamps crossing the joint.
- Apply even pressure to avoid shifting or gaps in the joint.
Panel Glue-ups
Panel glue-ups join several boards side by side for wide panels. Clamping patterns must keep all boards flat and tight.
| Clamp Type | Use | Placement |
|---|---|---|
| Bar clamps | Apply strong, even pressure | Every 12–16 inches across the panel |
| Cauls | Distribute pressure evenly | Above and below the joint, across full width |
| Pipe clamps | Useful for longer panels | Spaced evenly along panel length |

Credit: www.familyhandyman.com
Clamping Tips For Complex Projects
Gluing wood pieces with complex shapes needs special clamping tricks. It can be hard to hold all parts tight and even.
Good clamping stops gaps and keeps the wood in place while glue dries. Use the right tools and methods for best results.
Clamping Irregular Shapes
Wood pieces with odd shapes need flexible clamping. Normal clamps may not fit or apply pressure evenly.
Use strap clamps or band clamps to wrap around curves and hold parts tightly. Soft pads protect delicate wood.
- Wrap a strap clamp around the shape
- Use scrap wood as pads to spread pressure
- Tighten slowly to avoid shifting parts
- Check glue squeeze-out to confirm good contact
Handling Large Panels
Large wood panels need many clamps to hold the whole surface flat. One clamp is not enough for wide areas.
Use cauls, which are long boards, to spread pressure evenly across the panel. This stops dents and gaps.
- Place clamps every 6 to 8 inches along the panel
- Use cauls between clamps and wood
- Alternate clamp sides to keep panel flat
- Check panel for flatness before glue dries
Using Multiple Clamps Efficiently
Using many clamps saves time and improves glue strength. Plan clamp positions to cover all joints.
Start clamping from the middle and move outwards. This centers pressure and stops gaps at edges.
- Prepare clamps of different sizes for tight spots
- Don’t overtighten; wood can bend or crack
- Check alignment before glue sets
- Use clamp spacers to keep even pressure
Common Clamping Mistakes To Avoid
Clamping wood properly is key for strong glue joints. Avoiding common mistakes helps you get better results. Here are some errors to watch out for.
Using the right clamping technique saves time and prevents damage. Learn what to avoid during the clamping process.
Overtightening Clamps
Applying too much pressure can squeeze out glue and weaken the joint. It may also leave marks or dents on the wood surface.
- Use moderate pressure to hold pieces firmly but gently.
- Check the glue squeeze-out; a thin line means good pressure.
- Use clamp pads to protect soft wood from dents.
- Tighten clamps slowly and evenly to avoid damage.
Insufficient Clamp Pressure
Too little pressure causes weak bonds and gaps in joints. The glue may dry without sealing the wood properly.
| Problem | Cause | Effect |
| Weak joints | Low clamp pressure | Glue bond fails |
| Gap formation | Uneven pressure | Poor fit of wood pieces |
| Loose parts | Insufficient clamping time | Joint movement after drying |
Make sure clamps press wood pieces tight enough. Test by tapping joints and checking for movement.
Ignoring Wood Movement
Wood expands and contracts with changes in humidity. Clamping without allowance for this can cause cracks or splits later.
Tips to handle wood movement:
- Do not clamp too tightly across the grain.
- Leave slight gaps for natural expansion.
- Use flexible glue and joints where needed.
- Store wood in stable conditions before gluing.
Credit: www.familyhandyman.com
Maintaining And Storing Clamps
Keeping your clamps clean and well-maintained helps them last longer. Proper care ensures they work smoothly every time you glue wood.
Storing clamps correctly prevents damage and saves space in your workshop. Follow simple steps to maintain and store your clamps.
Cleaning After Use
Remove any glue residue as soon as possible. Dried glue can make clamps sticky and hard to use. Use a cloth or scraper to clean the clamp surfaces gently.
- Wipe clamps with a damp cloth.
- Use mild soap for stubborn glue.
- Dry clamps completely to stop rust.
- Check for any stuck glue in moving parts.
Lubricating Moving Parts
Lubricate clamp screws and sliding bars to keep them moving smoothly. Without lubrication, parts may wear out or become hard to adjust.
| Part | Lubricant Type | Frequency |
| Screw threads | Light machine oil | Monthly |
| Sliding bars | Silicone spray | Every 3 months |
| Pivot points | Grease | Every 6 months |
Proper Storage Techniques
Store clamps in a dry place to avoid rust and damage. Organize clamps so you can find and use them easily.
- Hang clamps on a wall rack or pegboard.
- Keep clamps off the floor to prevent dirt buildup.
- Group clamps by type or size for quick access.
- Cover clamps if storing for a long time.
Frequently Asked Questions
What Are The Best Clamps For Gluing Wood?
Bar clamps and pipe clamps are ideal for wood gluing. They provide even pressure and prevent wood movement during drying. Quick-release clamps are handy for small projects. Choose clamps based on wood size and joint type for best results.
How Much Pressure Is Needed When Clamping Wood?
Apply firm but moderate pressure when clamping wood. Excessive pressure can squeeze out glue and weaken the bond. Aim for enough pressure to close joints tightly without damaging the wood. Proper pressure ensures strong, durable glued joints.
How Long Should Wood Be Clamped After Gluing?
Clamp wood for at least 30 minutes to 1 hour after gluing. Some wood glues reach full strength after 24 hours. Follow glue manufacturer instructions for precise clamping times. Proper clamping time ensures a solid, lasting bond.
Can I Reuse Clamps For Multiple Wood Projects?
Yes, clamps can be reused multiple times if kept in good condition. Clean clamps after each use to remove glue residue. Store clamps properly to avoid rust or damage. Reusing clamps saves money and maintains consistent clamping pressure.
Conclusion
Good clamping makes wood glue hold strong and tight. Choose the right clamps for your project size. Apply even pressure without squeezing out all the glue. Check clamps often to keep them steady while drying. Clean glue spills quickly to avoid stains.
Practice these simple steps to improve your woodworking results. Patience and care lead to sturdy, lasting joints. Keep trying, and your skills will grow with each project.

