Are you ready to give your cabinets a fresh, stylish look without spending a fortune? Learning how to install cabinet pulls is one of the easiest and most effective ways to upgrade your kitchen or bathroom.
If you’ve never done it before, the process might seem tricky. Don’t worry—this guide will walk you through every step clearly and simply. By the end, you’ll have the confidence to install cabinet pulls and transform your space quickly and smoothly. Keep reading, and let’s get those cabinets looking fantastic!
Tools And Materials Needed
Installing cabinet pulls is a simple job that can improve your kitchen or bathroom. You need the right tools and materials to do it well.
Using proper tools makes the installation faster and keeps your cabinets safe from damage.
Choosing The Right Cabinet Pulls
Pick cabinet pulls that match your cabinet style and color. This helps create a nice look in your room.
Check the size and shape to make sure they fit your cabinet doors and drawers well.
- Measure the distance between screw holes on your cabinet
- Choose finishes like chrome, brass, or matte black
- Consider the pull’s length for easy grip
- Match the pull style with your room’s design
Essential Tools for Installation
Gather the right tools before you start. This makes the job smooth and prevents mistakes.
- Drill with drill bits (usually 3/16 inch)
- Screwdriver (Phillips or flathead depending on screws)
- Measuring tape or ruler
- Masking tape to mark drill points
- Level to keep pulls straight
- Pencil for marking holes
- Center punch or nail to start holes
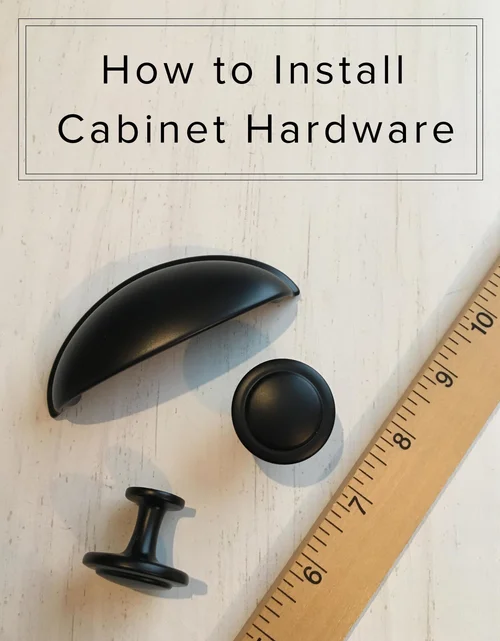
Credit: www.birchlandinghome.com
Preparing Your Cabinets
Installing cabinet pulls starts with good preparation. Getting your cabinets ready makes the process easier and faster.
Careful preparation helps your new pulls fit well and look great on your cabinets.
Removing Old Hardware
First, take off the old cabinet pulls or knobs. Use a screwdriver to remove the screws holding them in place.
Keep the screws in a safe place if you want to reuse them later or need them for reference.
Cleaning And Measuring
After removing the old hardware, clean the cabinet surface well. Use a mild cleaner to remove dirt and grease.
Measure carefully where you want to place the new pulls. Accurate measuring prevents mistakes and misalignment.
- Use a ruler or tape measure for exact measurements
- Mark the screw holes lightly with a pencil
- Check the pull size to match hole spacing
Marking And Drilling Holes
Installing cabinet pulls needs careful marking and drilling. You must place holes exactly for a neat look.
Correct hole placement helps the pulls fit well and work properly. Use simple tools to measure and drill.
Measuring For Placement
Measure the cabinet door or drawer to find the best spot for the pull. Use a tape measure or ruler.
Mark the center point where you want to place the pull. Check both sides to keep it even and balanced.
Using A Template for Accuracy
A template helps you mark holes quickly and with precision. You can buy one or make your own from cardboard.
Place the template on the cabinet surface. Use a pencil to mark the hole positions through the template holes.
- Hold the template steady to avoid mistakes
- Double-check marks before drilling
- Use the same template for all pulls on the project
Drilling Pilot Holes
Drill small pilot holes at the marked spots. These holes guide the screws and prevent wood from splitting.
Use a drill bit smaller than the screw size. Drill straight and stop when you reach the right depth.
- Wear safety glasses before drilling
- Use a clamp to hold the cabinet steady
- Clean dust from holes before installing pulls
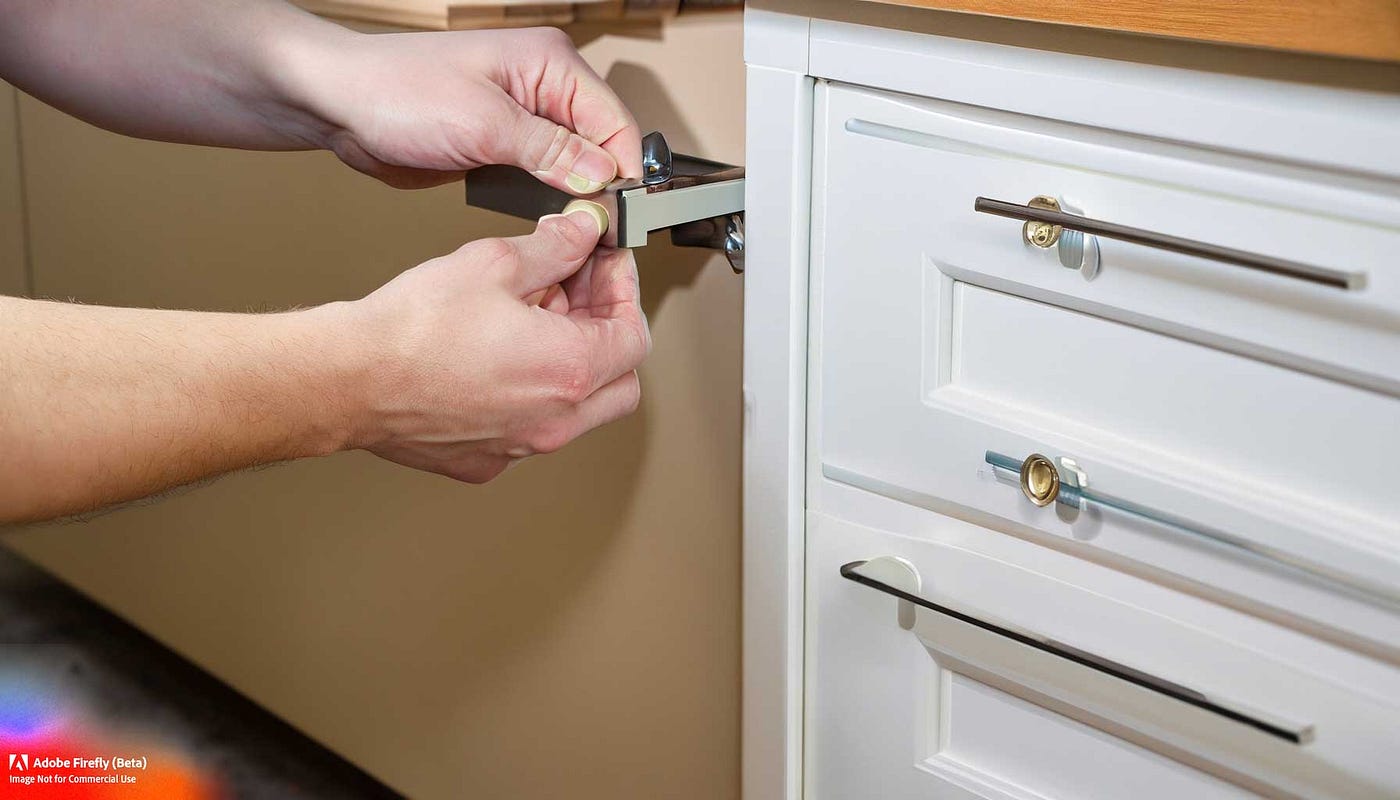
Attaching The Cabinet Pulls
Attaching cabinet pulls is a simple task if you follow the right steps. This guide helps you fix the pulls firmly and straight on your cabinets.
Use the right tools and take your time to align and secure the pulls. This ensures a neat look and long-lasting hold.
Aligning Pulls Correctly
Correct alignment makes your cabinet pulls look professional and feel balanced. Measure carefully before drilling any holes.
- Use a ruler or measuring tape to mark the pull positions.
- Mark the screw holes with a pencil for precision.
- Check the marks with a level to keep pulls straight.
- Measure from the cabinet edges to keep pulls consistent.
Securing With Screws
Use the screws that come with your pulls. Tighten them enough to hold the pulls without damaging the cabinet.
| Tool | Purpose | Tip |
| Screwdriver | Drive screws into the cabinet | Use the correct size to avoid stripping screws |
| Drill | Make pilot holes for screws | Use a drill bit slightly smaller than the screws |
| Level | Check pull alignment | Hold it against the pull before tightening screws |
Tips For a Professional Look
Installing cabinet pulls can change the look of your kitchen or bathroom. Follow these tips to get a professional finish.
Careful planning and attention to detail are key. This will ensure your cabinet pulls are aligned and functional.
Checking For Level and Alignment
Ensure your cabinet pulls are level for a polished look. Use a ruler or a measuring tape to mark positions accurately.
- Use a spirit level to check alignment.
- Mark the drill spots with a pencil.
- Double-check measurements before drilling.
Dealing With Misaligned Holes
Misaligned holes can affect the appearance and function of cabinet pulls. Fix them carefully to maintain a clean look.
Consider using a dowel and wood glue to fill misaligned holes.
| Tool | Use |
| Dowel | Fills holes |
| Wood Glue | Secures dowels |
| Drill | Creates new holes |
Credit: medium.com
Maintenance And Care
Keeping your cabinet pulls clean and well-maintained helps them last longer. Simple care prevents damage and keeps them looking good.
Follow easy steps to clean and protect your cabinet pulls from wear and tear. This guide helps you care for them properly.
Cleaning Your Cabinet Pulls
Regular How to Clean and Maintain Cabinet Pulls? Practical Tips – Home Briefings Use gentle methods to avoid scratches or damage.
- Wipe pulls with a soft, damp cloth weekly.
- Use mild soap and water for deeper cleaning.
- Dry pulls completely with a soft towel after cleaning.
- Avoid harsh chemicals or abrasive cleaners.
- Polish metal pulls with a suitable cleaner if needed.
Preventing Wear and Tear
Prevent damage by handling cabinet pulls carefully and reducing stress on them. Simple habits can protect your pulls for years.
| Tip | Description |
|---|---|
| Use gentle force | Pull handles softly to avoid loosening screws or bending pulls. |
| Check screws regularly | Tighten loose screws to keep pulls secure and prevent damage. |
| Avoid moisture | Keep pulls dry to stop rust or corrosion on metal parts. |
| Protect finish | Use protective pads if pulls touch other surfaces to avoid scratches. |
| Limit exposure | Avoid direct sunlight which can fade or discolor pulls over time. |

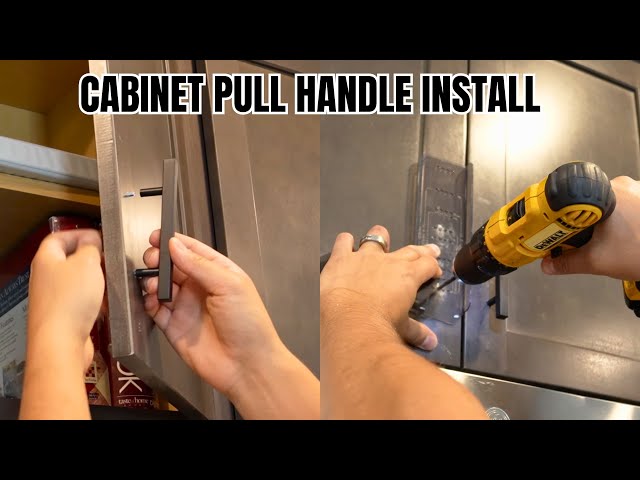
Credit: www.youtube.com
Frequently Asked Questions
What Tools Do I Need to Install Cabinet Pulls?
You need a drill, screwdriver, measuring tape, pencil, and screws. These tools help ensure precise and secure installation of cabinet pulls.
How Do I Measure for Cabinet Pull Placement?
Measure the cabinet door width and height. Mark the center or desired position with a pencil for even pull placement.
Can I Install Cabinet Pulls Without Drilling New Holes?
Yes, if existing holes match the new pulls’ size and spacing. Otherwise, drilling new holes is necessary for proper fit.
What Screw Size Is Best for Cabinet Pulls?
Use screws that match the pull’s thickness and cabinet door depth. Typically, 8 or 10 screws work well for secure mounting.
Conclusion
Installing cabinet pulls is a simple way to update your space. Measure carefully and mark holes before drilling. Use a screwdriver to attach each pull firmly. Take your time to align pulls evenly. Small details like these make a big difference.
Enjoy your refreshed cabinets and easier access. Try different styles to match your room. This project saves money and adds charm. Ready to give your cabinets a fresh look? Just follow these easy steps and see the change.