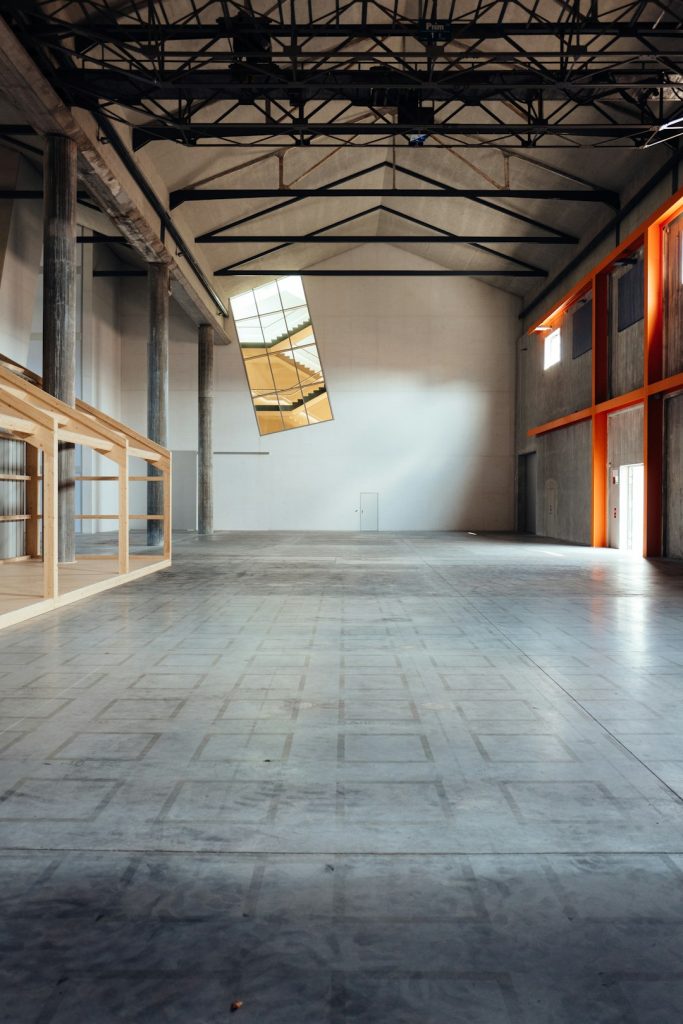
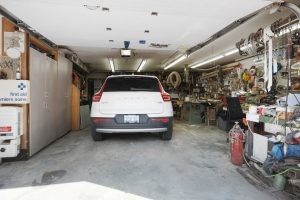
Are you tired of looking at your dull, cracked garage floor? Imagine transforming it into a sleek, shiny surface that not only looks amazing but also lasts for years.
With epoxy garage floor coating DIY, you can achieve a professional finish without spending a fortune or waiting for contractors. This guide will show you simple steps to upgrade your garage floor, saving you time and money. Ready to boost your home’s value and enjoy a cleaner, more durable space?
Keep reading, and you’ll discover how easy it is to get started today.
Benefits Of Epoxy Garage Floor Coating
Epoxy garage floor coating offers more than just a fresh look for your garage. It transforms the space into a durable, easy-to-clean, and visually appealing area. If you’re considering a DIY project, understanding the benefits can help you decide if epoxy coating is right for your garage.
Durability And Long-lasting Protection
Epoxy coatings create a tough, resistant surface that stands up to heavy use. Whether you park cars, work on projects, or store equipment, the floor resists cracks, chips, and stains. This durability means fewer repairs over time, saving you money and hassle.
Easy Maintenance And Cleaning
One of the best parts about epoxy floors is how simple they are to clean. Dust, oil spills, and dirt wipe away quickly without special cleaners. This ease of maintenance keeps your garage looking neat without spending hours scrubbing.
Enhanced Safety Features
Epoxy coatings can improve safety by adding slip-resistant textures. This feature is especially helpful if your garage floor tends to get wet or oily. You can choose coatings with anti-slip additives to reduce the risk of slips and falls.
Improved Aesthetics And Customization
Epoxy floors don’t just protect; they also look great. You can select from a wide range of colors and finishes to match your style. Some coatings even allow for decorative flakes or metallic effects, turning your garage into a stylish, inviting space.
Cost-effectiveness Compared To Alternatives
Compared to other flooring options, epoxy provides excellent value. It’s cheaper than replacing concrete or installing tiles and lasts longer than paint alone. Plus, the DIY application makes it accessible without hiring expensive contractors.
Have you thought about how much time you spend cleaning your garage floor? Imagine cutting that time in half with a simple epoxy coating. Wouldn’t that make your weekends more enjoyable?
Preparing Your Garage Floor
Preparing your garage floor is the most important step before applying epoxy coating. A clean and smooth surface ensures the epoxy sticks well. It also helps the coating last longer and look better. Proper preparation prevents peeling and bubbling later on.
Follow simple steps to get your floor ready. Each step removes dirt, fixes damage, and checks for moisture. This way, your DIY project will have a strong base.
Cleaning And Degreasing
Start by removing all items from the garage. Sweep the floor to clear dust and debris. Use a heavy-duty cleaner to remove oil stains and grease spots. A degreaser breaks down stubborn grime that stops epoxy from sticking. Rinse the floor well with water and let it dry completely before moving on.
Repairing Cracks And Damages
Check the floor for cracks, holes, or chips. Small cracks can cause bigger problems under the epoxy. Use a concrete patch or filler to repair damaged areas. Smooth the surface with a putty knife or trowel. Let the repair dry fully according to product instructions. A smooth floor creates a perfect base for the coating.
Testing For Moisture
Moisture under the floor can ruin epoxy coating. Test for moisture by taping a square piece of plastic on the floor. Leave it for 24 hours. If water droplets form under the plastic, the floor has moisture issues. Moisture can cause peeling and bubbles. Solve moisture problems before applying epoxy for best results.
Tools And Materials Needed
Getting your garage floor coated with epoxy yourself can save money and give you a sense of accomplishment. But before you start, you need to gather the right tools and materials. Having everything ready makes the process smoother and helps you avoid frustrating delays.
Essential Tools For Epoxy Garage Floor Coating
- Paint roller and extension pole:These help you spread the epoxy evenly over large areas without straining your back.
- Paintbrush:Useful for cutting in edges and corners where the roller can’t reach.
- Mixing drill with paddle attachment:Epoxy comes in two parts that need thorough mixing for the best results.
- Protective gear:Gloves, goggles, and a mask protect you from fumes and skin contact.
- Scraper or floor grinder:Removing old paint or smoothing rough spots improves epoxy adhesion.
- Measuring cups:Accurate measurement of resin and hardener is crucial for proper curing.
Materials You’ll Need For A Durable Finish
- Epoxy coating kit:Choose a kit designed for garage floors with enough coverage for your space.
- Concrete cleaner or degreaser:Dirt and oil prevent epoxy from sticking well, so cleaning is a must.
- Concrete patch or filler:Fill in cracks and holes to create a smooth surface before coating.
- Etching solution:This prepares the concrete by opening its pores for better epoxy bonding.
- Anti-slip additive:Mixing this into your epoxy can prevent slips in a wet or oily garage.
Why Preparation Tools Are Just As Important
You might underestimate how much prep work affects your final result. Without the right cleaning agents and surface preparation tools, the epoxy can peel or bubble. Have you ever started a project only to realize you forgot a simple tool? Avoid that by double-checking your list before you begin.
Choosing The Right Epoxy Kit
Choosing the right epoxy kit is key for a successful garage floor project. The right kit affects durability, look, and ease of application. Understanding your options helps you pick the best product for your needs. Consider the type of epoxy and the color choices before buying.
Water-based Vs Solvent-based Epoxy
Water-based epoxy is easy to apply and cleans up with water. It has low odor and dries fast. Good for indoor use and smaller jobs. Solvent-based epoxy is stronger and more resistant to chemicals. It lasts longer but has a strong smell. Requires good ventilation during application. Choose water-based for simple projects and solvent-based for heavy use areas.
Selecting Colors And Finishes
Epoxy kits come in many colors and finishes. Pick a color that fits your garage style and lighting. Light colors make the space look bigger. Dark colors hide dirt well. Finishes can be glossy, matte, or satin. Glossy finishes shine and show imperfections. Matte finishes hide scratches and dust better. Satin offers a balance between shine and hiding flaws.
Step-by-step Application Process
Applying an epoxy garage floor coating yourself can transform your space. The process needs care and patience. Follow these clear steps to get strong, lasting results.
Mixing The Epoxy
Start by preparing the epoxy mixture. Combine the resin and hardener in a clean container. Stir gently but thoroughly to avoid bubbles. Mix only the amount you can use within the working time. Proper mixing ensures the coating cures well and sticks to the floor.
Applying The Base Coat
Pour the mixed epoxy onto the floor in small sections. Use a roller or squeegee to spread it evenly. Work quickly to cover the surface before the epoxy thickens. Make sure to reach corners and edges. A smooth base coat creates a solid foundation for the next layers.
Adding Decorative Flakes
While the base coat is still wet, sprinkle decorative flakes over the surface. Spread them evenly for a uniform look. These flakes add texture and hide imperfections. Let the base coat dry fully before moving to the next step.
Sealing With The Top Coat
Mix a new batch of epoxy for the top coat. Apply it smoothly over the flakes using a roller. This layer seals the flakes and protects the floor from wear. Allow the top coat to cure completely before using the garage. The sealed surface is durable and easy to clean.
Tips For A Professional Finish
Achieving a professional finish on your epoxy garage floor coating requires more than just following the instructions. Attention to detail and proper preparation make all the difference in the final look and durability. These tips will help you avoid common pitfalls and get a smooth, lasting surface that looks like it was done by a pro.
Prepare The Surface Thoroughly
Your epoxy coating can only stick well if the floor is clean and rough enough. Sweep and vacuum to remove every bit of dust and debris. Then, use a degreaser to eliminate oil stains that could prevent adhesion.
Etching the concrete with a mild acid or a commercial etcher creates tiny pores that help the epoxy bond better. Skipping this step often leads to peeling or bubbling later, so take your time here.
Mix The Epoxy Components Correctly
Mixing the resin and hardener in the exact ratio specified by the manufacturer is crucial. Too much hardener can cause the epoxy to cure too fast and crack, while too little results in a sticky, soft finish.
Stir the mixture slowly to avoid introducing air bubbles, which show up as imperfections on the floor. If bubbles do appear, gently running a heat gun or propane torch over the surface can help release them.
Apply In Thin, Even Coats
Thicker coats don’t dry evenly and can lead to runs or drips. Use a high-quality roller to spread the epoxy smoothly and evenly across the floor.
Work in small sections and maintain a wet edge to prevent lap marks. Remember, patience here pays off in a flawless finish.
Control The Environment
Temperature and humidity affect how epoxy cures. Aim for a dry day with temperatures between 60°F and 80°F for the best results.
Try to minimize dust and airflow in the garage during application to avoid particles settling on the wet surface. Have you ever noticed tiny specs ruining a fresh paint job? The same goes for epoxy.
Allow Proper Curing Time
Rushing to walk or park on your new floor can ruin all your hard work. Even if it feels dry to the touch after a few hours, epoxy needs at least 24 to 72 hours to fully cure, depending on the product.
Protect the area from heavy traffic and moisture during this time. Patience here ensures a tough, long-lasting finish that stands up to wear.
Maintaining Your Epoxy Floor
Maintaining your epoxy garage floor is key to keeping it looking fresh and durable for years. Unlike other floorings, epoxy stands up well to wear, but it still needs regular care to prevent damage. The good news? Maintenance is straightforward and doesn’t require expensive products or complicated routines.
Regular Cleaning Practices
Keeping dirt and debris off your epoxy floor prevents scratches and dull spots. Sweep or vacuum the floor frequently to remove grit that can wear down the coating.
Use a mop with warm water and a mild detergent to clean spills or stains quickly. Avoid harsh chemicals or abrasive scrubbers—they can break down the epoxy’s shine and protective layer.
Dealing With Stains And Spills
Accidents happen, but epoxy floors resist most common stains like oil, grease, or paint. Wipe spills immediately using a soft cloth and soapy water to avoid permanent marks.
For tougher stains, try a mixture of ammonia and water; it lifts grime without harming the surface. Have you ever tried scrubbing a stubborn oil spot only to make it worse? A gentle approach saves your floor’s finish.
Preventing Damage And Wear
Furniture legs and heavy objects can scratch or chip your epoxy floor over time. Place protective pads under furniture and avoid dragging heavy items across the surface.
Consider using rugs or mats in high-traffic areas to reduce wear. You’ll find that a little prevention goes a long way in preserving your floor’s sleek look.
When To Recoat Your Epoxy Floor
Even the best epoxy floors need a refresh eventually. If you notice dullness, peeling, or significant scratches, it may be time to apply a new topcoat.
Reapplying a clear epoxy layer every few years restores shine and extends the floor’s life. How do you know when to take this step? Regular inspection helps you catch early signs before damage worsens.
Common Mistakes To Avoid
Epoxy garage floor coating DIY projects can save time and money. Yet, mistakes during the process can lead to poor results. Avoiding these errors ensures a durable and professional finish.
1. Skipping Surface Preparation
Proper surface preparation is crucial for epoxy to bond well. Dirt, grease, or oil can cause the coating to peel. Sweep, scrub, and degrease the floor thoroughly. Use a concrete etcher to open up the pores for better adhesion.
2. Ignoring Moisture Testing
Moisture in concrete can prevent the epoxy from curing properly. Test for moisture by taping a plastic sheet to the floor. If condensation forms, address the issue before applying epoxy.
3. Choosing The Wrong Epoxy Type
Not all epoxy products are suitable for garage floors. Use high-quality, solvent-based or 100% solids epoxy. Water-based epoxies may not provide the same durability.
4. Mixing Epoxy Incorrectly
Improper mixing can lead to uneven curing or weak spots. Follow the manufacturer’s instructions precisely. Mix the resin and hardener thoroughly for the recommended time.
5. Applying Epoxy In Unfavorable Conditions
Temperature and humidity affect epoxy application. Apply epoxy between 60°F and 85°F for best results. High humidity can cause a cloudy finish or improper curing.
6. Applying Too Thin Or Too Thick Layers
Uneven application can compromise the floor’s durability. Spread the epoxy evenly using a roller or squeegee. Apply additional coats only after the first layer has set properly.
7. Rushing The Curing Process
Epoxy requires sufficient time to cure. Walking or driving on it too early can cause damage. Follow the recommended curing times provided by the manufacturer.
8. Overlooking Protective Gear
Epoxy products can release harmful fumes. Wear gloves, safety goggles, and a respirator mask. Protect your skin and eyes to avoid irritation or injuries.
Frequently Asked Questions
What Materials Are Needed For Epoxy Garage Floor Coating Diy?
You need epoxy resin, hardener, primer, cleaning supplies, paint rollers, and protective gear. Proper surface preparation ensures strong adhesion. Buying a complete epoxy kit simplifies the process. Ensure good ventilation during application for safety and better results.
How Long Does Epoxy Garage Floor Coating Take To Dry?
Epoxy typically takes 24 to 72 hours to dry completely. Initial curing happens within 12 hours. Avoid heavy traffic until fully cured. Temperature and humidity affect drying time, so follow manufacturer’s guidelines for best outcomes.
Can I Apply Epoxy Coating On A Painted Garage Floor?
It’s not recommended to apply epoxy over old paint. Remove all paint to ensure proper adhesion and durability. Clean the surface thoroughly before applying epoxy. Proper surface prep prevents peeling and extends floor life.
How Often Should Epoxy Garage Floor Coating Be Reapplied?
Epoxy coatings usually last 3 to 5 years with proper care. High traffic or harsh chemicals may reduce lifespan. Inspect floors regularly and reapply when signs of wear appear to maintain protection and appearance.
Conclusion
Epoxy garage floor coating DIY saves money and adds durability. It protects your floor from stains, cracks, and wear. The process takes time but is simple to follow. Proper preparation ensures the best results and long-lasting finish. Enjoy a clean, shiny garage that looks great.
This project suits anyone willing to work step-by-step. Try it yourself and see the difference it makes. Your garage will thank you.
