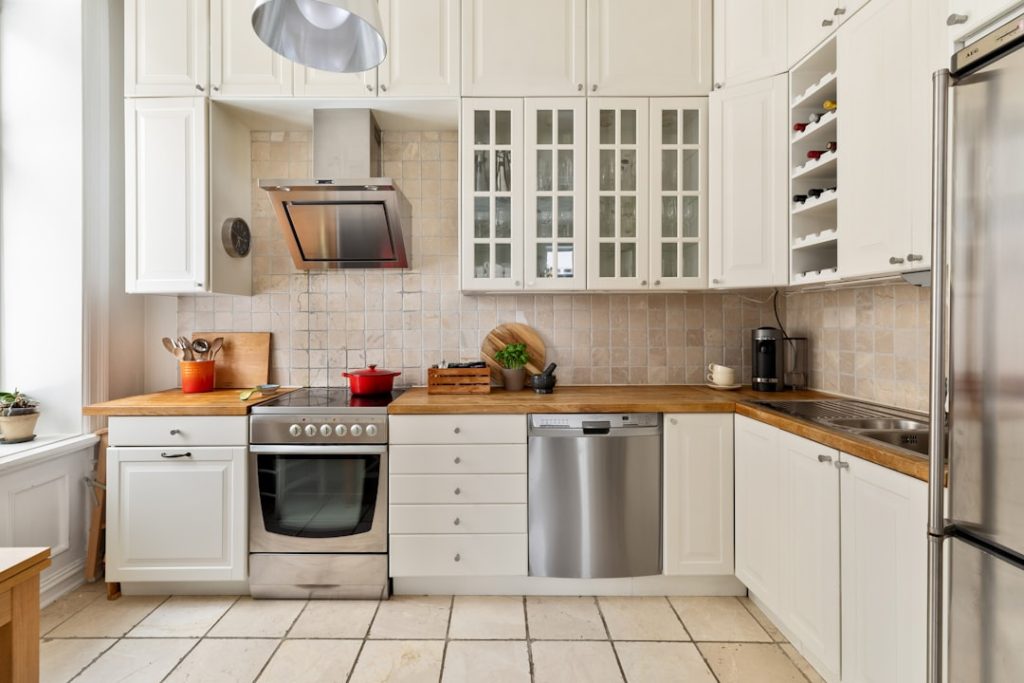
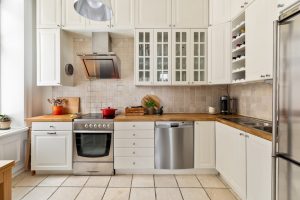
Are your kitchen counters cluttered with appliances that you don’t use every day? Imagine having a neat, hidden space where your toaster, blender, and coffee maker stay out of sight but are still easy to reach when you need them.
A DIY kitchen appliance garage can transform your kitchen into a clean, organized haven. In this post, you’ll discover simple steps to create your own stylish storage spot that saves space and keeps your kitchen looking sleek. Ready to clear the clutter and make your cooking area more enjoyable?
Let’s dive in!
Benefits Of A Kitchen Appliance Garage
A kitchen appliance garage helps keep your kitchen neat and organized. It stores small appliances like toasters, blenders, and mixers out of sight. This simple addition saves counter space and reduces clutter. It also protects appliances from dust and kitchen splashes. The garage blends appliances into your kitchen design for a cleaner look.
Space Saving And Clutter Reduction
Appliance garages free up valuable counter space. They keep appliances hidden but easy to reach. This reduces clutter and makes your kitchen look larger. Storing appliances in one place helps maintain a tidy workspace.
Protection For Your Appliances
Kitchen appliance garages shield devices from dust and spills. This protection helps appliances last longer. It also keeps cords and plugs safe from moisture. Your appliances stay clean and ready to use.
Improved Kitchen Appearance
Appliance garages create a streamlined kitchen look. They hide bulky appliances behind doors or roll-up covers. This adds a sleek and organized feel. Matching the garage to your cabinets keeps design consistent.
Easy Access And Convenience
Appliance garages offer quick access to your tools. You don’t need to move or unplug many items. Just open the door or lid and use the appliance. This convenience saves time during food prep.
Customization And Versatility
These garages come in various sizes and styles. You can build one to fit your kitchen needs. They work for almost any small appliance. Customize shelves and doors for easy appliance storage and use.
Choosing The Right Spot
Choosing the right spot for your DIY kitchen appliance garage can make a huge difference in how functional and tidy your kitchen feels. You want a place that keeps your appliances handy but out of sight, creating a clutter-free workspace. Think about where you use these gadgets most often and how easy it will be to access them.
Consider Your Kitchen Workflow
Where do you spend the most time cooking or prepping? Positioning the appliance garage near your main work area saves you steps and time. For example, placing it close to the countertop where you chop vegetables or brew coffee makes grabbing your blender or toaster effortless.
Look For Underused Spaces
Check for awkward corners or wide gaps between cabinets that often go unused. These spots can be perfect for a compact appliance garage. I once turned a narrow space between the fridge and wall into a sleek garage that holds my mixer and food processor, freeing up countertop space instantly.
Think About Electrical Outlets
Appliances need power, so choose a spot near electrical outlets. Avoid places where cords would stretch across busy areas, creating hazards. If outlets are scarce, consider installing additional ones inside the garage for neat, hidden connections.
Measure Carefully Before Deciding
Measure the height, width, and depth of your chosen spot to ensure it fits your appliances comfortably. Don’t forget to leave room for the garage door or roll-up shutter to open smoothly. A snug but not tight fit will keep your gadgets protected and easy to access.
Balance Accessibility With Aesthetics
You want your appliance garage to blend with your kitchen style while remaining practical. Think about whether you prefer a closed cabinet look or a rolling shutter that reveals your appliances instantly. Ask yourself: does this spot maintain the flow of your kitchen’s design?
Materials And Tools Needed
Gathering the right materials and tools is essential before starting your DIY kitchen appliance garage. Having everything on hand saves time and makes the building process smoother. It also helps you avoid frustrating trips to the hardware store mid-project.
Think about the size and style of your garage first. This will guide the type of wood, hardware, and finishing materials you choose. Are you aiming for a sleek modern look or a classic farmhouse feel? Your materials should match your kitchen’s vibe.
Materials
- Wood:Choose sturdy plywood or hardwood for durability. Pine is budget-friendly, while oak offers a premium finish.
- Hinges and Hardware:Soft-close hinges prevent slamming, and quality handles add style and function.
- Paint or Stain:Select a finish that complements your kitchen. Consider water-resistant options for easier cleaning.
- Drawer Slides:Heavy-duty slides ensure smooth opening and closing of garage doors or drawers.
- Backing Board:Thin plywood or MDF to close the back and keep dust out.
- Magnetic or Roller Catches:These keep the doors securely closed but are easy to open when needed.
Tools Needed
- Measuring Tape:Accuracy matters, so double-check your dimensions before cutting.
- Power Drill:Essential for drilling holes and driving screws quickly.
- Saw:A circular saw or jigsaw works well for cutting wood pieces to size.
- Screwdrivers:Both flathead and Phillips to handle different screws.
- Clamps:Hold pieces steady while glue dries or while screwing parts together.
- Level:Ensures your appliance garage sits perfectly straight and functions smoothly.
- Sandpaper or Sander:Smooth edges and surfaces for a professional finish.
Have you ever started a project only to realize you’re missing a crucial tool halfway through? Take a moment now to create your checklist and gather everything. It’s a small step that saves big headaches later on.
Step-by-step Building Guide
Building your own kitchen appliance garage is a great way to keep your counters clear and your appliances within easy reach. This guide breaks down the process into manageable parts, helping you stay organized and confident throughout the build. Let’s dive into the practical steps that make this project achievable.
Measuring And Planning
Start by measuring the space where you want to build the garage. Consider the height, width, and depth needed to fit your appliances comfortably. Don’t forget to leave some extra room for ventilation and easy access.
Sketch a simple plan based on your measurements. Think about the type of doors or covers you prefer and how they will open. Planning now will save you time and headaches later.
Cutting And Assembling
Choose sturdy materials like plywood or MDF for durability. Use your measurements to mark and cut each piece carefully. If you’re new to cutting wood, using a guide or clamp can help keep your cuts straight.
Assemble the frame first, securing corners with screws and wood glue for extra strength. Add shelves or dividers if your appliances vary in size. Test the fit by placing your appliances inside before moving on.
Installing Doors Or Covers
Decide on a door style: roll-up, hinged, or sliding. Each has its own installation method and impact on accessibility. Hinged doors are easiest for beginners, while roll-up doors save space.
Attach hinges or tracks carefully, ensuring doors open smoothly without rubbing against the frame. Adjust as needed to get a perfect fit. Don’t overlook adding handles or knobs for ease of use.
Finishing Touches
Sand all surfaces to smooth out rough edges and prepare for painting or staining. Choose a finish that matches your kitchen décor and protects the wood from moisture.
Add non-slip mats inside to keep appliances steady. Consider installing small LED lights inside for better visibility. What small detail could make your kitchen routine easier?
Design Ideas And Styles
Designing a DIY kitchen appliance garage lets you tailor the space to fit your style and kitchen needs perfectly. You get to decide how it looks, functions, and blends with your kitchen’s vibe. The right design can keep your counters clutter-free while making your appliances easy to access.
Traditional Cabinet Style
This style uses classic cabinet doors that match your existing kitchen cabinetry. It hides appliances neatly behind wood or laminate doors, giving your kitchen a clean and uniform look. You can add handles or knobs that complement your kitchen hardware for a cohesive feel.
Roll-up Shutter Doors
Roll-up doors are practical for small spaces since they don’t swing out. Made from slatted wood or metal, they roll up smoothly, keeping your appliances visible only when you want them to be. This style adds a modern touch and works well with minimalist kitchens.
Open Shelving Garage
If you prefer easy access and don’t mind showing off your appliances, open shelving is a great choice. It lets you grab your toaster or blender quickly without opening any doors. You can organize this space with baskets or trays to keep things tidy and stylish.
Pull-out Drawer Garage
Pull-out drawers make it simple to slide your appliances in and out without heavy lifting. This design is perfect if you have bulky gadgets like stand mixers or slow cookers. Adding soft-close mechanisms can enhance the experience by making it smooth and quiet.
Mixed Material Design
Combining wood, metal, and glass can make your appliance garage stand out. For instance, wood doors with frosted glass panels add texture and lightness. Metal accents, like handles or frames, bring in an industrial edge that pairs well with modern kitchens.
Integrated Lighting
Adding LED strips inside your appliance garage highlights your gadgets and makes the space feel inviting. Lighting also helps when you’re working in dimmer kitchen corners. You can install motion sensors so the lights turn on automatically when you open the garage.
Tips For Organizing Appliances
Keeping your kitchen appliances organized can transform your cooking space into a more efficient and enjoyable area. A DIY kitchen appliance garage offers a smart way to hide appliances while keeping them accessible. Here are some practical tips to help you organize your appliances inside your garage for easy use and a clutter-free countertop.
Assess The Size And Frequency Of Use
Start by sorting your appliances based on how often you use them. Place daily-use items like toasters and coffee makers in the most accessible spots. Larger or rarely used appliances can go toward the back or on higher shelves within your garage.
Think about how much space each appliance takes up. This will help you choose the right shelf height and depth to fit everything comfortably. Have you measured your appliances before planning the layout?
Use Adjustable Shelving And Dividers
Adjustable shelves let you customize the space as your appliance collection changes. Dividers or small bins keep cords and accessories from tangling or getting lost. This approach keeps the garage tidy and your appliances easy to grab.
For example, I used removable shelf dividers to separate my blender base from its pitcher, preventing any accidental spills or scratches. Simple solutions like this save time and frustration in the kitchen.
Label Appliance Spots
Adding labels inside your kitchen appliance garage can speed up your daily routine. When each appliance has a designated spot, you’ll always know where to put things back. This small step helps maintain order and reduces the time spent searching for items.
You don’t need fancy labels—color-coded stickers or handwritten tags work well. Would labeling your appliance spots make tidying up easier for everyone in your home?
Ensure Proper Ventilation
Some appliances generate heat even when turned off. Leaving them in a closed space without airflow can cause damage or reduce lifespan. Make sure your appliance garage has vents or leave the door slightly open after use to let heat escape.
This simple precaution saved me from overheating my toaster oven. Your appliances will thank you with longer, trouble-free use.
Create A Charging Station
If you have cordless appliances, consider adding a power strip or charging station inside the garage. This keeps cords organized and appliances ready to go. It also prevents clutter on your countertop from charging cables.
Think about your busiest appliances—would they be more convenient if they were always charged and stored in one spot?
Maintaining Your Appliance Garage
Maintaining your kitchen appliance garage is key to keeping it functional and looking great. Regular care prevents dust buildup and keeps your appliances ready to use. You’ll find the garage stays fresh and inviting with just a few simple habits.
Cleaning And Dusting Regularly
Dust can settle quickly in tight spaces like appliance garages. Wiping down surfaces weekly helps avoid stubborn grime. Use a microfiber cloth and mild cleaner to gently remove dirt without damaging finishes.
Don’t forget the corners and hinges—they often collect the most dust. Keeping these spots clean makes opening and closing smooth and quiet. How often do you check these hidden areas in your kitchen?
Organizing Your Appliances Efficiently
Keeping your appliances organized inside the garage saves time and reduces clutter. Arrange items by how often you use them, with daily tools at the front. This simple shift makes your morning routine quicker and less stressful.
Consider adding small shelves or dividers to maximize space. These additions help separate items and prevent stacking that can cause scratches or damage. What’s one appliance you wish was easier to access?
Checking For Wear And Tear
Over time, hinges and doors may wear down from frequent use. Regularly inspect these parts to catch any issues early. Tighten loose screws and lubricate moving parts to keep everything operating smoothly.
Ignoring small problems can lead to costly repairs later. A little attention now saves money and hassle in the future. Have you noticed any squeaks or resistance when opening your appliance garage?
Maintaining Proper Ventilation
Appliances generate heat, so good airflow inside the garage is essential. Ensure vents or gaps aren’t blocked to prevent overheating. Heat buildup can shorten your appliances’ lifespan and reduce efficiency.
If your garage is enclosed, adding a small vent or fan can help. Keeping air moving also reduces moisture buildup, which can cause mold or mildew. How well ventilated is your appliance garage?
Frequently Asked Questions
What Is A Diy Kitchen Appliance Garage?
A DIY kitchen appliance garage is a custom storage space for small appliances. It keeps counters clutter-free and appliances easily accessible. You can build it using wood or materials that match your kitchen décor. It’s a practical and stylish solution for organized kitchens.
How Do I Build A Kitchen Appliance Garage?
Start by measuring your appliances and available counter space. Choose durable materials like plywood or MDF. Cut panels for sides, back, and door. Assemble with screws and hinges for easy access. Finish with paint or stain to match your kitchen style.
Add ventilation if needed.
What Appliances Fit In A Kitchen Appliance Garage?
Common appliances include toasters, blenders, mixers, and coffee makers. The garage can be customized to fit larger items like slow cookers too. It’s ideal for appliances used daily but better kept out of sight. Proper sizing ensures easy storage and retrieval.
Can A Kitchen Appliance Garage Improve Kitchen Organization?
Yes, it reduces countertop clutter and frees up workspace. It keeps appliances dust-free and hidden, improving kitchen aesthetics. This garage helps streamline kitchen routines by keeping essentials handy yet out of sight. It creates a cleaner, more organized cooking environment.
Conclusion
Creating a DIY kitchen appliance garage keeps your space neat and tidy. It hides clutter and protects your appliances from dust. Building one yourself saves money and fits your kitchen style. You can customize the size and design to suit your needs.
A simple project that adds great value and order. Try it and enjoy a cleaner, more organized kitchen every day. Small changes make a big difference. Ready to build your own?


