

Are your cabinet drawers missing that perfect finishing touch? Learning how to install cabinet drawer pulls can instantly transform the look of your kitchen or bathroom, making your space feel fresh and stylish.
But if you’ve never done it before, the thought of measuring, drilling, and fitting hardware might seem tricky. Don’t worry—you can do this yourself, even if you’re not a DIY expert. In this guide, you’ll discover simple, step-by-step instructions to install cabinet drawer pulls quickly and confidently.
Ready to upgrade your cabinets and add that little detail that makes a big difference? Keep reading, and you’ll have it done in no time.
Credit: www.birchlandinghome.com
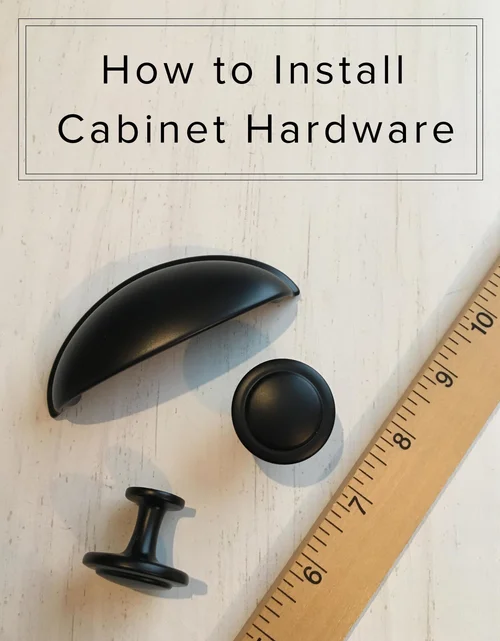
Choosing The Right Drawer Pulls
Choosing the right drawer pulls can change the look of your cabinets. The right pulls make your drawers easy to open and match your room’s style.
Think about size, style, and finish before you buy. These details help you find pulls that fit well and look good.
Consider The Size Of Your Drawers
Measure your drawer front before picking pulls. Small drawers need smaller pulls. Large drawers look better with bigger pulls.
Match Your Cabinet Style
Drawer pulls should match the style of your cabinets. Traditional cabinets go well with classic designs. Modern cabinets suit sleek and simple pulls.
- For classic cabinets, choose ornate or curved pulls.
- For modern cabinets, choose straight or geometric pulls.
- For rustic cabinets, choose pulls made of wood or iron.
Choose The Right Finish
The finish of drawer pulls affects the room’s look. Match the finish with other hardware like faucets and hinges. Common finishes include chrome, brass, and bronze.
| Finish | Best For | Care Tips |
| Chrome | Modern kitchens | Wipe with a soft cloth |
| Brass | Traditional rooms | Use mild polish |
| Bronze | Rustic or farmhouse style | Clean with warm water |
Think About Functionality
Choose pulls that feel comfortable to hold. Think about how you use your drawers. Some pulls are better for quick grip, others for a gentle pull.
Tip:Test a few pulls in your hand before buying. Comfort matters as much as style.
Credit: medium.com
Tools And Materials Needed
Installing cabinet drawer pulls is a simple task that requires a few basic tools and materials. Having everything ready before you start will help the process go smoothly.
Below is a list of common tools and materials needed to install cabinet drawer pulls safely and correctly.
Tools
- Electric drill or screwdriver
- Drill bits (usually 3/16 inch or 1/8 inch)
- Measuring tape or ruler
- Center punch or nail
- Level
- Pencil or marker
- Safety glasses
- Clamps (optional)
Materials
You will need the correct size and style of cabinet drawer pulls. Make sure the screws fit the thickness of your drawer fronts.
| Material | Description |
| Cabinet Drawer Pulls | Choose metal or plastic pulls that match your cabinet style |
| Screws | Usually come with the pulls; check length fits drawer thickness |
| Wood filler (optional) | For filling any mistakes or old holes |
| Sandpaper (optional) | Used to smooth filled holes or rough areas |
Safety Equipment
Wear safety glasses to protect your eyes from dust or wood chips while drilling. Gloves can also protect your hands if needed.
Tip:Keep your workspace clean and well-lit to avoid accidents.
Preparing The Cabinets
Installing cabinet drawer pulls begins with preparing the cabinet surface. Good preparation helps the pulls fit well and last longer.
Take time to clean and mark the cabinets. These steps make installation easier and more accurate.
Cleaning The Surface
Start by removing dirt, grease, and dust from the drawer fronts. Use a mild cleaner and a soft cloth to wipe the surface.
- Use warm water mixed with mild soap.
- Wipe the surface gently to avoid scratches.
- Dry the surface fully with a clean cloth.
- Check for any damage or chips that need repair.
Marking The Drill Points
Next, mark where to drill holes for the pulls. Accurate marks make drilling easier and prevent mistakes.
| Tool | Purpose |
| Measuring tape | Measure drawer width and pull placement |
| Pencil | Mark drill points lightly on the drawer front |
| Level | Ensure marks are straight and even |
| Template (optional) | Use for consistent hole spacing on multiple drawers |
Measuring And Marking
Measuring and marking are the first steps to install cabinet drawer pulls. Accurate marks ensure the pulls fit well and look balanced. Take your time to measure carefully.
Use a ruler or tape measure and a pencil to make light marks. You can erase or adjust them if needed before drilling holes.
Aligning With The Cabinet Edge
Start by deciding how far the pull will be from the cabinet edge. Most pulls are placed 1 to 1.5 inches from the edge. This helps keep the look clean and easy to use.
- Place the ruler along the drawer front edge.
- Mark the spot where the pull will attach.
- Check that the mark is straight and even on both sides if you have multiple drawers.
- Use a square tool to keep the mark perpendicular to the edge.
Ensuring Consistent Placement
Keeping the pulls in the same spot on each drawer makes your cabinets look neat. Use a measuring tool or guide to repeat the marks easily.
| Tool | Purpose | How to Use |
| Measuring Tape | Measure distance from edge | Stretch tape from edge and mark the pull spot |
| Combination Square | Check alignment and mark straight lines | Place against edge to draw perpendicular mark |
| Template Jig | Mark holes quickly and evenly | Place jig on drawer, mark holes through guide |
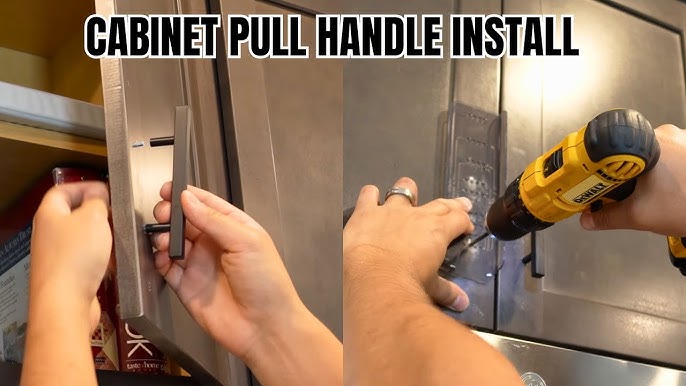
Drilling Holes
Installing cabinet drawer pulls requires precise drilling. Accurate holes keep the pulls aligned and secure.
Using the right drill bit and drilling carefully will help you avoid damage and get a professional look.
Using The Right Drill Bit
Select a drill bit that matches the screw size of your drawer pulls. This helps the screws fit tightly.
- Use a brad point bit for clean holes in wood.
- A spade bit works for larger holes but may be rougher.
- Check the pull’s screw diameter before choosing your bit.
- Use a drill bit stop or tape to control hole depth.
Drilling With Precision
Mark the exact spot for each hole using a pencil and a ruler or template. This ensures even spacing.
| Tip | Explanation |
| Use a center punch | Create a small dent to keep the drill bit from slipping. |
| Drill slowly | Control the drill to avoid splintering the wood. |
| Keep drill straight | Hold the drill perpendicular to the drawer front for straight holes. |
| Check depth | Stop drilling once you reach the screw length. |
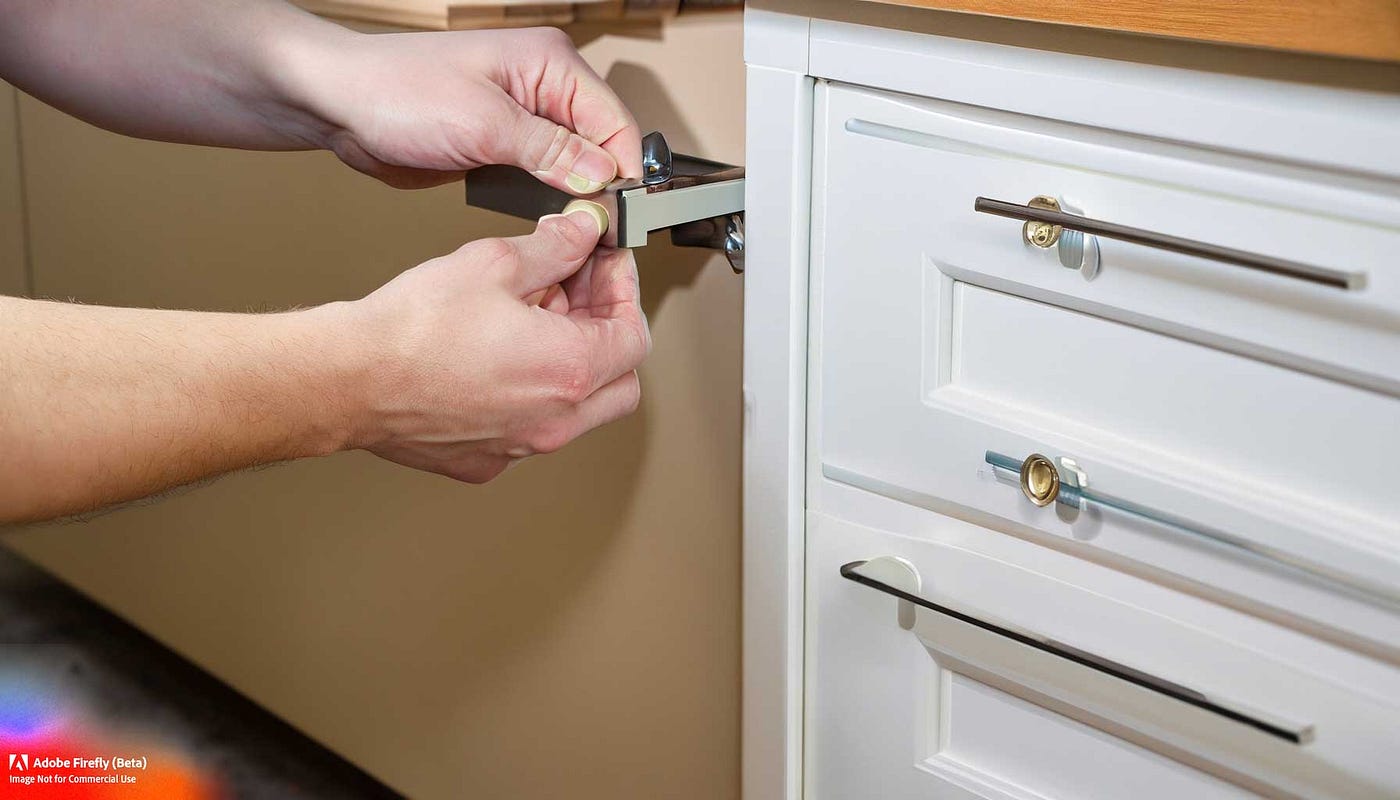
Attaching The Drawer Pulls
Attaching drawer pulls is a simple way to update your cabinets. It makes drawers easier to open and look nicer.
Follow these steps to attach drawer pulls correctly. Take your time to get a good fit and finish.
Securing Screws Firmly
Use the screws that come with your drawer pulls. Place the screw through the hole in the pull.
Turn the screw with a screwdriver until it feels tight. Do not over-tighten to avoid damage.
- Use a screwdriver that fits the screw head well.
- Turn screws slowly and stop when tight.
- Check that the pull does not move after tightening.
Checking Alignment
Make sure the drawer pull is straight before fully tightening screws. Misaligned pulls look uneven and feel awkward.
Look at the pull from different angles. Adjust the position if needed before securing the screws.
- Check alignment with a ruler or level.
- Make small adjustments to keep pulls straight.
- Ensure all pulls on the same cabinet are aligned.
Final Adjustments
After installing cabinet drawer pulls, it is important to make final adjustments. These ensure the pulls work well and look good.
Pay attention to tightness and visual alignment before finishing the job. This helps avoid future problems.
Ensuring Tightness
Check that all screws are securely tightened. Loose screws can cause the pull to wobble or fall off.
Use a screwdriver to gently tighten each screw. Do not overtighten, or you may damage the drawer or pull.
- Hold the pull steady while tightening
- Stop tightening when the pull feels firm
- Recheck after a few uses to keep it secure
Making Visual Checks
Look closely at the pulls to make sure they are straight and centered. Proper alignment improves the cabinet’s appearance.
Stand back and view from different angles. Small misalignments are easier to spot this way.
- Check that pulls line up horizontally across drawers
- Make sure pulls are not tilted or crooked
- Adjust screws slightly if needed for perfect fit
Common Mistakes to Avoid
Installing cabinet drawer pulls seems easy but can have common errors. Avoiding these mistakes saves time and effort.
Knowing what not to do helps your drawers look neat and function well. Read on to learn key errors to skip.
Wrong Measurement Placement
Many people measure drawer pulls from the wrong spot. This causes uneven handles and poor fit.
Measure carefully from the center of the drawer or as per manufacturer instructions. Double-check all measurements before drilling.
Skipping Pilot Holes
Not drilling pilot holes can split the wood or make screws go in crooked.
Always drill small pilot holes before inserting screws. This helps keep the wood safe and the pulls secure.
Using Incorrect Screw Length
Using screws that are too long or too short can cause problems. Too long screws may poke through the drawer back.
Choose screws that fit the drawer thickness. Check the pull’s instructions for the right length.
Ignoring Drawer Material
Different materials need different tools and screws. Hardwoods, softwoods, and MDF react differently to screws.
Match your drill bits and screws to the drawer material. This ensures a tight hold and prevents damage.
Not Aligning Pulls Consistently
Uneven or crooked pulls look unprofessional and can be hard to use.
Use a ruler or template to place each pull at the same height and position on every drawer.
Over-tightening Screws
Too much force can strip screws or crack wood around the pull.
Screw in pulls until snug. Stop once you feel resistance to avoid damage.
Maintenance Tips
Keeping your cabinet drawer pulls in good shape ensures they last longer. Regular care helps them look new and work smoothly.
Simple maintenance steps can prevent damage and keep your drawers easy to open and close.
Cleaning Your Drawer Pulls
Clean drawer pulls regularly to remove dirt and oils. Use a soft cloth with mild soap and water. Avoid harsh chemicals that can damage the finish.
Checking For Loose Screws
Loose screws make pulls wobbly and can cause damage. Tighten screws with a screwdriver every few months. If screws are stripped, replace them to keep the pulls secure.
Protecting The Finish
Protect the pull’s finish by avoiding abrasive cleaning tools. Use furniture polish occasionally to add a protective layer and shine.
Lubricating Moving Parts
For pulls with moving parts, apply a small amount of lubricant to keep them working smoothly. Wipe off excess oil to prevent dirt buildup.
Common Issues And Solutions
| Issue | Cause | Solution |
| Loose pull | Loose screws | Tighten or replace screws |
| Stuck pull | Dirt or rust | Clean and lubricate |
| Faded finish | Harsh cleaning | Use mild soap and polish |

Credit: atelierdeluxe.online
Frequently Asked Questions
How Do You Measure For Cabinet Drawer Pulls?
Measure the distance between existing screw holes or decide the center point on the drawer front. Use a ruler or tape measure for accuracy. Mark the spots lightly with a pencil before drilling holes to ensure proper alignment and fit of the drawer pulls.
What Tools Are Needed To Install Drawer Pulls?
You need a drill, screwdriver, measuring tape, pencil, and a level. A drill bit matching the screw size is essential. These tools help create precise holes, align pulls correctly, and secure them firmly to your cabinet drawers.
Can I Install Drawer Pulls Without Pre-drilled Holes?
Yes, but accuracy is crucial. Measure and mark the drill points carefully. Use a drill bit appropriate for the screws provided with the pulls. Drilling straight holes prevents misalignment and ensures the pulls fit securely on the drawer fronts.
What Size Screws Do Cabinet Drawer Pulls Use?
Screw sizes vary but commonly range from 1 inch to 1. 5 inches. Check the pull’s specifications before installation. Using the right screw length avoids damaging the drawer or leaving the pull loose.
Conclusion
Installing cabinet drawer pulls is a simple task anyone can do. Start by measuring and marking the holes carefully. Use the right tools to make the job easier and safer. Take your time to align the pulls evenly for a neat look.
Changing pulls can freshen your kitchen or bathroom instantly. Enjoy your updated cabinets and the new style they bring. This small project adds both function and beauty to your space. Try it yourself and see how easy it can be.
You’ll feel proud of your handiwork.

