

Have you ever tried to fix a squeaky door or replace a worn-out hinge, only to get stuck because you didn’t know How to Remove Door Hinge Pin? It can be frustrating when a simple task turns into a struggle.
But don’t worry—removing a door hinge pin is easier than you think. In this guide, you’ll learn clear, step-by-step tips to get the job done quickly and safely. By the end, you’ll feel confident handling your door hinges like a pro.
Ready to save time and avoid common mistakes? Let’s dive in!

Credit: www.reddit.com
Tools Needed
Removing a door hinge pin is a simple task. You need a few basic tools. These tools help you take out the pin without damaging the door or frame.
Gathering the right tools before you start saves time. It also makes the job easier and safer.
Hammer
A hammer helps you tap the hinge pin out gently. A small to medium-sized hammer works best. Avoid heavy strikes to prevent damage.
Flathead Screwdriver
Use a flathead screwdriver to pry the hinge pin slightly. It creates space to tap the pin out with the hammer. Choose a screwdriver that fits well under the pin head.
Pliers
Pliers help pull out the hinge pin once it is loose. Needle-nose pliers work well for this task. They provide a strong grip on the pin.
Additional Tools
- Penetrating oil to loosen stuck pins
- Protective gloves for safety
- Wood block to protect surfaces while hammering
| Tool | Purpose |
| Hammer | Taps the hinge pin out gently |
| Flathead Screwdriver | Pries the pin slightly for tapping |
| Pliers | Pulls the loosened pin out |
| Penetrating Oil | Loosens stuck pins |
| Protective Gloves | Protects hands during work |
| Wood Block | Prevents damage to surfaces |
Safety Precautions
Removing a door hinge pin can be simple but requires care. Safety is important to avoid injury and damage.
Follow these safety tips before and during the process to keep yourself safe.
Wear Protective Gear
Always wear gloves to protect your hands from sharp edges. Eye protection is also important to guard against flying debris.
- Use sturdy work gloves
- Wear safety glasses or goggles
- Consider ear protection if using power tools
Use The Right Tools
Choose tools that fit the hinge pin and door size. Using the wrong tools can cause slips and injuries.
- Use a hammer and nail punch or screwdriver
- Use a lubricant spray to loosen rusted pins
- A pair of pliers can help pull the pin out
Secure The Door
Make sure the door is stable before removing the hinge pin. An unstable door can fall and cause injury.
Work Slowly And Carefully
Do not rush the removal process. Slow and steady work reduces the risk of slipping or breaking the hinge pin.
- Tap gently on the hinge pin with a hammer
- Check progress often to avoid bending the pin
- Stop if you feel resistance and apply lubricant
Keep Work Area Clear
Clear your workspace of any clutter. This helps prevent trips and makes tools easy to find.
- Remove rugs or mats near the door
- Keep tools organized and within reach
- Make sure floor is dry to avoid slips
Identify Hinge Type
Removing a door hinge pin starts with knowing the hinge type. Different hinges need different tools and methods.
Identifying the hinge helps you avoid damage and makes removal easier. Look closely at the hinge before you start.
Standard Butt Hinges
Standard butt hinges are the most common door hinges. They have two rectangular plates joined by a pin in the middle.
The pin is usually removable by tapping it out from the bottom with a hammer and punch or screwdriver.
Ball Bearing Hinges
Ball bearing hinges look like butt hinges but have small ball bearings inside. These reduce friction and wear.
The pin is often heavier and harder to remove. Use a strong punch and hammer carefully to avoid damage.
Spring Hinges
Spring hinges have a built-in spring to close the door automatically. They look thicker and have a small hole on top.
Removing the pin is tricky because of the spring. You may need to release tension before pulling out the pin.
Flag Hinges
Flag hinges are used for gates or special doors. One leaf is flat and the other is perpendicular, forming a flag shape.
The hinge pin may be fixed or removable. Check if the pin has a clip or cap that needs to be removed first.
Prepare The Work Area
Removing a door hinge pin requires a clean and organized space. Preparing the work area helps you work safely and efficiently.
Gathering tools and clearing the area prevents accidents and saves time during the process.
Clear The Surrounding Space
Remove any objects near the door that might get in the way. This includes rugs, furniture, and decorations.
Gather Necessary Tools
Having the right tools ready makes pin removal easier. Common tools include a hammer, a screwdriver, and pliers.
- Hammer to tap the pin out
- Flathead screwdriver to pry the pin
- Pliers to pull the pin
- Protective gloves to avoid injury
- Safety glasses to protect eyes
Protect The Floor And Door
Place a cloth or cardboard under the door hinge area. This protects the floor from scratches and catches any falling parts.
Removing The Pin
Removing a door hinge pin is easy with the right tools. You can do it yourself with simple items at home.
There are two common ways to remove the pin: using a hammer and nail or a hinge pin removal tool.
Using A Hammer And Nail
First, place a nail or small punch at the bottom of the hinge pin. Tap it gently with a hammer.
Keep tapping until the pin slides upward and you can pull it out by hand. Be careful not to damage the door or hinge.
- Use a nail slightly smaller than the pin
- Tap gently to avoid bending the pin
- Wear safety glasses to protect your eyes
- Pull the pin out once it moves up
Using A Hinge Pin Removal Tool
A hinge pin removal tool fits under the pin’s head. It pushes the pin up with leverage.
Place the tool under the pin and squeeze the handles. The pin will rise and can be pulled out easily.
- Position the tool at the pin base
- Squeeze handles firmly for leverage
- Lift the pin until it pops out
- Remove the pin by hand
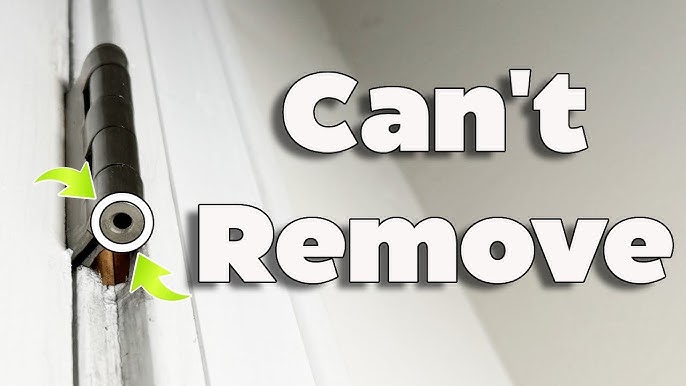
Dealing With Stubborn Pins
Sometimes, door hinge pins get stuck and are hard to remove. Rust, dirt, or paint can cause this issue. You need special methods to loosen these pins safely.
This guide shows two effective ways to deal with stubborn hinge pins. Using lubricant and applying heat can help you remove them without damage.
Applying Lubricant
Lubricant helps loosen rust and dirt around the hinge pin. It reduces friction and makes the pin easier to pull out.
- Choose a penetrating oil like WD-40 or a similar product.
- Spray the lubricant directly on the hinge pin and inside the hinge.
- Let it sit for 10 to 15 minutes to soak in.
- Tap gently on the pin with a hammer to help the oil work deeper.
- Try pulling the pin out using pliers or a hinge pin remover.
Using Heat
Heat expands metal and breaks rust bonds. This method works well if lubricant alone does not free the pin.
| Tool | Purpose | Safety Tip |
|---|---|---|
| Heat gun or small torch | Heats the hinge pin and surrounding metal | Keep flame away from paint and wood |
| Protective gloves | Protects your hands from burns | Wear at all times during heating |
| Hammer and punch | Helps tap the pin out after heating | Use gentle taps to avoid damage |
Warm the hinge pin for 1 to 2 minutes. Avoid overheating the door or frame. Once hot, use pliers or a punch and hammer to remove the pin quickly.
Reinstalling The Hinge Pin
After removing a door hinge pin, you need to put it back correctly. Proper reinstalling keeps the door secure and working well.
This guide explains how to reinstall the hinge pin safely and easily. Follow these steps to avoid damage.
Clean The Hinge And Pin
Before reinstalling, clean the hinge and pin. Dirt or rust can stop the pin from sliding in smoothly.
Use a cloth or brush to remove dust and grime. If needed, apply a little lubricant to help the pin slide easily.
Align The Door And Hinge
Make sure the door is properly aligned with the hinge. The pin must go straight down through the hinge plates.
Hold the door steady or ask for help if the door is heavy. This keeps everything in place while you insert the pin.
Insert The Hinge Pin
Place the hinge pin at the top of the hinge barrel. Push it down as far as you can by hand.
If the pin is tight, gently tap it with a hammer or mallet. Use a block of wood to avoid damage to the pin or door.
- Hold the pin straight to avoid bending
- Tap lightly and check progress often
- Stop tapping when the pin is flush with the hinge
Check The Door Movement
After the pin is in place, open and close the door slowly. Make sure it moves smoothly without sticking.
If the door is stiff, remove the pin and apply more lubricant. Reinstall the pin and test again.
Preventive Maintenance Tips
Keeping door hinges in good shape prevents squeaks and sticking. Regular care helps you avoid big repairs later.
Removing the door hinge pin safely allows you to clean and lubricate the hinge. This keeps the door working smoothly.
Tools You Need
Having the right tools makes removing the hinge pin easier and prevents damage to the door or hinge.
- Hammer or mallet
- Punch or nail set
- WD-40 or lubricant spray
- Cloth or rag
- Screwdriver (optional)
Preparing The Door
Before removing the hinge pin, open the door slightly. This reduces pressure on the pin and makes removal easier.
If the pin is rusty, spray lubricant and let it sit for five minutes. This loosens rust and helps the pin slide out smoothly.
Removing The Hinge Pin
Use a punch or nail set to tap the pin upwards from the bottom of the hinge. A hammer helps apply gentle taps.
- Place the punch at the bottom end of the hinge pin.
- Tap gently with the hammer to move the pin upward.
- Once the pin is loose, pull it out by hand or with pliers.
- Keep the pin and hinge parts together to avoid losing them.
Hinge Maintenance After Removal
| Task | Purpose | How Often |
| Clean hinge | Remove dirt and dust | Every 6 months |
| Apply lubricant | Prevent rust and squeaks | Every 6 months |
| Check hinge screws | Ensure tight fit | Every 3 months |
Tips To Prevent Future Problems
- Keep hinges clean and dry.
- Use lubricant regularly to avoid rust.
- Check and tighten screws often.
- Fix door alignment issues early.
- Replace worn pins to keep doors stable.
Common Mistakes To Avoid
Removing a door hinge pin seems simple but can go wrong easily. Avoiding common errors helps protect your door and tools.
Learn which mistakes to skip for a smooth hinge pin removal process without damage or injury.
Using The Wrong Tools
Many try to remove the hinge pin with unsuitable tools. This can bend or break the pin and damage the door.
Always use a hammer and a punch or a nail set to tap the pin out gently.
Ignoring Safety Precautions
Some skip wearing safety glasses or gloves. This can cause injury from flying debris or sharp edges.
- Wear safety glasses to protect your eyes.
- Use gloves to avoid cuts and pinches.
- Work in a well-lit space to see clearly.
Forcing The Pin Without Lubrication
Forcing a dry hinge pin out can cause damage. Pins often get stuck due to rust or dirt.
Apply oil or penetrating lubricant first. Let it soak to loosen the pin before trying removal.
Not Supporting the Door
Removing the pin without supporting the door can cause it to fall or get misaligned.
| Problem | Solution |
|---|---|
| Door falls off after pin removal | Use a wedge or have someone hold the door |
| Hinge gets damaged | Support door weight before pin removal |
| Pin stuck firmly | Apply lubricant and wait before tapping |

Credit: www.youtube.com

Credit: www.familyhandyman.com
Frequently Asked Questions
How Do I Remove A Door Hinge Pin Safely?
To remove a hinge pin safely, use a hammer and nail punch or screwdriver. Tap the pin upward gently until it pops out. Wear gloves to protect your hands. Ensure the door is supported to prevent it from falling during removal.
What Tools Are Needed To Remove A Door Hinge Pin?
You need a hammer and a nail punch or flathead screwdriver. Sometimes pliers help to pull the pin out once loosened. A lubricant like WD-40 can ease removal if the pin is stuck.
Why Is My Door Hinge Pin Hard To Remove?
Pins get stuck due to rust, dirt, or paint buildup. Applying lubricant and tapping gently can loosen the pin. If stuck badly, use penetrating oil and let it sit before trying again.
Can I Remove A Door Hinge Pin Without Removing The Door?
Yes, you can remove the pin while the door is hung. Support the door securely to avoid damage. Removing the pin allows door removal or hinge maintenance without dismounting the entire door.
Conclusion
Removing a door hinge pin is simple with the right steps. Use basic tools and stay patient. Start by tapping the pin gently from the bottom. Keep the door steady to avoid damage. Once out, clean or replace the pin as needed.
Following these tips saves time and effort. Now, you can fix or paint your door easily. Try this method next time your door hinge needs work. It’s a small task anyone can do at home.

