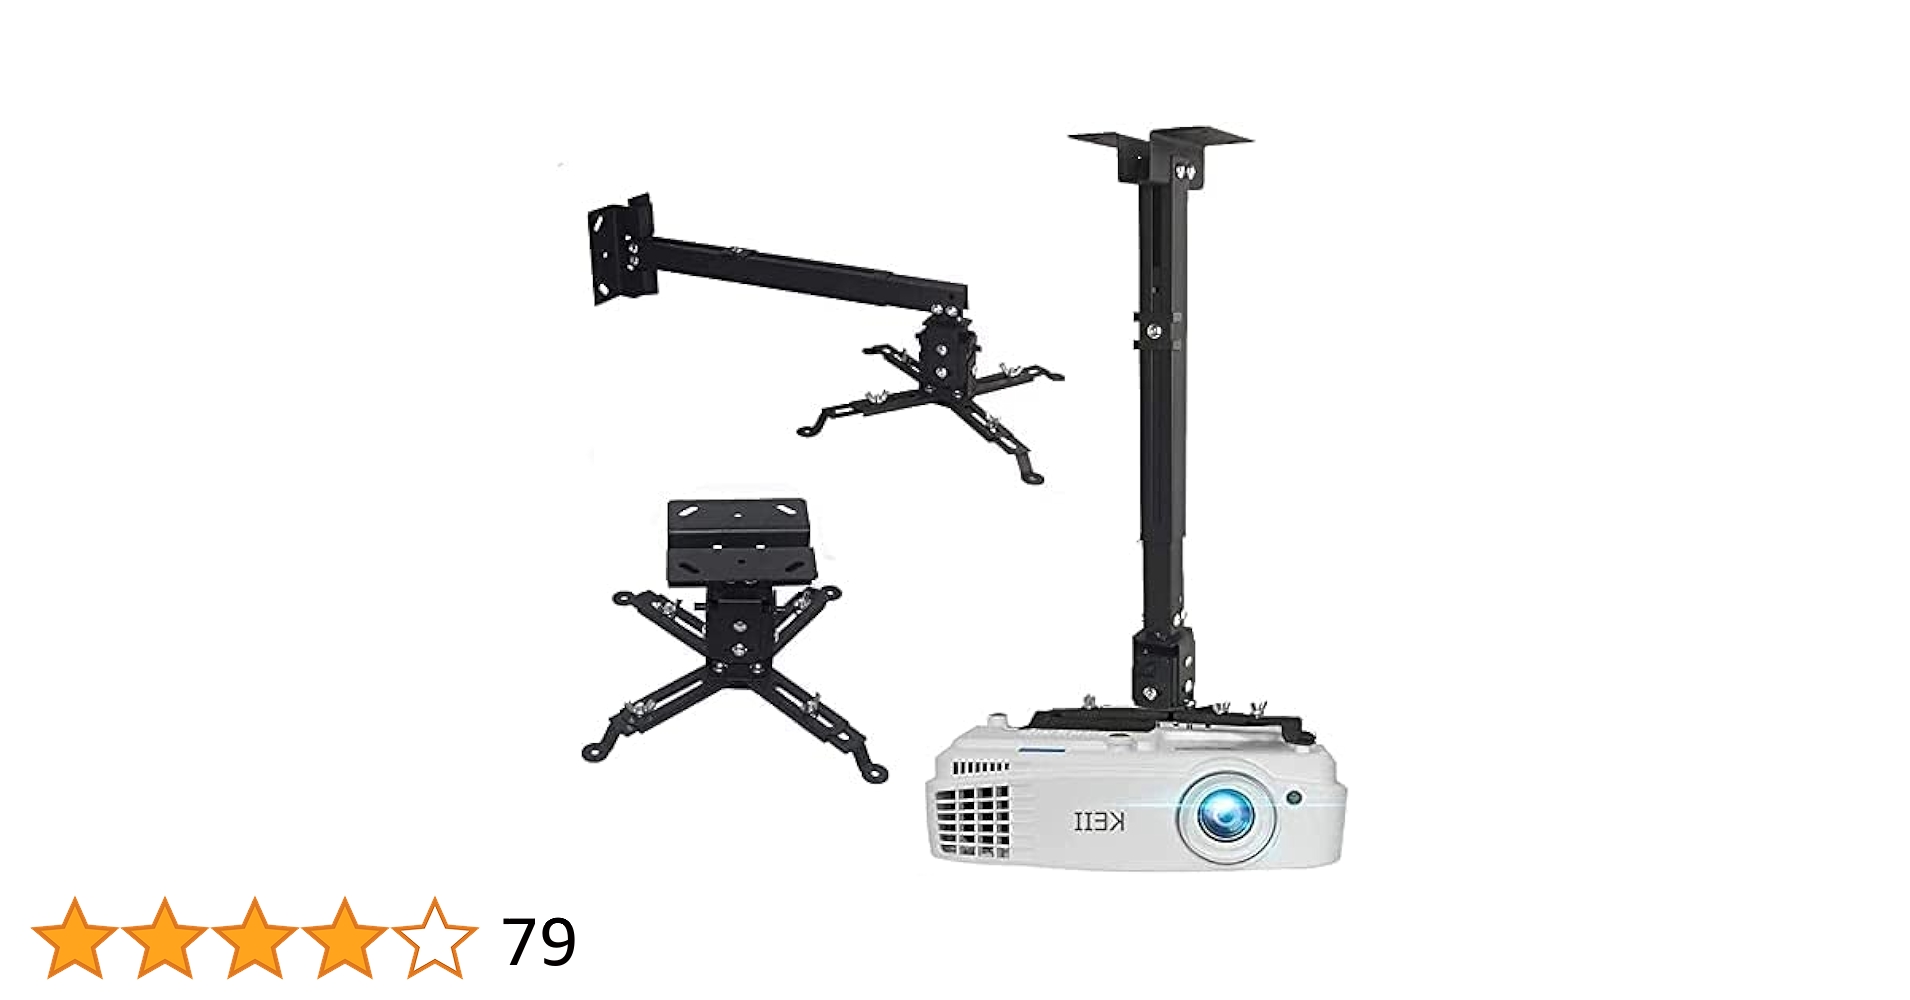
Are you tired of bulky projector setups that take up too much space? A wall projector bracket might be just what you need to transform your viewing experience.
Imagine having your projector perfectly mounted, saving space, and creating a clean, organized look in your room. You’ll discover how the right wall projector bracket can make your setup easier, safer, and more enjoyable. Keep reading to find out how to choose the best bracket for your needs and get the most out of your projector.

Credit: www.amazon.ca
Choosing The Right Bracket
Picking the right wall projector bracket is important for a good setup. The bracket holds your projector safely on the wall.
You need to think about the bracket type, material, and how much weight it can hold. This helps to avoid damage and get the best view.
Types Of Wall Projector Brackets
There are different types of wall projector brackets. Each type fits certain needs and spaces.
- Fixed brackets keep the projector in one position.
- Tilting brackets allow you to change the angle up or down.
- Full-motion brackets let you move the projector in many directions.
Choose a type based on your room layout and projector use. Full-motion brackets offer more flexibility, while fixed brackets are simple and strong.
Material And Build Quality
Strong materials make sure the bracket lasts and holds your projector well. Look for brackets made from metal or high-quality alloys.
Good build quality means tight joints and smooth movement if the bracket moves. Avoid cheap plastic brackets that might break easily.
- Steel brackets are very strong and durable.
- Aluminum brackets are lighter but still sturdy.
- Plastic parts should only be small, not load-bearing.
Weight Capacity And Size Compatibility
The bracket must hold your projector’s weight safely. Check the weight limit of the bracket before buying.
Also, the bracket must fit the size and mounting holes of your projector. Some brackets work with many models, while others fit only certain brands.
- Know your projector’s weight and size first.
- Pick a bracket with a higher weight limit than your projector.
- Check if the mounting pattern matches your projector’s holes.

Credit: www.walmart.com
Installation Tips
Installing a wall projector bracket needs care and the right tools. This guide helps you place and fix the bracket safely and steadily.
Follow these tips to set up your projector bracket properly and avoid common mistakes.
Tools You’ll Need
Before you start, gather all tools. This makes the installation smooth and fast.
- Drill with appropriate bits
- Screwdriver (manual or electric)
- Stud finder
- Level tool
- Measuring tape
- Wall anchors and screws
- Pencil for marking
Locating The Ideal Mounting Spot
Choose a spot that holds the projector steady and gives a clear image on the screen.
| Factor | Tip |
| Wall Material | Use anchors for drywall, bolts for concrete |
| Stud Location | Find studs with a stud finder for strong support |
| Projector Distance | Measure distance to screen for best focus |
| Height | Mount bracket at projector lens height |
| Obstacles | Avoid light switches, vents, or power outlets |
Step-by-step Installation Process
Follow these steps carefully to install the projector bracket securely on the wall.
- Use the stud finder to mark stud locations with a pencil.
- Hold the bracket against the wall at the chosen height and mark screw holes.
- Drill holes where you marked the screw points.
- If no stud is found, insert wall anchors into the drilled holes.
- Align the bracket with the holes and screw it tightly to the wall.
- Check the bracket level with the level tool and adjust if needed.
- Attach the projector to the bracket following the product instructions.
- Test the projector position and make final adjustments for clear projection.
Adjusting Your Projector
Setting up your projector correctly improves your viewing experience. Adjusting the projector helps fit the image to the screen.
Using a wall projector bracket makes these adjustments easier and more stable.
Tilt And Swivel Options
The tilt lets you move the projector up or down. Swivel moves it left or right. These help aim the image perfectly.
Most brackets allow both tilt and swivel to give you flexible control over the image angle.
- Tilt adjusts vertical angle
- Swivel changes horizontal direction
- Lock screws keep the projector steady
Achieving Perfect Alignment
Perfect alignment makes sure the image is clear and not distorted. You can adjust the projector position on the bracket.
Use the bracket’s adjustment features to center the image on the screen and keep it level.
- Center the projector with the screen
- Level the image using the tilt control
- Check focus after adjusting position
Cable Management Solutions
Good cable management keeps cables neat and safe. It prevents tangles and damage to wires.
Many projector brackets include clips or channels to hold cables close to the wall.
- Use cable clips to secure wires
- Hide cables inside the wall if possible
- Keep cables away from heat sources
Design And Style Choices
Choosing the right wall projector bracket can enhance your room’s look. The design and style of the bracket matter.
A good bracket fits well with your room’s theme and keeps the projector secure. It should blend with the space without drawing too much attention.
Matching Your Room Decor
Pick a bracket style that fits your room’s decor. Modern rooms suit sleek, simple brackets. Traditional rooms look better with classic designs.
Think about the shapes and lines in your room. Choose a bracket that matches these details for a balanced look.
- Minimalist brackets for modern rooms
- Ornate brackets for vintage or classic styles
- Adjustable brackets for versatile setups
Concealing The Bracket
Hide the bracket to keep your wall neat and tidy. Concealing helps the room look less cluttered and more organized.
Use covers or paint the bracket to match the wall. Some brackets come with built-in cable management to hide wires.
- Paint the bracket to blend with the wall color
- Use wall plates or covers to hide parts
- Choose brackets with cable management features
Color And Finish Options
Brackets come in different colors and finishes. Pick one that matches or complements your walls and furniture.
Matte finishes reduce glare and look clean. Glossy finishes add shine but can show dust easily.
- Black or white for basic, clean looks
- Metallic finishes like silver or bronze for modern style
- Custom colors to match unique decor
- Matte finish for subtle appearance
- Glossy finish for a polished look
Maintenance And Safety
Keeping your wall projector bracket in good condition is important. Regular maintenance helps the bracket last longer.
Safety is key when using a wall projector bracket. Proper care can prevent accidents and damage.
Regular Checks And Tightening
Check the screws and bolts on the bracket often. Loose parts can cause the projector to fall.
Tighten any loose screws carefully. Use the right tools to avoid damage.
- Inspect screws every month
- Tighten bolts if they feel loose
- Use a screwdriver or wrench as needed
- Avoid over-tightening to prevent stripping
Preventing Damage And Wear
Keep the bracket clean and dry to stop rust and wear. Dirt can cause parts to stick or break.
Do not overload the bracket beyond its weight limit. Extra weight can bend or break it.
- Wipe the bracket with a dry cloth regularly
- Avoid exposure to water and moisture
- Check the weight capacity before installation
- Keep cables organized to prevent pulling
Safety Precautions
Always install the bracket on a strong wall. Weak walls may not hold the projector safely.
Use a level tool to ensure the bracket is straight. This prevents the projector from slipping.
- Locate wall studs before installation
- Use proper anchors for drywall
- Check the bracket’s stability after mounting
- Keep children away during installation
Popular Brands And Models
Wall projector brackets help mount your projector securely. Many brands offer various models to fit different needs.
Choosing the right bracket ensures your projector is stable and positioned correctly for the best viewing experience.
Top-rated Wall Brackets
Top-rated wall brackets provide excellent stability and durability. They are often preferred by professionals for their reliability.
- Brand A: Model X offers adjustable angles for perfect projection.
- Brand B: Model Y is known for its easy installation process.
- Brand C: Model Z supports heavy projectors with ease.
Budget-friendly Picks
Budget-friendly options are ideal for those looking to save money without sacrificing quality. These models offer essential features at a lower cost.
| Brand | Model | Price Range |
| Brand D | Model L | $20 - $30 |
| Brand E | Model M | $25 - $35 |
| Brand F | Model N | $30 - $40 |
Premium Options
Premium options offer advanced features and superior build quality. These brackets cater to those who want the best performance.
For those seeking top-notch performance, consider investing in a premium wall bracket. These models often include features like enhanced adjustability and sleek designs.

Credit: www.amazon.ca
Frequently Asked Questions
What Is A Wall Projector Bracket?
A wall projector bracket is a mount designed to securely hold a projector on a wall. It saves space and ensures stable projection. It allows for adjustable angles to optimize image quality and viewing experience.
How Do I Install A Wall Projector Bracket?
To install, first locate wall studs for secure mounting. Use proper anchors and screws. Attach the bracket firmly, then mount the projector. Adjust tilt and swivel for perfect alignment.
Can Wall Projector Brackets Fit All Projector Sizes?
Most brackets are adjustable and fit various projector sizes. Always check the weight limit and mounting hole pattern before purchase. Compatibility ensures safe and effective installation.
What Are The Benefits Of Using A Wall Projector Bracket?
Wall brackets save space, reduce clutter, and prevent projector damage. They provide stable mounting, better ventilation, and improved image alignment. This enhances your viewing experience significantly.
Conclusion
A wall projector bracket helps save space and keeps your room tidy. It holds the projector steady for a clear, sharp picture. You can adjust it to fit your needs easily. Installation is simple and does not take much time.
Choosing the right bracket improves your viewing experience a lot. Small details like this make a big difference in your setup. Consider a wall bracket to enjoy movies and presentations better. It’s a smart, practical addition to any room.