


Are you planning to install a ceiling fan and feeling a bit lost with all the wires? You're not alone.
Understanding the electrical wiring diagram for a ceiling fan can seem daunting, but it's easier than you might think. Imagine having the confidence to tackle this DIY project, saving money, and impressing your friends and family with your newfound skills.
We'll break down the wiring diagram step-by-step, using simple language that makes sense. By the end, you'll feel empowered and ready to connect those wires like a pro. Let's unravel the mystery together and get your ceiling fan up and running smoothly!

Credit: recpro.com
Basic Ceiling Fan Wiring
Understanding the basic wiring of a ceiling fan is essential if you want to install or troubleshoot it safely and effectively. The wiring connects your fan to your home's electrical system, controlling both the fan motor and the light fixture if your fan has one. Knowing how the wires work together can save you from costly mistakes and ensure your fan operates exactly as it should.
Common Wire Colors
Wires in ceiling fan installations usually come in standard colors, but it’s important to verify each wire’s purpose before connecting anything. The most common wire colors you’ll encounter include:
- Black– This is typically the hot wire that powers the fan motor.
- Blue– Usually controls the light kit if your fan has one.
- White– Neutral wire, completing the electrical circuit.
- Green or Bare Copper– Ground wire for safety.
Seeing these colors might make wiring seem straightforward, but remember: wire colors can vary in older homes or different manufacturers. Have you ever wondered why your ceiling fan’s wires don’t match the usual colors? That’s why testing each wire with a voltage tester is a smart move before proceeding.
Wire Functions Explained
Each wire in your ceiling fan setup has a specific job that affects how the fan and lights work. The hot wirecarries power from your home’s electrical panel to the fan motor. The blue wireis a separate hot wire dedicated to the light kit, allowing independent control of lights and fan.
The neutral wirereturns electricity back to the panel, completing the circuit. Without it, your fan or light won’t function properly. The ground wireis a safety feature that directs electricity safely into the earth in case of a short circuit.
Mixing up these wires can cause your fan to malfunction or create a dangerous situation. Have you ever experienced a ceiling fan that only spins when the light switch is on? That’s usually a sign of wiring confusion—something you can avoid by clearly understanding each wire’s role.
Tools And Materials Needed
Before diving into wiring your ceiling fan, gathering the right tools and materials is crucial. Having everything ready helps you work efficiently and safely. Missing just one tool can slow you down or even cause mistakes, so let's make sure you’re fully prepared.
Essential Tools
- Screwdrivers:Both flathead and Phillips screwdrivers are needed for removing and attaching fan parts.
- Wire Strippers:These help you remove insulation from wires without damaging the metal inside.
- Voltage Tester:A must-have to check if wires are live before you touch them.
- Drill:Useful for making holes or securing the fan bracket to the ceiling.
- Pliers:Needle-nose pliers can help twist wires together tightly.
- Electrical Tape:For insulating wire connections safely.
- Ladder:You'll need a sturdy ladder to reach the ceiling comfortably.
Think about the last time you started a project without all the tools—did it slow you down? Having these essentials ready will keep your wiring work smooth and safe.
Required Materials
- Ceiling Fan Kit:Includes the fan blades, motor, mounting bracket, and sometimes the light fixture.
- Electrical Wires:Typically 14/3 or 12/3 gauge wires depending on your fan and house wiring.
- Wire Nuts:Small plastic connectors that secure wire ends together.
- Mounting Bracket:Comes with the fan but verify it’s sturdy and fits your ceiling box.
- Switch or Remote Control:Depending on how you want to control your fan speed and light.
- Electrical Box:A ceiling-rated box designed to hold the fan’s weight securely.
Do you know if your existing ceiling box can support a fan? If not, replacing it with a fan-rated box is essential to avoid safety hazards. Gathering the right materials before starting keeps your project on track and prevents unexpected trips to the hardware store.
Preparing For Installation
Preparing for the installation of a ceiling fan involves careful planning and safety measures. Proper preparation makes the wiring process easier and safer. It ensures the new fan works efficiently and lasts longer. Start by gathering all tools and materials needed. Clear the workspace for easy movement and access to wiring points.
Power Safety Tips
Always switch off the power at the circuit breaker before starting. Use a voltage tester to confirm no electricity flows to the wires. Wear insulated gloves to protect against shocks. Avoid working in wet or damp areas. Keep a flashlight nearby in case of low light. Never touch wires with wet hands. Safety first keeps accidents away.
Removing Old Fixtures
Turn off power to the old fixture. Remove any bulbs or glass covers carefully. Unscrew the fixture base from the ceiling. Gently pull it down to expose the wiring. Note the wire colors and connections for reference. Disconnect wires by loosening wire nuts. Keep screws and small parts safe for reuse. Check the ceiling box for damage and replace if needed.

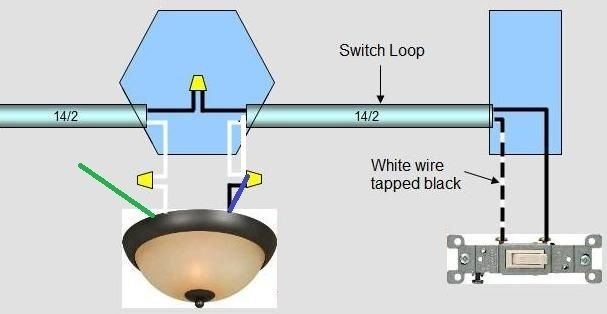
Credit: www.reddit.com
Wiring The Ceiling Fan
Wiring a ceiling fan might seem tricky at first, but breaking it down into simple connections can make the task manageable. Understanding each wire’s role helps you avoid common mistakes and ensures your fan runs safely and efficiently. Let’s look closely at how to connect the essential wires to get your ceiling fan up and running.
Connecting The Ground Wire
The ground wire is your safety net. It usually has a green or bare copper insulation. Connecting this wire properly helps protect you from electrical shocks.
Locate the grounding screw on the fan’s mounting bracket or the green ground wire from the fan itself. Use a wire nut to join your house’s ground wire to the fan’s ground wire or secure the ground wire to the grounding screw tightly.
Have you ever skipped grounding a fan and faced issues later? It’s a small step that prevents big problems.
Joining The Neutral Wires
The neutral wire, usually white, completes the electrical circuit. It carries current back to the electrical panel, so your fan and light will function correctly.
Twist together the fan’s neutral wire with the house’s neutral wire, then secure them with a wire connector. Make sure the connection is tight and no bare wire is exposed.
Double-checking this connection can save you hours of troubleshooting if your fan doesn’t start or the light doesn’t turn on.
Attaching The Hot Wires
The hot wires power the fan motor and lights, typically black and blue. Correctly attaching these wires controls which parts of the fan receive electricity.
Connect the fan’s black wire to the house’s black wire—this usually powers the fan motor. Then, connect the fan’s blue wire to the house’s red or another colored wire, which often powers the light kit.
If you want separate control over the fan and light, these connections matter a lot. Have you considered how you’ll operate your fan and light switches before wiring?
Installing The Fan Control Switch
Installing the fan control switch is key to managing your ceiling fan's operation. This step controls the fan speed and light functions. Correct wiring ensures safety and smooth performance. Understanding different control switch setups helps match your needs and wiring skills.
Single Switch Setup
A single switch controls both the fan and light together. It is the simplest setup. The switch connects to the live wire and sends power to the fan unit. Usually, one wire from the switch goes to the fan's live input. The neutral wire bypasses the switch and connects directly to the fan.
- Turn off the main power before starting.
- Connect the live wire from power source to switch input.
- Connect switch output wire to fan's live wire.
- Join neutral wires together and connect to fan's neutral.
- Secure all connections with wire nuts.
Dual Switch Configuration
Dual switches let you control the fan and light separately. One switch controls the fan speed, the other controls the light. This setup uses two live wires from the power source. One wire goes to the fan live input, the other to the light live input. Neutral wires connect directly to fan and light neutrals.
- Turn off power before wiring.
- Connect two live wires from switches to fan and light.
- Connect neutral wires together to fan and light.
- Ensure ground wires are connected to metal parts.
- Test both switches after wiring is complete.
Remote Control Wiring
Remote control wiring adds convenience with a wireless controller. A remote receiver sits inside the fan canopy. It connects to the power source and fan wires. The remote controls fan speed and light without wall switches. Wiring includes live, neutral, and ground wires connected to the receiver.
- Turn off main power before installation.
- Connect power live and neutral to remote receiver inputs.
- Connect receiver outputs to fan and light wires.
- Secure ground wires to fan metal parts.
- Follow receiver manual for pairing the remote.
Credit: www.doityourself.com
Troubleshooting Wiring Issues
Wiring issues can turn your ceiling fan installation into a frustrating puzzle. Identifying the exact problem quickly saves time and prevents further damage. Let’s break down the most common wiring errors and how to test your connections effectively.
Common Wiring Mistakes
One frequent mistake is mixing up the live (hot) and neutral wires. This can cause the fan or light to malfunction or not work at all. Another problem is loose connections, which might lead to intermittent operation or flickering lights.
Incorrect grounding is often overlooked but critical for safety. Without proper grounding, you risk electric shocks or damage to your fan. Also, confusing the remote control wiring with manual switches can cause unexpected behavior.
- Swapping black (hot) and white (neutral) wires
- Failing to connect the ground wire properly
- Loose wire nuts or connectors
- Ignoring manufacturer wiring instructions
Have you double-checked the color codes and wire labels before connecting? Small details like these can save you from headaches later.
Testing With A Voltage Meter
A voltage meter is your best friend when troubleshooting wiring issues. It helps you confirm if power is reaching the fan and whether wires are correctly connected.
Start by turning off the power at the breaker for safety. Then, remove the fan canopy to access the wiring. With the power back on, carefully test the wires:
- Check for voltage between the black (hot) wire and the white (neutral) wire.
- Test the ground wire to ensure it is properly connected.
- Measure voltage at the switch terminals if your fan has a wall control.
If you find no voltage where you expect it, trace the wiring back to the breaker or switch to spot any breaks. Are you seeing unexpected voltage readings? That’s a clear sign of wiring errors or faulty components.
Using a voltage meter also helps verify if the fan’s internal wiring is intact when the external wiring seems correct. Have you tried testing continuity on your fan’s wires? It’s a simple step that can pinpoint hidden wiring faults.
Safety Tips For Electrical Work
Working with ceiling fan electrical wiring can be straightforward, but safety must never take a backseat. Electrical work involves risks that can lead to serious injuries or damage if precautions aren’t taken. Understanding key safety tips helps you protect yourself and ensures the wiring is done correctly.
Avoiding Electrical Shocks
Always turn off the power at the circuit breaker before starting any wiring job. Don’t rely on just the wall switch to cut the power; it might still carry electricity. Use a voltage tester to confirm the wires are not live.
Wear insulated gloves and use tools with rubber handles to reduce the chance of shock. Avoid working in wet or damp conditions because water greatly increases shock risk. If you feel unsure or uncomfortable at any point, stop and get professional help.
Proper Grounding Techniques
Grounding is essential for your safety and the fan’s proper operation. Connect the green or bare copper grounding wire from the ceiling fan to the grounding wire in the ceiling box. This helps direct stray electrical current safely into the earth.
Never skip grounding; it prevents electrical shocks and reduces fire hazards. Make sure the grounding wire connection is secure and not loose or exposed. A poor ground can cause the fan’s metal parts to become energized and dangerous.
Upgrading To Smart Ceiling Fans
Upgrading to smart ceiling fans can transform your home’s comfort and convenience. These fans offer more than just airflow—they bring customizable control, energy savings, and seamless integration with your smart home system. Understanding the electrical wiring behind these fans is key to a smooth upgrade that fits your lifestyle and home setup.
Smart Wiring Considerations
Wiring a smart ceiling fan differs from traditional fans because it often requires additional components like smart switches or remote controls. You’ll need to identify the correct wires for power, ground, and fan control separately, ensuring compatibility with your fan’s smart features.
Some smart fans come with built-in Wi-Fi or Bluetooth modules, so you might only need basic wiring plus a neutral wire to keep the smart functions powered. If your home’s wiring lacks a neutral wire, you may need to install one or use a smart switch designed for no-neutral setups.
Think about how you want to control your fan—via app, voice commands, or wall switches—as this affects the wiring and installation process. If you’re replacing an old fan, check the existing wiring to avoid surprises. Have you checked if your current wiring supports smart devices?
Integration With Home Automation
Smart ceiling fans can connect to popular home automation systems like Amazon Alexa, Google Home, or Apple HomeKit. This allows you to control your fan with voice commands or automate it based on schedules and sensor data.
Setting up integration usually involves pairing the fan with your home’s Wi-Fi network and linking it to the app of your chosen ecosystem. Once connected, you can create routines such as turning the fan on when the room temperature rises or turning it off when you leave home.
Consider how your smart fan fits into your existing smart devices. Are you ready to create a truly connected environment where your fan responds to your lifestyle automatically? This integration can simplify your daily routines and save energy without extra effort on your part.
Frequently Asked Questions
What Is A Ceiling Fan Electrical Wiring Diagram?
A ceiling fan electrical wiring diagram shows how to connect wires safely. It helps understand wiring connections for power, fan motor, and lights. This guide prevents mistakes and electrical hazards during installation or repair.
How Do I Wire A Ceiling Fan With A Remote?
To wire a ceiling fan with a remote, connect the fan’s receiver to the power source. Follow the wiring diagram for correct connections. The remote controls fan speed and light operation wirelessly.
Can I Install A Ceiling Fan Without A Wiring Diagram?
Installing without a wiring diagram is risky and may cause errors. A diagram ensures safe connections and proper functioning. Always use a wiring diagram for accurate and secure installation.
What Colors Are Used In Ceiling Fan Wiring?
Typically, black or red wires carry power, white is neutral, and green or bare is ground. Knowing wire colors helps avoid incorrect connections and ensures safety during installation.
Conclusion
Understanding the ceiling fan wiring diagram makes installation safer and easier. Clear wiring helps avoid mistakes and saves time. Always double-check connections before turning on power. Proper wiring ensures the fan works well and lasts longer. Simple steps can prevent common electrical problems.
Keep the diagram handy for future repairs or upgrades. Safe wiring means comfort and peace of mind at home.

