

Are you gearing up for your next RV adventure and want to ensure everything is running smoothly? Understanding RV electrical plug wiring is crucial for a seamless experience on the road.
Imagine setting up camp, only to find out that your electrical system isn't working properly. Frustrating, right? By grasping the basics of RV electrical plug wiring, you can avoid these headaches and keep your adventures powered up. You'll discover how to connect your RV to power sources safely and efficiently.
Dive in to learn more and ensure your travels are as electrifying as they are relaxing!
Credit: www.vevor.com
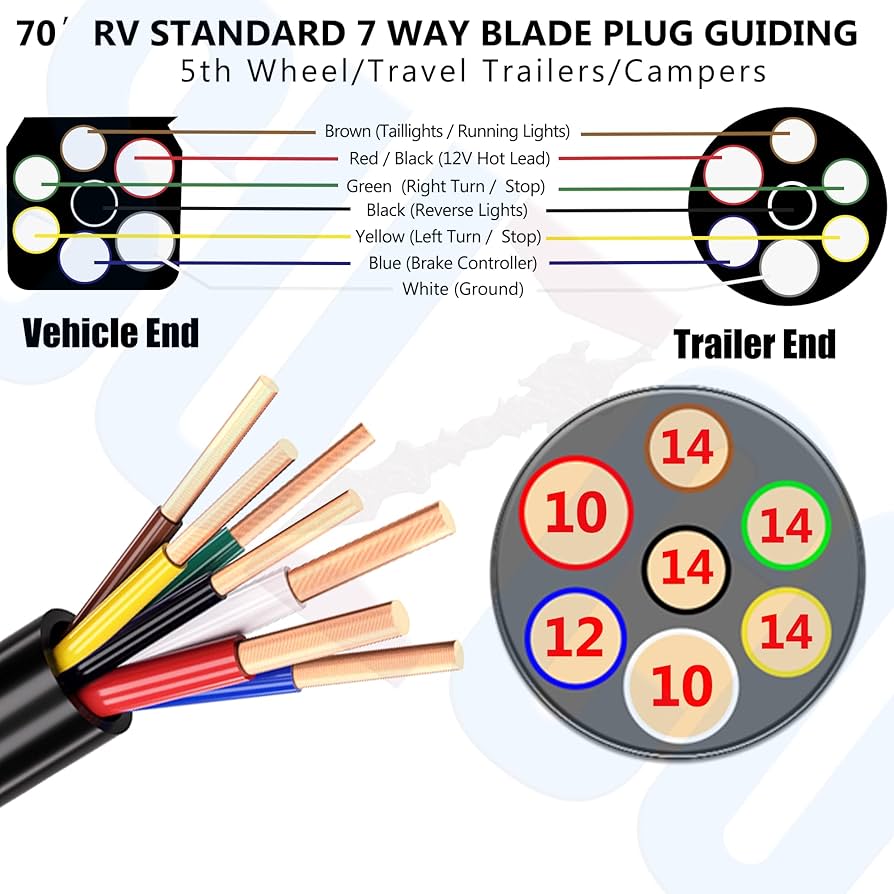
Types Of Rv Electrical Plugs
Understanding the types of RV electrical plugs is essential for safe and efficient power connections during your travels. Each plug type serves a specific purpose, matching the power needs of your RV’s appliances and systems. Knowing the differences helps you avoid mishaps like overloading circuits or using incompatible outlets.
Standard Plug Designs
RV electrical plugs come in several standard designs, each tailored for different power uses. The most common are the NEMA (National Electrical Manufacturers Association) plugs, which you’ll find in various forms based on shape and pin configuration.
For instance, the NEMA TT-30 is a popular 30-amp plug found at many campgrounds. It features three prongs and is designed specifically for RVs requiring 30 amps of power.
Another common design is the NEMA 14-50, a heavy-duty 50-amp plug often used for larger RVs. Its four-prong setup supports higher power needs, like running multiple appliances simultaneously.
Amperage Ratings
Amperage ratings indicate how much current the plug can safely handle. Most RV plugs fall into three categories: 15-amp, 30-amp, and 50-amp.
- 15-amp plugs are usually for small travel trailers or basic power needs.
- 30-amp plugs are the most common and offer a good balance for mid-sized RVs.
- 50-amp plugs cater to large motorhomes with high electrical demands.
Choosing a plug with the right amperage is key to preventing electrical issues. If your RV draws more current than the plug supports, you risk tripped breakers or damaged equipment.
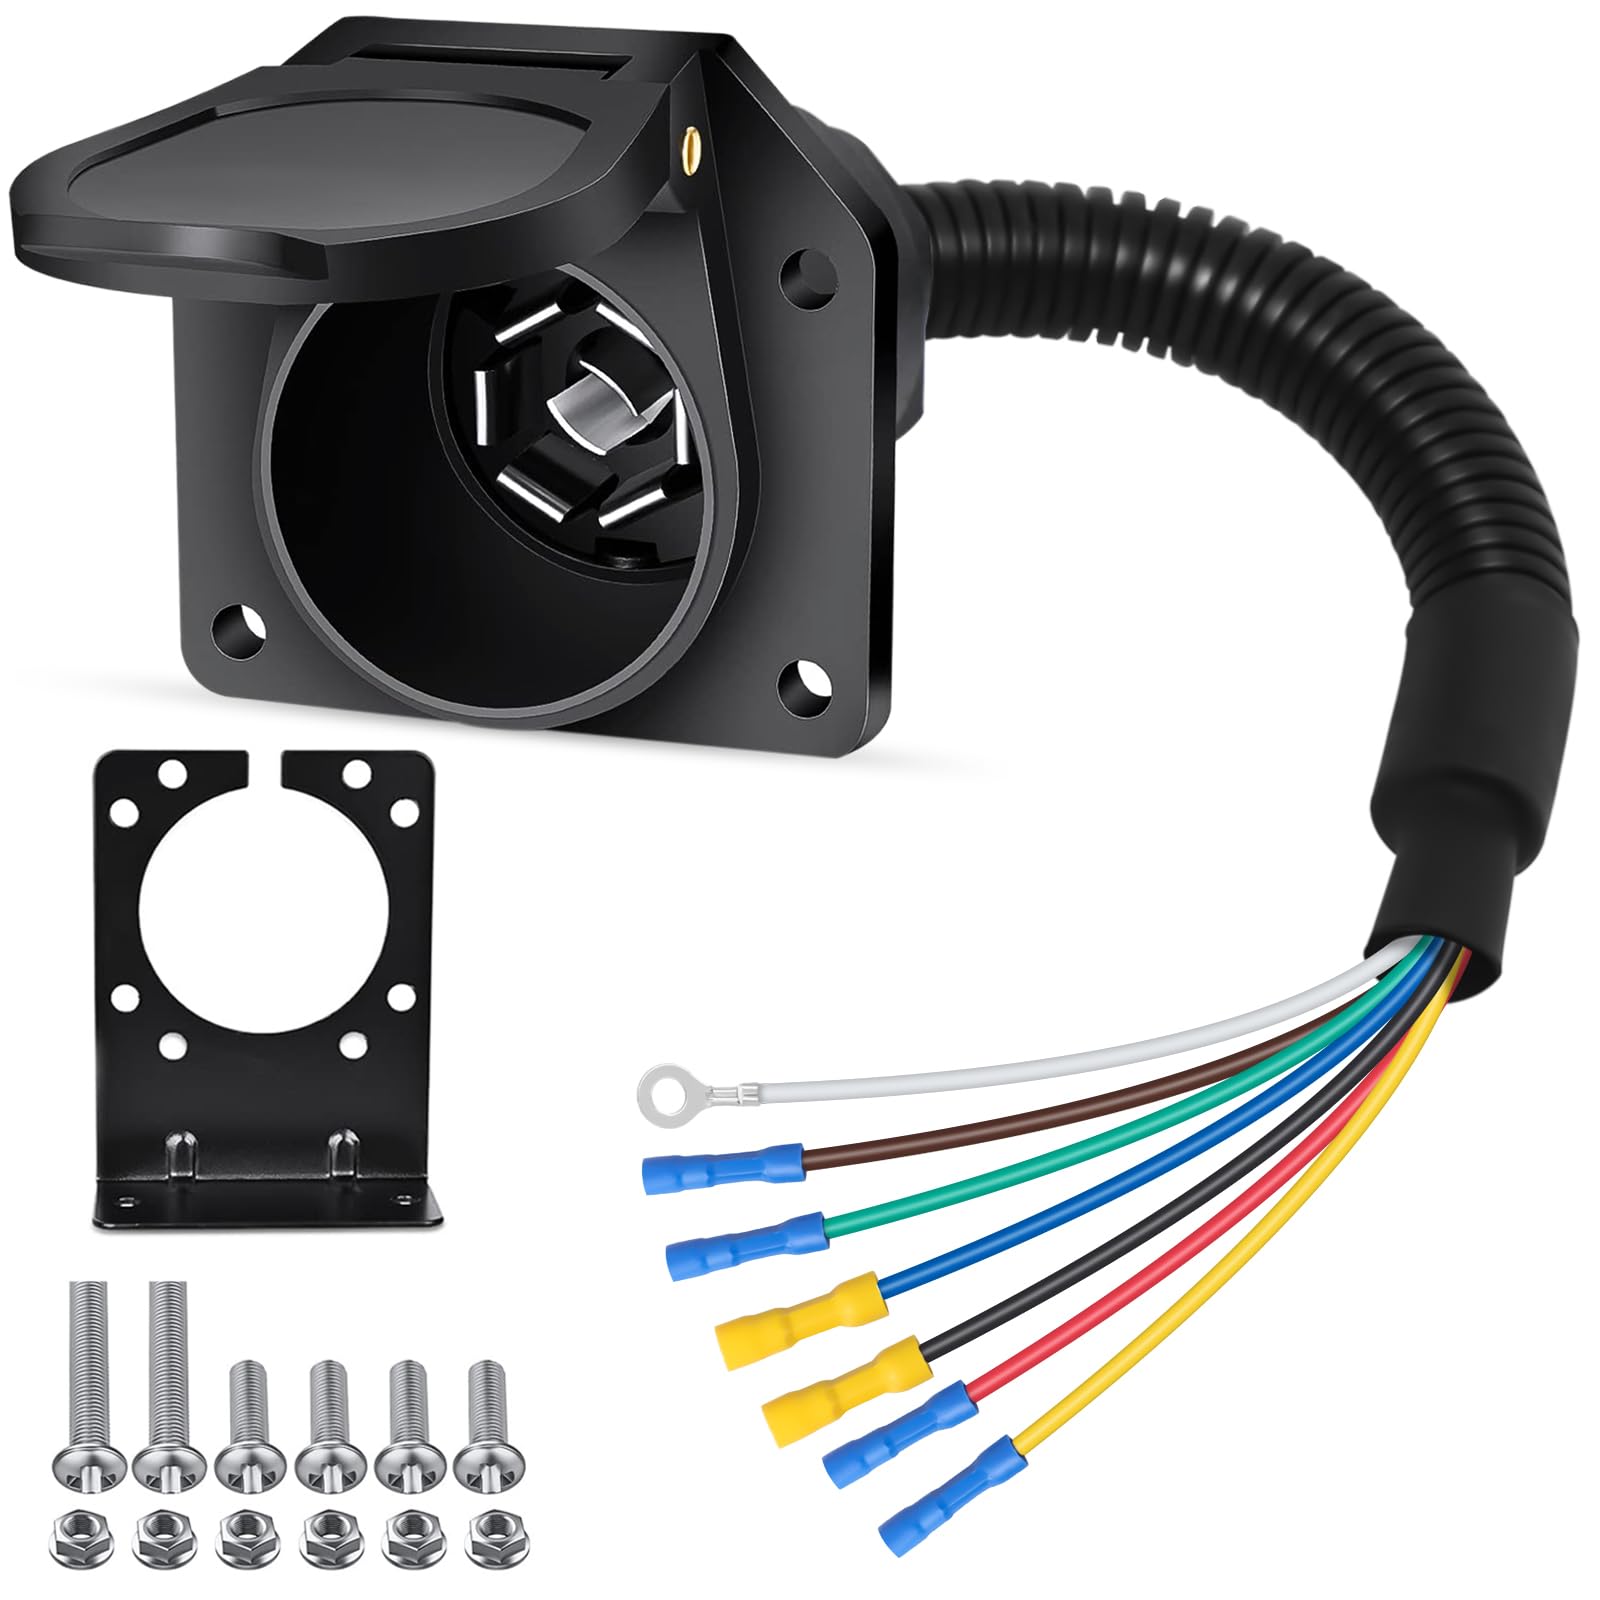
Common Plug Configurations
Plug configurations vary by the number and arrangement of prongs, which correspond to power type and grounding. Typical configurations include:
- 3-prong plugs: Often 30-amp TT-30 plugs, with two hot wires and one ground.
- 4-prong plugs: Usually 50-amp 14-50 plugs, with two hot wires, a neutral, and a ground.
- 2-prong plugs: Less common and typically only for very low power devices.
When you connect your RV, matching the plug configuration to the power source is crucial. Have you ever arrived at a campground only to find your plug doesn't fit the outlet? Understanding these configurations beforehand saves time and frustration.
Essential Tools For Wiring
Working on RV electrical plug wiring requires the right tools. Proper tools ensure safety and make the job easier. Using the correct equipment helps avoid mistakes and saves time. Here are the essential tools needed for successful wiring tasks.
Wire Strippers And Cutters
Wire strippers remove insulation from wires without damaging the metal inside. Cutters trim wires to the needed length cleanly. Both tools come in various sizes for different wire gauges. Using sharp and quality tools prevents frayed wires and poor connections.
Multimeter Usage
A multimeter measures voltage, current, and resistance in wires. It helps check if circuits are live or broken. Testing wires before and after installation ensures proper function. A simple digital multimeter is easy to use and very useful for RV wiring.
Screwdrivers And Connectors
Screwdrivers tighten or loosen terminals and connectors on plugs. Flathead and Phillips types are commonly needed. Connectors link wires securely to plugs and outlets. Using the right connectors prevents loose or faulty connections that cause problems later.
Choosing The Right Wire
Choosing the right wire for your RV electrical plug wiring is crucial for safety and performance. The wire you select affects how well your electrical system handles power and how safe it remains during use. Understanding key factors like wire gauge, material, and length will help you make the best choice.
Wire Gauge Importance
Wire gauge determines how much current the wire can safely carry. Using a wire that’s too thin can cause overheating and even fire hazards. On the other hand, thicker wire handles more current but is heavier and less flexible.
Think about the devices you'll power in your RV. Are you running heavy appliances like air conditioners or just small electronics? Matching wire gauge to your load is essential—don’t guess. Check the amp rating of your devices and pick a wire gauge that supports a bit more than your maximum need.
Material Considerations
Copper and aluminum are the most common materials for RV wiring. Copper is the better conductor and more durable, but it’s also more expensive. Aluminum is lighter and cheaper but requires thicker wires and special connectors to avoid corrosion.
In my own RV upgrade, I chose copper because I wanted reliability without frequent maintenance. If you plan to camp in wet or humid areas, copper’s resistance to corrosion can save you headaches. Always consider the environment your wiring will face.
Length And Flexibility
Longer wires cause voltage drops, reducing power efficiency. If your wire run is long, you might need a thicker gauge to compensate. Think about the layout of your RV and keep wire runs as short as possible.
Flexibility matters too, especially in tight or moving spaces. Stranded wire is more flexible than solid wire, making it easier to route through narrow spots and less prone to breaking. Have you checked if your wiring route requires bending or twisting? Choosing the right wire flexibility will save you installation trouble and future repairs.

Credit: www.ebay.com
Step-by-step Wiring Process
Wiring an RV electrical plug correctly is crucial for safety and reliable power supply. The process involves careful preparation, precise connections, and thorough testing to ensure everything works smoothly. Understanding each stage helps you avoid common pitfalls and keeps your RV’s electrical system in top shape.
Preparing The Plug
Start by selecting the right plug for your RV’s power needs. Check the amperage rating to match your RV’s electrical system, typically 30 or 50 amps. Before you begin wiring, make sure the power is off to avoid any shocks.
Remove the plug’s cover and inspect the internal terminals. Clean any dirt or corrosion you find, as this can affect the connection quality. Take a moment to identify the terminals: usually labeled for hot, neutral, and ground wires.
Connecting Wires Safely
Strip the insulation off each wire end carefully, exposing just enough copper for a solid connection—about half an inch. Avoid nicking the wire strands as that weakens the connection. Attach each wire to its corresponding terminal:
- Hot wire: Connect to the brass or black terminal.
- Neutral wire: Attach to the silver or white terminal.
- Ground wire: Secure to the green terminal.
Tighten each terminal screw firmly, but don’t overtighten to avoid damaging the wire. Loose connections can lead to overheating or power loss. Double-check that no bare wire is exposed outside the terminal.
Securing And Testing Connections
Once all wires are connected, position them neatly inside the plug housing. Use the strain relief clamp to hold the cable firmly in place—this prevents wires from pulling loose if the cord moves. Close the plug cover securely to protect the connections from dirt and moisture.
Testing is essential before you plug into power. Use a multimeter or plug tester to verify correct wiring and continuity. Have you ever experienced a blown fuse or tripped breaker right after plugging in? Testing beforehand saves you that frustration and ensures safety for your RV and campsite.
Safety Tips For Electrical Work
Working with RV electrical plug wiring requires attention to safety. Electrical work can be dangerous if proper steps are not followed. Protect yourself and your RV by knowing key safety tips. These tips help prevent accidents and keep your wiring in good condition.
Avoiding Common Hazards
Always turn off the power before starting any electrical work. Check for damaged wires or loose connections. Use insulated tools to reduce the risk of electric shock. Wear rubber-soled shoes and avoid working in wet areas. Keep flammable materials away from your workspace.
Proper Grounding Techniques
Grounding protects against electrical faults and shocks. Connect the ground wire securely to the RV’s grounding point. Use grounding rods if needed, especially in outdoor setups. Check that all metal parts are properly grounded to avoid stray currents. Never skip grounding; it is vital for safety.
Regular Inspection And Maintenance
Inspect your RV electrical plugs and wiring regularly. Look for cracks, corrosion, or worn-out insulation. Tighten loose connections and replace damaged parts immediately. Clean plugs and sockets to ensure good contact. Regular checks help spot problems early and prevent failures.
Troubleshooting Wiring Issues
Wiring issues in RV electrical plugs can cause many problems. These issues may stop power flow or cause unsafe conditions. Troubleshooting helps find and fix these problems fast. Understanding common faults and testing tools makes the process easier and safer.
Identifying Faulty Connections
Look for loose or corroded wires in the plug and socket. Check for broken or frayed insulation. Listen for buzzing sounds or notice flickering lights. These signs often point to bad connections. Tighten screws and clean any corrosion carefully. Make sure wires fit snugly in terminals.
Using A Multimeter For Diagnosis
A multimeter measures voltage, current, and resistance in wiring. Set it to the correct mode before testing. Use probes to check each wire for power and continuity. No reading or unusual values mean a problem exists. Test both ends of the wire to find breaks or shorts. This tool helps pinpoint exact trouble spots quickly.
Resolving Power Supply Problems
Check the main power source and circuit breakers first. Replace blown fuses or reset tripped breakers. Verify the RV battery is charged and connections are clean. Inspect the power cord for damage or wear. Swap out faulty cords or plugs if needed. Confirm power flows smoothly after repairs for safe use.
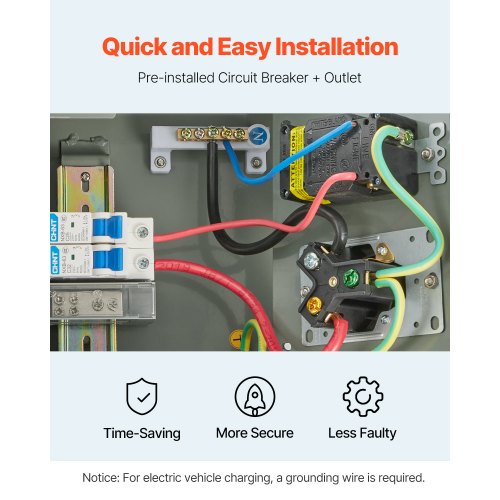
Upgrading Rv Electrical Systems
Upgrading your RV electrical system is essential for safety and performance. Old wiring and plugs can cause problems during travel or camping. Modern electrical needs require stronger and safer setups. Upgrading ensures your RV can handle new appliances and gadgets without risk.
Proper upgrades also prevent electrical fires and reduce power loss. Knowing when and how to upgrade helps keep your RV reliable. Understanding the basics of plug wiring is the first step to a safer system.
When To Replace Plugs
Look for cracks, discoloration, or loose connections in your plugs. These signs mean the plug is worn out or damaged. Frequent tripping of breakers is another signal to check plugs. Old plugs may not fit modern cords properly. Replace plugs if they feel hot during use or spark.
Enhancing Capacity And Safety
Upgrading plugs can increase your system’s power capacity. Use plugs rated for higher amperage to support new devices. Proper grounding reduces shock risks and improves safety. Choose weatherproof plugs for outdoor use to prevent moisture damage. Secure wiring and use quality materials for lasting upgrades.
Professional Vs Diy Upgrades
DIY upgrades save money but require careful work and knowledge. Mistakes can cause serious electrical hazards or damage. Professionals ensure code compliance and correct installation. They can spot hidden problems and suggest the best solutions. Choose a professional for complex upgrades or if unsure about wiring. Simple plug replacements can be done safely with proper instructions.
Credit: www.amazon.com
Frequently Asked Questions
What Is Rv Electrical Plug Wiring?
RV electrical plug wiring connects power from external sources to your RV. It ensures safe and efficient energy flow for appliances and systems inside the vehicle. Proper wiring prevents electrical hazards and maintains reliable power supply during camping or travel.
How Do I Wire A 30 Amp Rv Plug?
To wire a 30 amp RV plug, connect the black wire to the brass terminal (hot), white to silver (neutral), and green to the green terminal (ground). Use proper gauge wire and tighten connections securely to ensure safe and efficient power transfer.
Can I Replace Rv Plug Wiring Myself?
Yes, you can replace RV plug wiring if you have basic electrical skills. Always disconnect power before starting, use correct wire gauge, and follow wiring diagrams. If unsure, consult a professional electrician to avoid risks and ensure safety.
What Wire Gauge Is Needed For Rv Plugs?
For 30 amp RV plugs, use 10-gauge wire; for 50 amp, use 6-gauge wire. Using the correct wire gauge prevents overheating and power loss. Always check your RV’s electrical specifications before selecting wire size.
Conclusion
Wiring an RV electrical plug needs care and attention. Follow the right steps for safety and function. Use the correct tools and parts to avoid problems. Always check your work before use. Understanding basic wiring helps prevent damage and hazards.
Keep your RV’s electrical system reliable and safe. Simple knowledge goes a long way in RV maintenance. Stay cautious and enjoy your travels with confidence.

